
How to Create a Product Review Table?
When reviewing a product, its details and specifications need to be clear and informative. If you’re showcasing everything in a stylish product review table, customers find it easier to buy stuff.
To increase sales and revenue of a product-led business, the website has to display every little detail of the products. It helps to have them all organized in a table. Ninja Tables is the best tool in this case.
Feature the product info in a customized data table. You can show the product image, star ratings from users, buy button, pros and cons, and usefulness. Or maybe even more if your business requires it.
This blog is for our lovely users who wanted to know how they can create the review table from our Demo page. We heard you all!
Today you’ll learn how to create a simple review table for a product.
Why use a product review table?
Suppose your website sells pet food. You need to be transparent about the quality, side-effects, price, user reviews, and nutritional values for your customers.
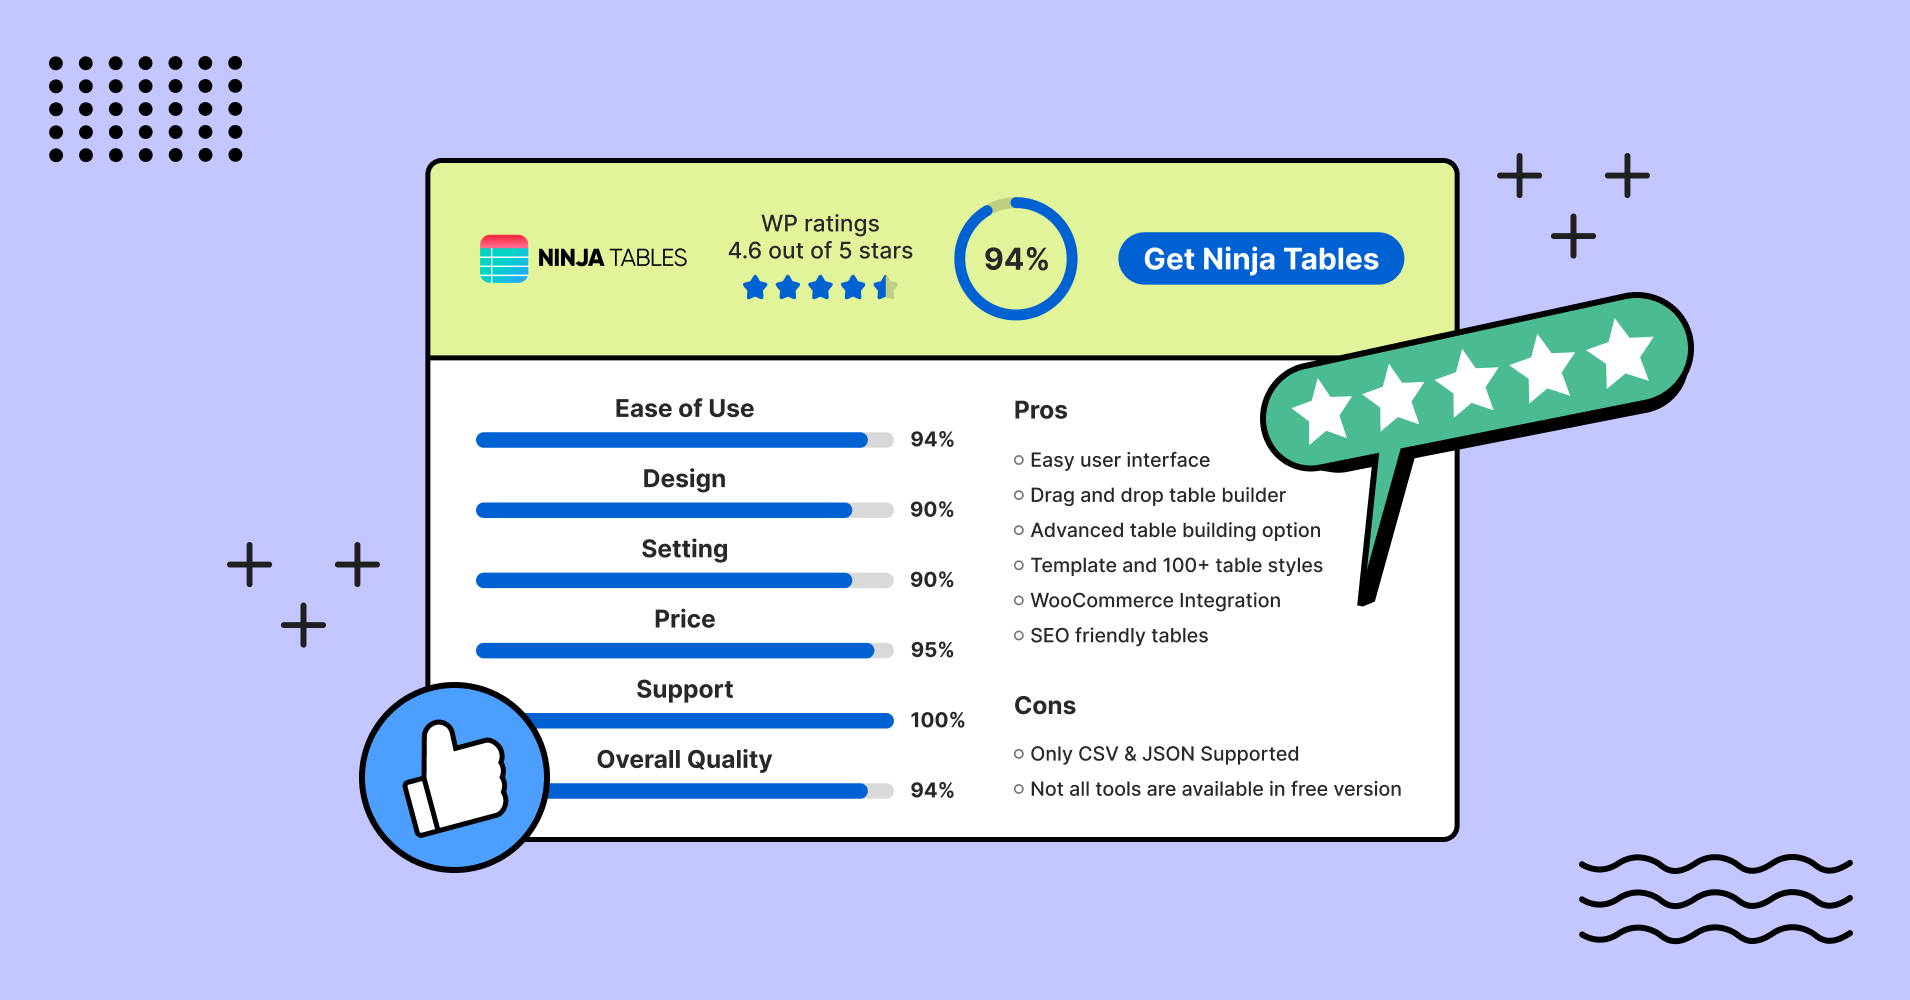
Here’s how Ninja Tables is transparent with all the details in a review table.
WP Ratings 4.6 out of 5 Stars | 94% | ||
Ease Of Use 95% Design 90% Settings 90% Price 95% Support 100% Overall Quality 94% | Pros
Cons
Pricing per year
| ||
The more honest you are with the review and the numbers, the better your sales!
Customers can see it all, visit the pricing page, roam the website, and consider the WP ratings before purchasing.
A product review blogger can use this type of table easily. No need to look for a WP product review plugin if you already have Ninja Tables!
4 steps to create a product review table
Writing a product review always calls for clarity and genuinity. You’ll find many product review templates online explaining how to write one.
Since you’re here, we won’t waste time on showing you how to write a product review.
Instead, we’re gonna show you how to create a product review table with Ninja Tables.
Step 1: Get Ninja Tables and use Drag and Drop
You can create any product table with Ninja Tables- comparison, specification, or for WooCommerce.
And when you review a product like this image below, you can go for “Drag and Drop.”
First of all, pick “Drag and Drop Table” from the table creation options list.
To manually create the table shown above, add 4 columns and 7 rows and hit “Create.”

Step 2: Add elements for table header
Now, drag and drop the table elements from the menu on the left side.
- “Image” element for the logo
- “Text” and “Rating” for the 2nd column
- “Progress” for 3rd column
- And a “Button” for the last
- Customize the elements, size, and colors
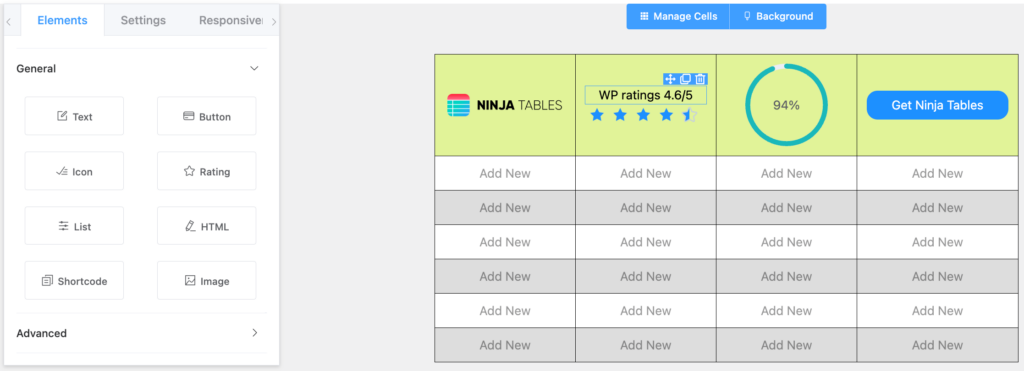
We added the Ninja Tables logo in the image cell, texts and “Circle” progress type, WP ratings of the plugin, and the “Get Ninja Tables” button.
Color table header the way you want from the “Background” tab above the table.
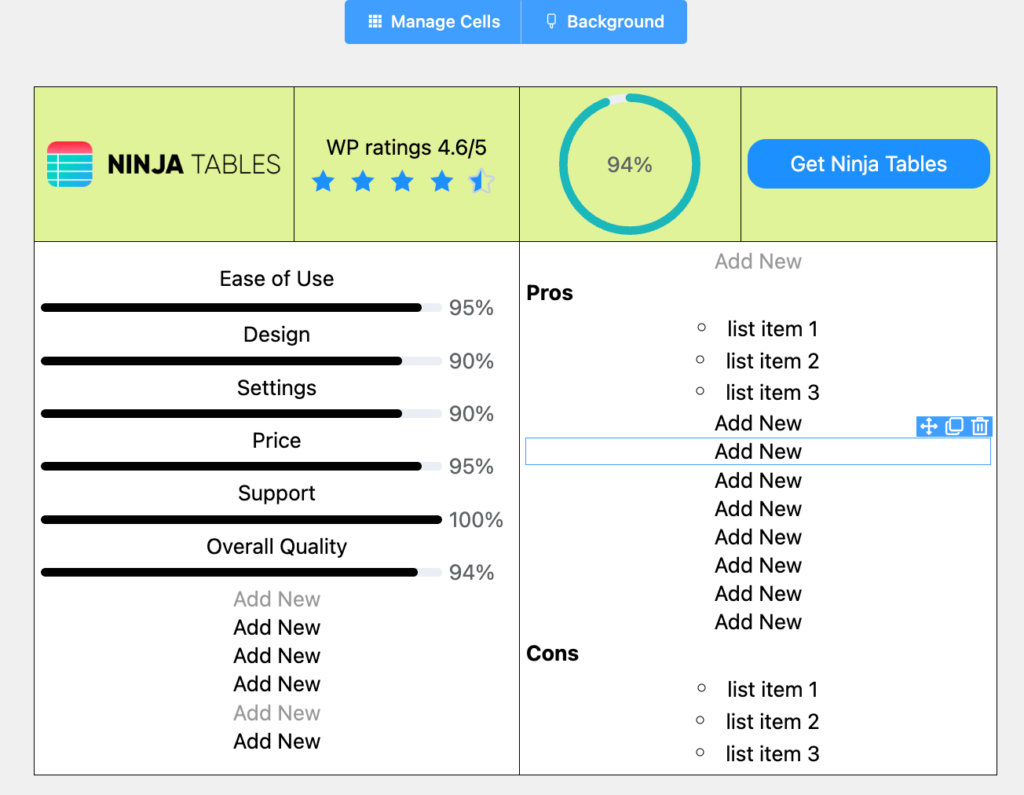
Step 3: Repeat adding elements for table body
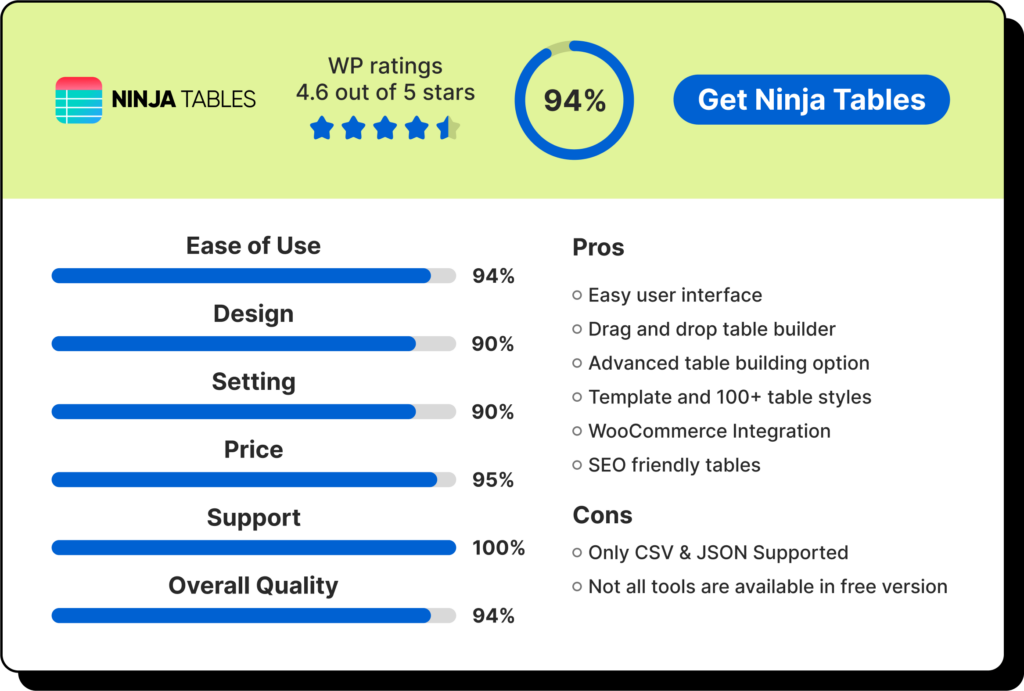
The product review table example shows 6 aspects of Ninja Tables with their respective scores in the first column. And the last column has some pros and cons.
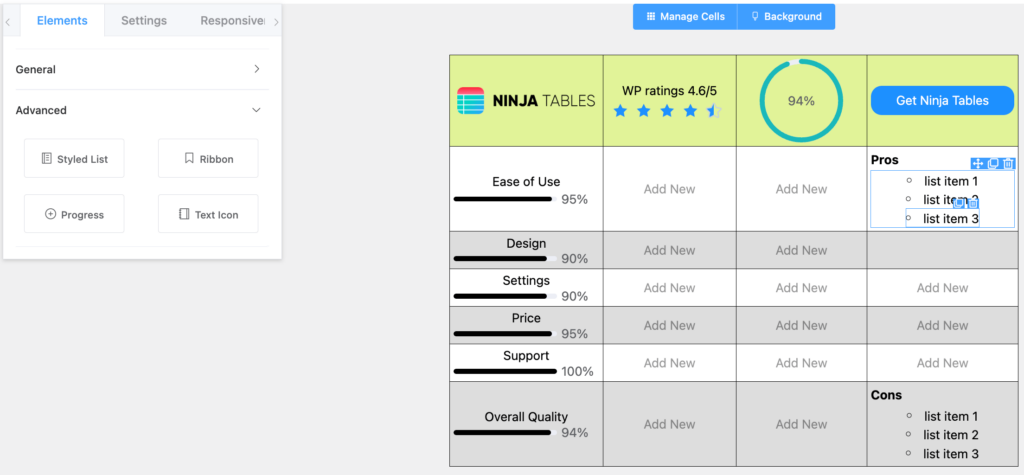
For the 6 aspects column, we have added one “Text” element and one “Progress” element (progress type- Line) for each cell.
2 table cells between pros and cons and the 2 columns in the middle are blank. We will later merge them into a nice single-cell table design.
The color of the table body is switched to white.
Step 4: Merge table cells and remove border
After adding the details and colors, we merged the cells for the seamless table design we want.
Hold “shift” and select the cells of the first 2 columns.
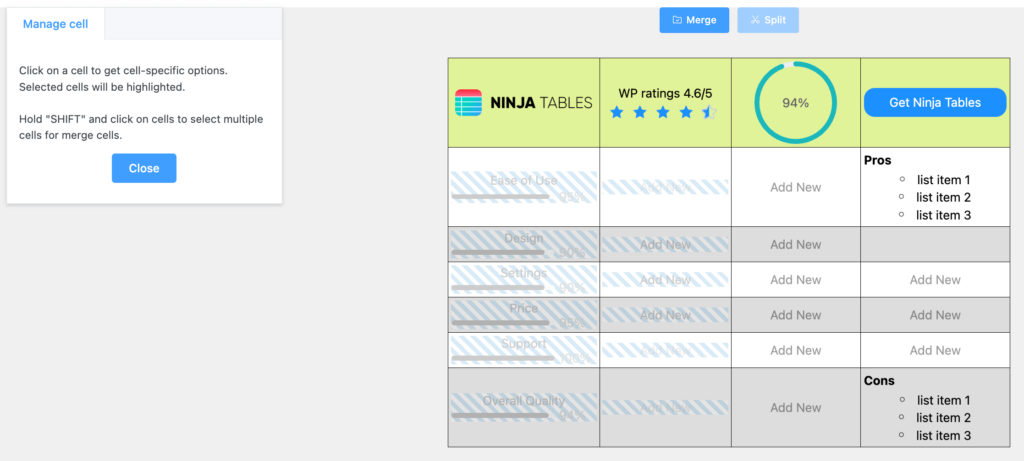
After merging, you’ll see some blank “Add New” cell element appear, but don’t worry. These blank elements are the default elements from the 2nd column.
You don’t need them for this table, so you can delete them one by one following the bin icon.
Repeat the merging process for the 3rd and 4th column. This is when your review table is basically done.
And finally, toggle the “Apply Inner Border” button off.
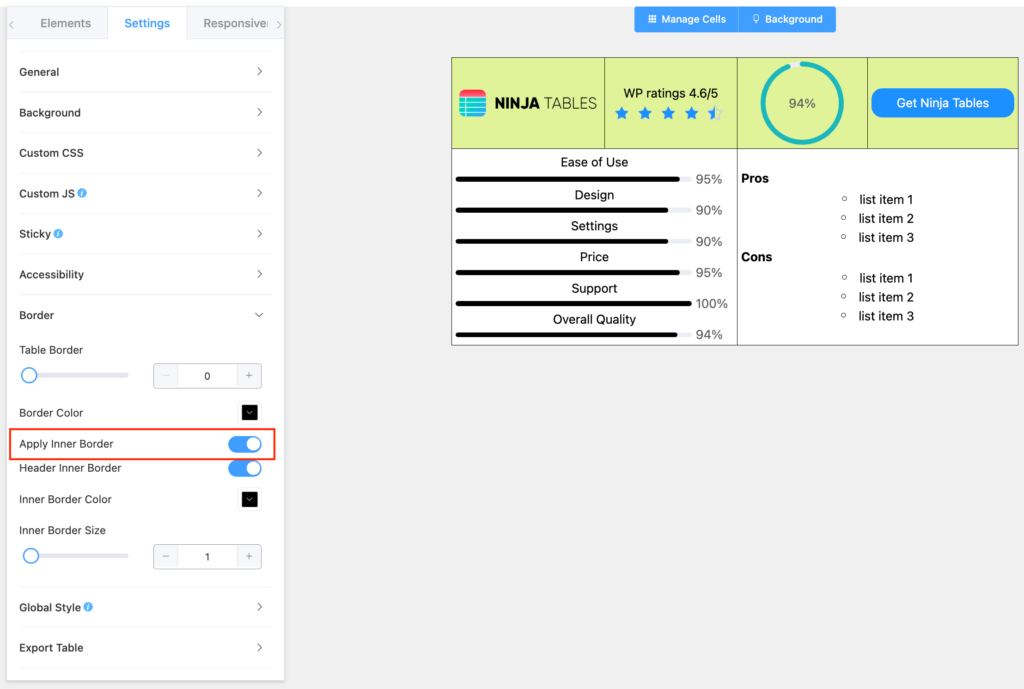
That’s it! Now you can show details about your product in a table and proceed with your product review writing.
Bonus tips
You may notice the Line progress element shows the percentage below the line after you create the table.
To make the percentage appear in a straight line with the progress element, use the following CSS. First notice the table shortcode and use it as css selector prefix. (Or keep the texts left aligned)
.ntb_360 .el-progress__text {
margin-left: px !important;
}
.ntb_360 .el-progress.el-progress–line {
display: flex !important;
}
Here in “.ntb_360,” the numbers are from the table shortcode .
More interactive data visualization ideas for product reviews
Check some out.
Ratings(4.6 out of 5 stars) | 94% | ||
Ease Of Use 95% Design 90% Setting 90% Price 95% Support 100% Overall Quality 94% | Pros
Cons
| ||
GSMArena | Product Review I phone 15  The iPhone 15 boasts a Super Retina XDR display, an A16 Bionic chip for powerful performance, and an advanced dual-camera system with a 48MP main sensor for super-high-resolution photos | Jane  Very smooth and fast performance,super camera, but heating | John  Heating issue while charging. It heats up like anything, it will |
AT & T | |||
Trustpilot | Juan  Awesome phone with awesome features. Specifically in love with | Pablo  Overall very good product, specially long lasting battery, | |
Techradar | |||
Pros
| Cons
| ||
WP Ratings 4.6 out of 5 Stars | 95% | ||
Ease Of Use 95% Design 95% Setting 95% Price 100% Support 100% Overall Quality 98% | Features
| ||
Ratings and reviews of a product make it easier for your target customer decide the purchase. It increases CX and generates sale. Try using a rating/review table like the ones shown here or create some new tables that fit your taste. Don’t forget to show us!
FAQ
What is a product table?
A product table is where sellers or reviewers list the product information. With Ninja Tables you can create multiple types of product tables.
- Product comparison table
- Product specification table
- Product pricing table
- Product review table
- WooCommerce product table
Can Ninja Tables create a WP product review comparison table?
Yes. Ninja Tables is the maestro for all your table needs. You can create any WordPress product review comparison table with this plugin.
How can I get a product review table template?
We have published a Free Table Template page with 30+ fully designed tables in 9 categories.
Download this product review table template, submit your name and email, import the JSON file, customize, and enjoy!
How do you write a product review?
To write any review, you need to be honest and transparent. A product review requires user ratings, image/video, site link, features, pros and cons, and pricing.
If you organize those information in a data table, it looks a lot less wordy for your audience.
Information from a table is digestible better than text paragraphs. So, use Ninja Tables for a product review table and visualize data perfectly.
Final note
Many users reach out to us asking about how to create a review table with this specific design. Some also ask for the product review table template.
We’ve explained the process step-by-step in this blog so you can create the table easily. And those who wanted more, we sent them the table JSON file so they can customize on their own.
Ninja Tables Drag and Drop lets you make any type of table you want. Wasn’t this 4-step table creation process easy?
Stay tuned because soon you’ll get to pick any free table template from our new page.
Ninja Tables– Easiest Table Plugin in WordPress


Add your first comment to this post