
Create Online Tables Easily with Drag and Drop Table Builder

Bloggers and developers often struggle with making an efficient comparison table for their blogs and landing pages. Using table plugins for your website is very beneficial in this case.
Fortunately, there are many tools to make that happen easily.
In this article, we’ll show you how you can add a table to your WordPress website. It’s going to be super fast and easy.
Let’s get into it!
Drag and Drop table builder: Features of Ninja Tables
Here, we present one of the most renowned table builder plugins for your WordPress website.
Yes, it’s Ninja Tables! And today we are here with the most awaited updates of this year. It offers a very easy and user-friendly interface to build tables by dragging and dropping the elements you need.
Ninja tables come with a LOT!
- Drag and drop table
- WooCommerce product tables
- Google sheets auto-sync
- Fluent Forms integration
- Table color
- Dynamic data types
- Pre-made drag and drop templates
- Conditional formatting
- Value transformation
- Custom filter
- Responsiveness
- Custom CSS
- Front-end editing
- Charts
- Merge cells
- Export-Import, and so on.
Here in this article, we’ll show you how you can make a comparison table using the free features of Ninja Tables. So, let’s make your first comparison table for free.
Making a comparison table with Ninja Tables free
A table-building process starts with installing a table-builder plugin and ends with embedding the table to your website. Below, we show you step by step process to make it happen.
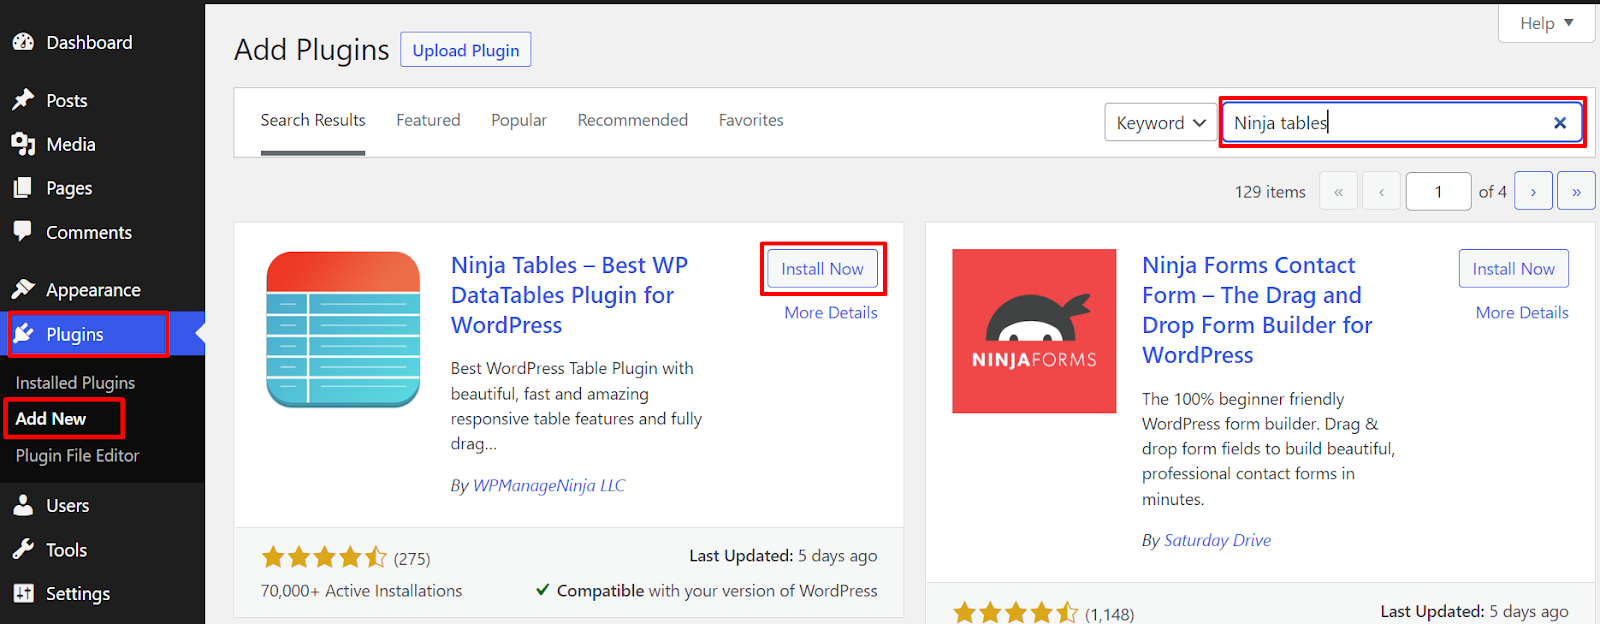
Search Ninja Tables from your WordPress dashboard and Install & Activate it.
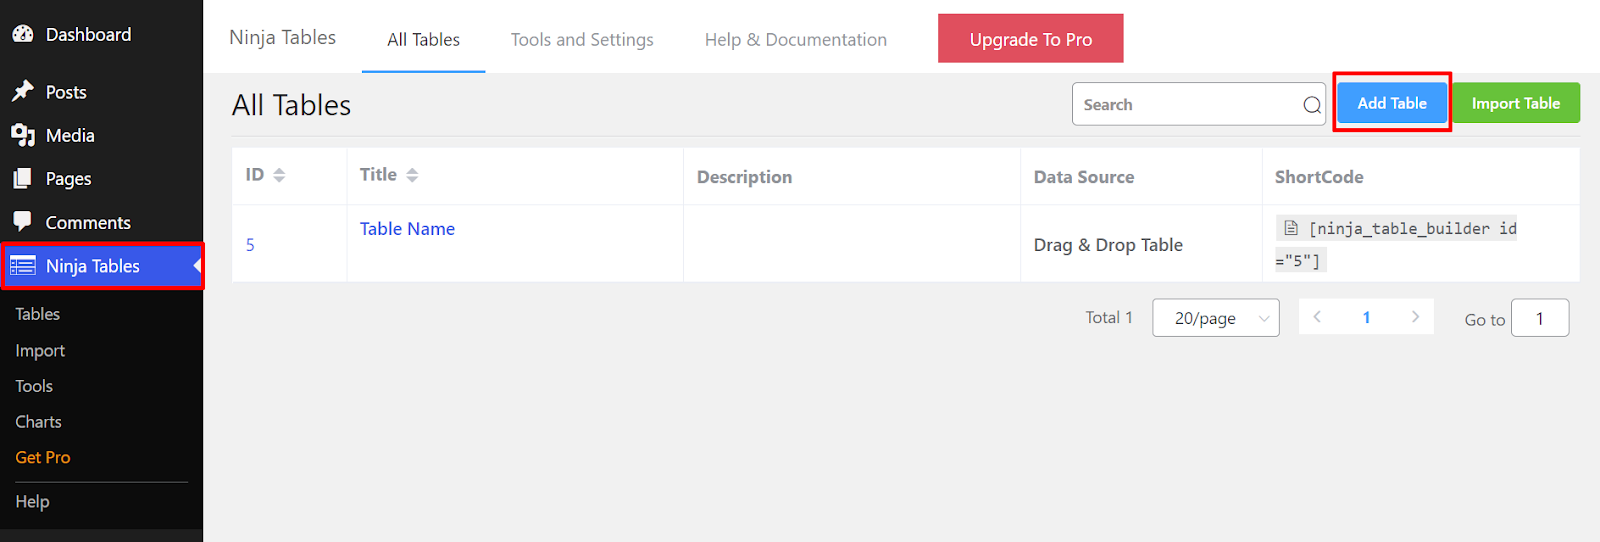
Step 1: Add New Table
Now go to Ninja Tables and click on Create your first table or the “Add Table” button.
Step 2: Add Columns & Rows
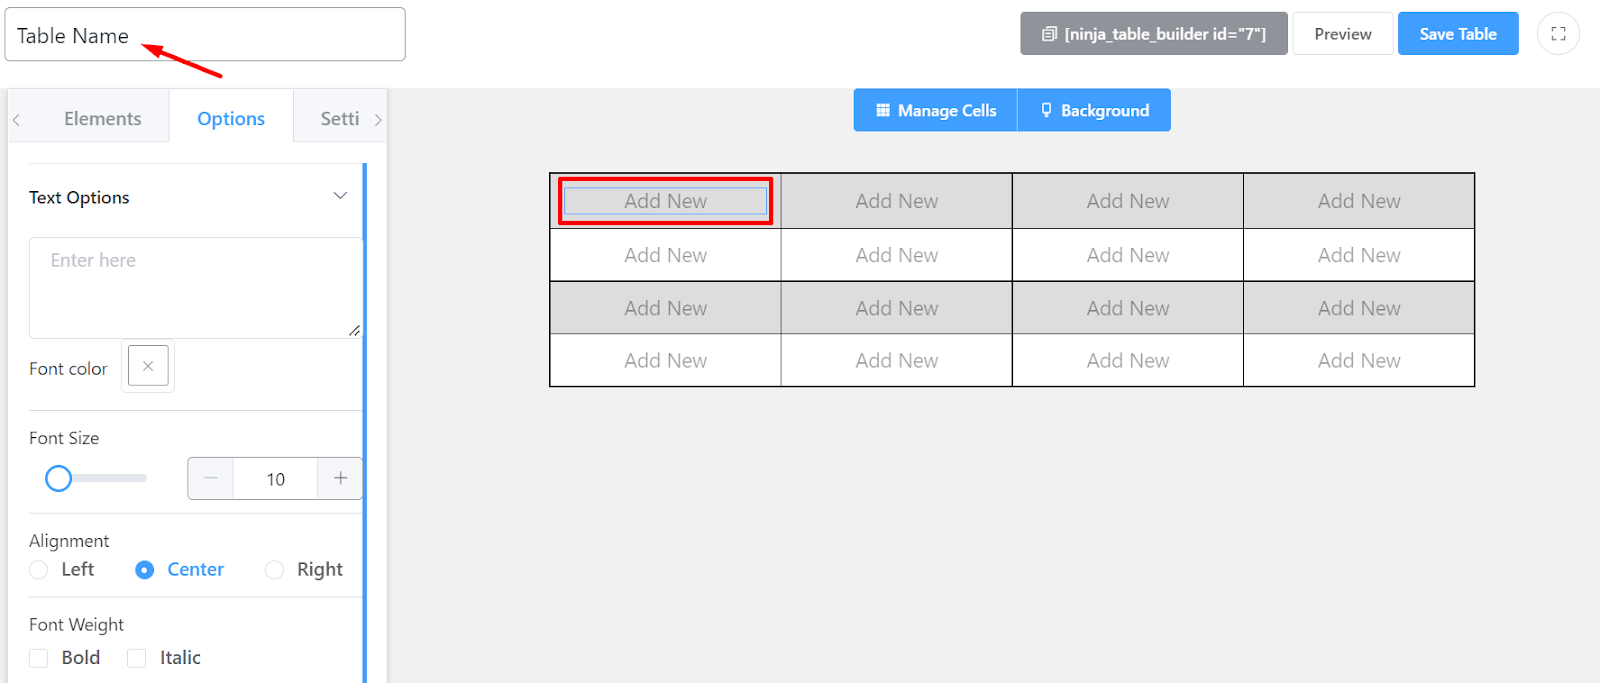
After clicking the Add New button, there will be a default table interface. Click on the Drag & Drop Table from the left sidebar.
That click will show you a window where you can add your columns and rows. Add your desired rows and columns. Don’t worry. You can remove and add more later.
You can set in your table name here. Finally, click on create.

You can choose from the premade templates too. These templates are ready with elements, colors, fonts, etc. You can customize and save the table how you want.
You’ll get tables like pricing tables, comparison tables, employee tables, and schedule tables. Some templates are reserved for the pro version.
Step 3: Add Headings
For this demonstration, the comparison table is created manually, not using the comparison table template.
Add heading simply by using a text module. First, you will have to define your table name and start making the table. You can control font color, alignment, weight, and even the spacing, margin, and padding.
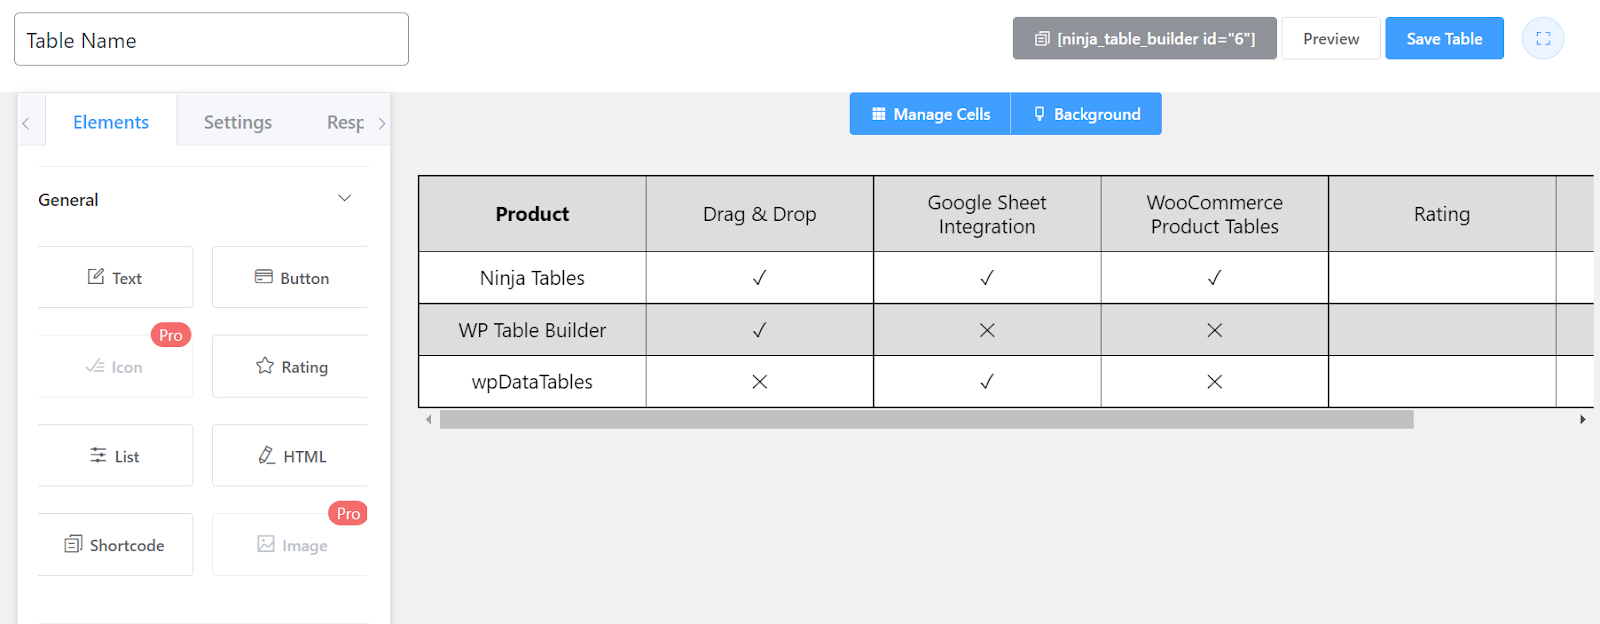
Step 4: Add Contents
You can add your information and contents to the table. We used tick and cross to indicate feature availability. Ninja Tables Pro provides a lot of icon options. You can’t use the icon element for free.
Here we used HTML codes for the tick(✔) and cross(✕) icons.
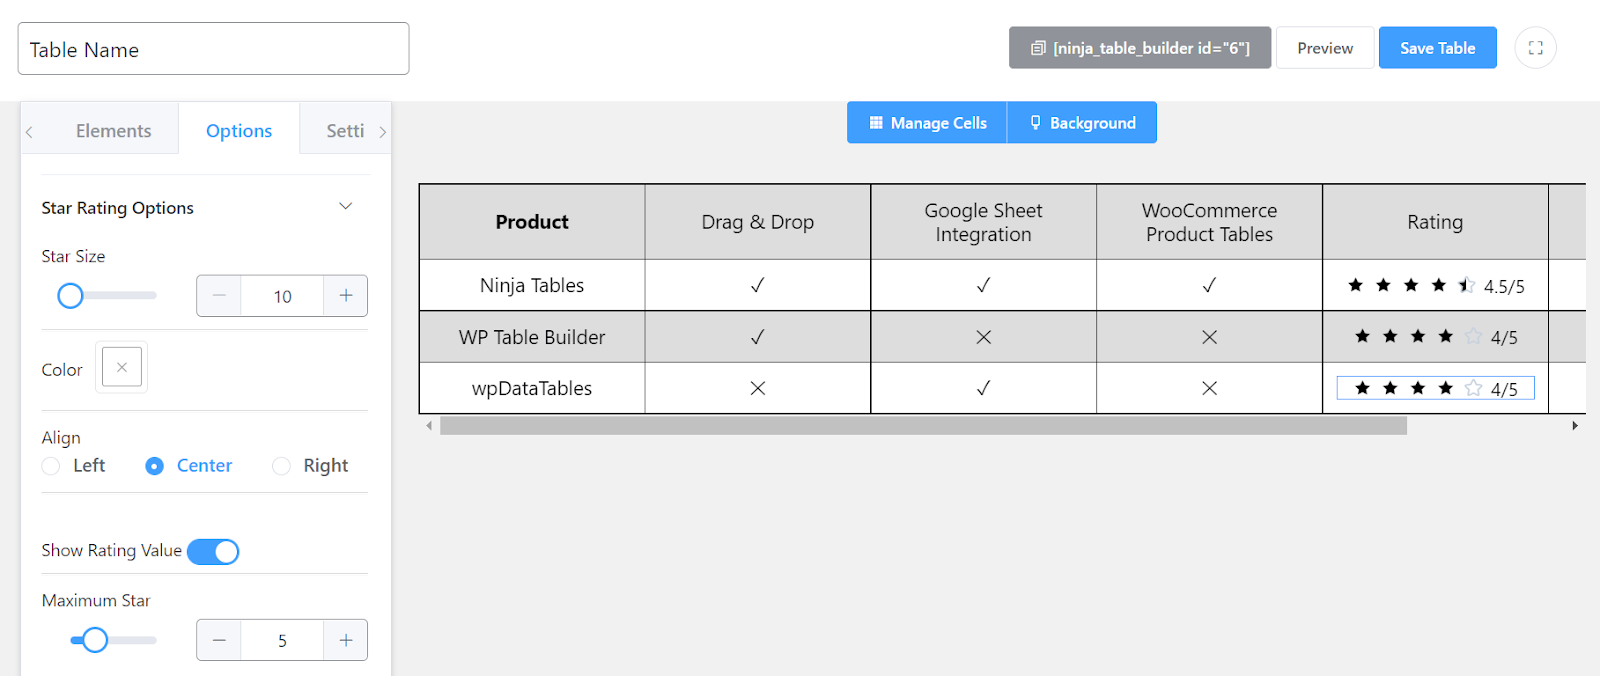
Step 5: Add Star Ratings
Now, drag the rating from the left sidebar, and drop it to the table you want. You can change the size, color, star count, and alignment and show the rating value.
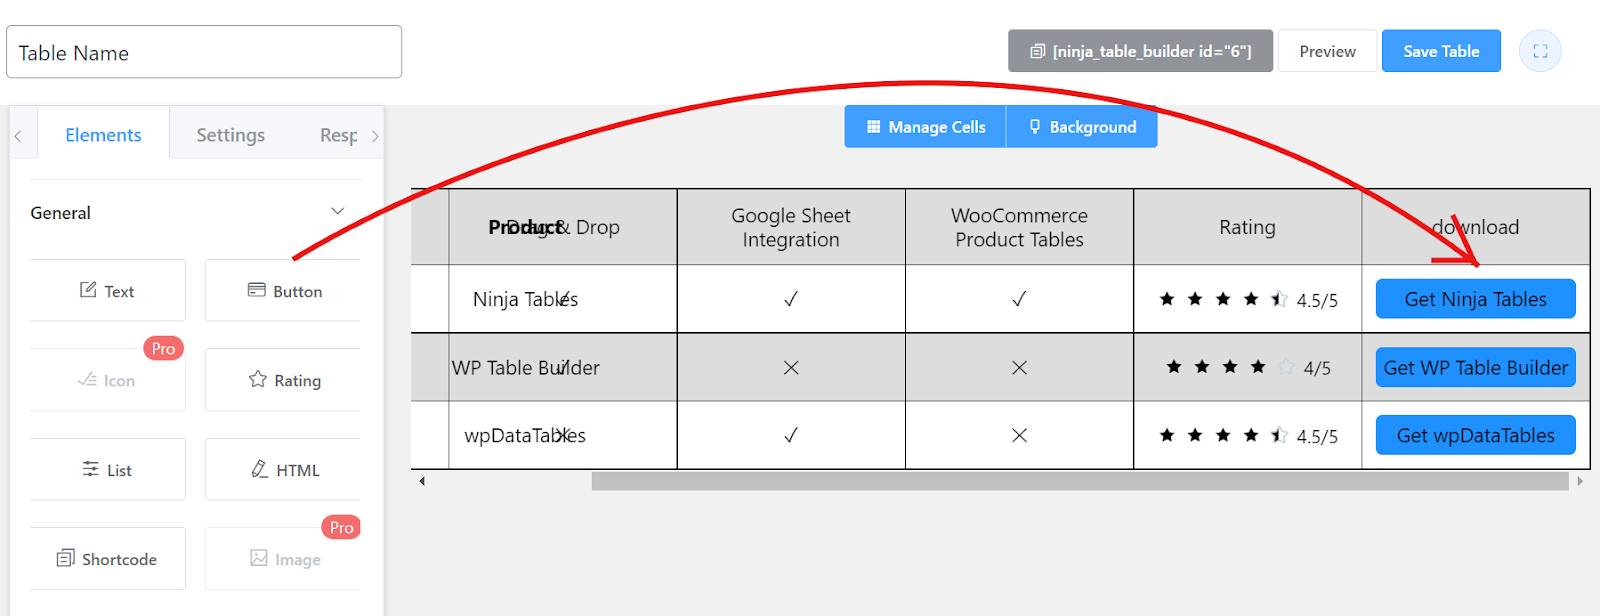
Step 6: Add Button & Links
Here, you can add a button to download or any other action you want your users should take. Simply drag the button and drop it to your desired spot on your table.
You can redirect people to your product pages or enter any other link. There is another option to set it to dofollow or a nofollow link.
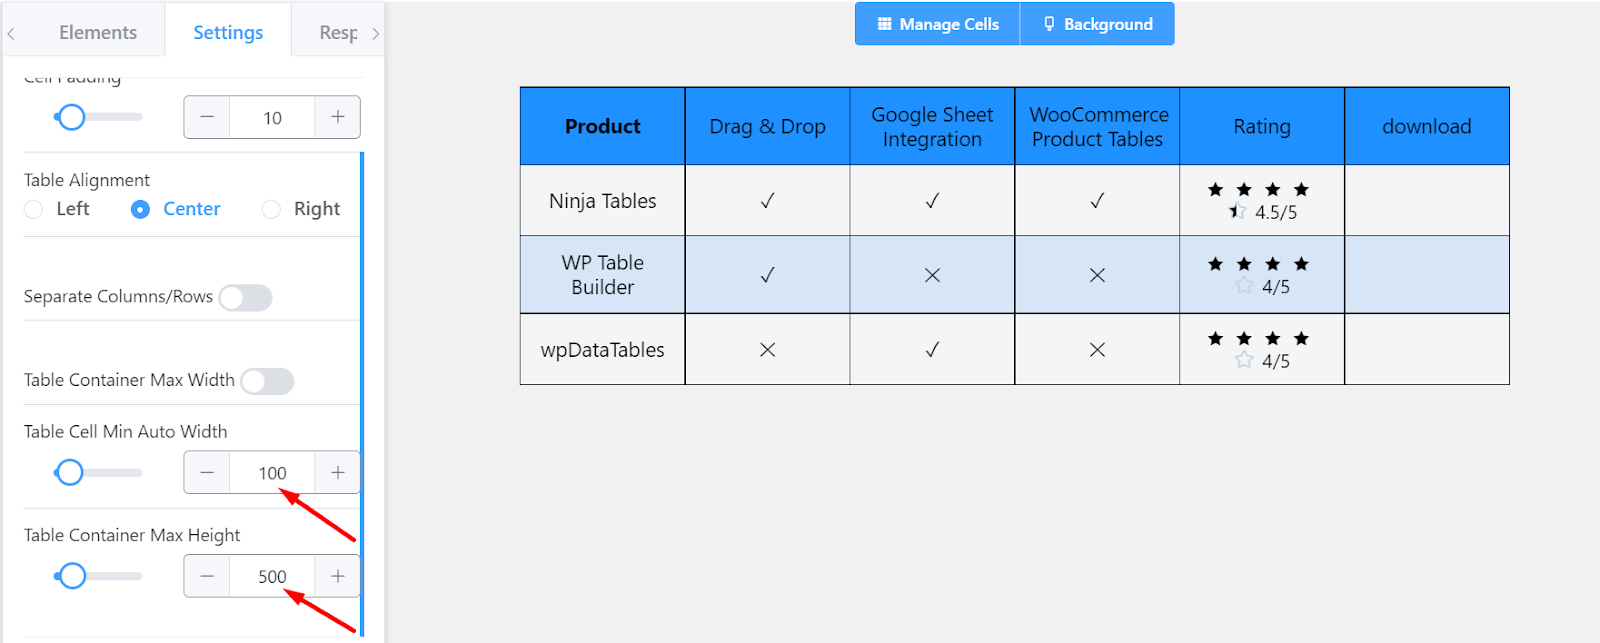
Step 7: Styling Colours
You can adjust the header background colors and the rows and select a custom area you’d like to change the color for.

Moreover, Ninja Tables lets you customize the column width. It is important because sometimes the text or images may not fit your web post or pages.
Step 8: Preview & Embed
To embed your table on your website, you just need to click the Save Table on the top right and copy the shortcode near that.
You can paste this shortcode on any page, post, or text module.
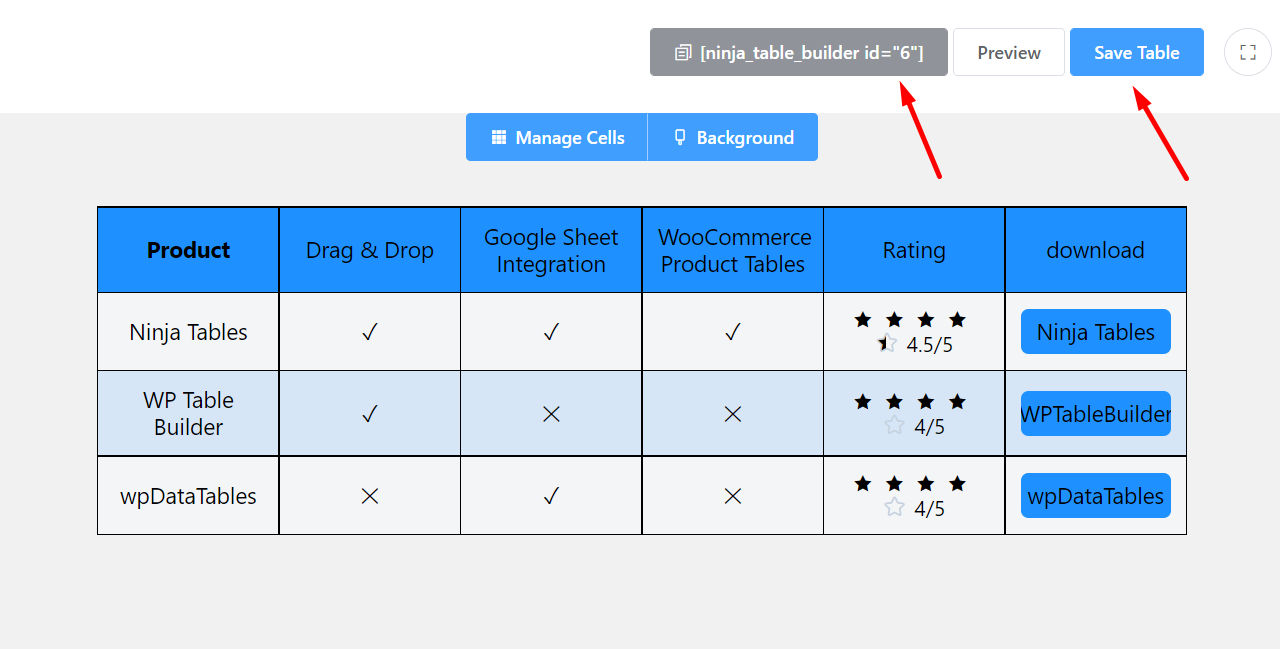
Here you get a colorful responsive comparison table with star ratings and easy call-to-action buttons. It’s just a glance, but Ninja Tables is much more than this.
Get more in the PRO version of Ninja Tables
As we already discussed, when you upgrade your plan to the pro version, you will get many icons to embed into your tables.
The pro version contains more than ten pre-built templates, whereas the free version gives three basic templates. And there are many other features unlocked with that.
Ninja Tables drag and drop table builder (Free vs pro)
| Features | Pro | Free |
|---|---|---|
| Unlimited data | ||
| Multimedia | ||
| FluentCart Product Table | ||
| WooCommerce product table | ||
| Google Sheets Auto-sync | ||
| Drag & drop table builder | ||
| Fluent Forms integration | ||
| Custom color scheme | ||
| Import-export | ||
| Conditional formatting | ||
| Transform value | ||
| WP posts | ||
| Pre-built templates | ||
| Custom filter | ||
| Select Field | ||
| Cell merge | , (Drag and Drop) | |
| Stackable tables | ||
| Ribbon, icon, styled list elements | ||
| Charts | ||
| Sticky column/header | ||
| Shortcode in cells | ||
| Trashed tables | ||
| HTML table header | ||
| Single column color | ||
| Button/Link | , (Drag and Drop) | |
| Lightbox | ||
| Column width | ||
| Responsive breakpoints |
Conclusion
Tables are an important component of any website or blog. With them, you can improve your website UX, as readers will find it easy to digest the data you share.
After reading this article, you can make your first table completely free. Even you can make many other tables like that too. As a beginner, it can be your great choice to start over.
Hopefully, this article helped you enough with making your first table for your website or blog. We are signing off for today, but if you have any other questions about Ninja Tables, mention those in the comment section below.
Ninja Tables– Easiest Table Plugin in WordPress


Add your first comment to this post