
Export-Import Tables in WordPress

Caught in the loop of exporting and importing tables in WordPress, it might feel like an endless cycle. It’s like Groundhog Day, but with data. Well, what if we told you there’s a way to break free from this cycle?
Importing tables in CSV or JSON format is simple and easy, thanks to Ninja Tables!
We’re on a mission to make the mundane process of handling tables more exciting and efficient for your WordPress life.
Get ready for a data dance that’s anything but routine!
Import data table in Ninja Tables
Imagine you can simply import data tables like a pro, directly from your WordPress dashboard. Sounds too good to be true, right? Wrong!
No more juggling between software, or complex queries, no manual entry for loads of data and numbers. There’s a solution right under your nose.
Introducing Ninja Tables– your knight in shining data visualization!
How data table export-import works in Ninja Tables
If you are still wondering, ‘How do I import and export data from WordPress?’, we are here for you. We will show you how to export/import tables in WordPress:
- Install and activate: Simply get started by installing and activating the Ninja Tables plugin. It seamlessly integrates into your WordPress admin dashboard, ready for action.
- Import with ease: Bring your existing data to life by importing CSV or JSON files with just a few clicks. No need for manual entry or coding expertise!
- View, customize and manage from your dashboard: Ninja Tables puts all your custom tables right at your fingertips, accessible directly from your WordPress dashboard.
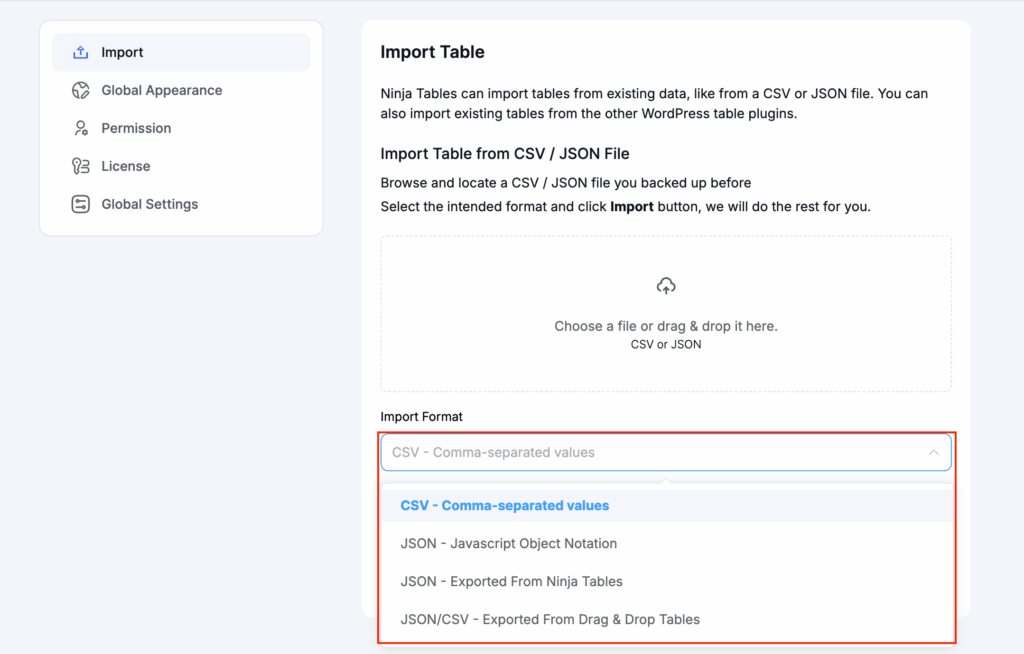
Navigate to the Ninja Tables dashboard, hit the import button, or access the alternative import option from the left menu bar. Once there, click on ‘Choose File.’ Upon clicking the ‘Import format’ button and selecting your file, you’ll encounter four distinct options.
- CSV– Comma-separated values
- JSON– JavaScript Object Notation
- JSON– Exported from Ninja Tables
- JSON/ CSV– Exported from Drag and Drop Tables
Not surprisingly enough, this plugin comes with many futuristic features that’ll help you create robust, intuitive WordPress tables. Simply choose between CSV or JSON file formats using a reliable WordPress table plugin.
CSV data table import
To add existing tables from another website to Ninja Tables, follow these steps:
- First and foremost, turn those tables into CSV or JSON files.
- Then access the Ninja Tables dashboard and choose ‘Import’ besides Create new table option or use the ‘Import’ option in the left menu.

- Then select your CSV/JSON option from the ‘Import format’ section.
- Click ‘Choose File’ to select the CSV or JSON file containing your data, or drag-and-drop it into the section.
- Press the ‘Import’ button to upload the chosen file.
- Ninja Tables will handle the rest, automatically importing and organizing your data.
These straightforward steps streamline the process of transferring tables, ensuring a seamless integration with Ninja Tables.
Data table import for MS Excel
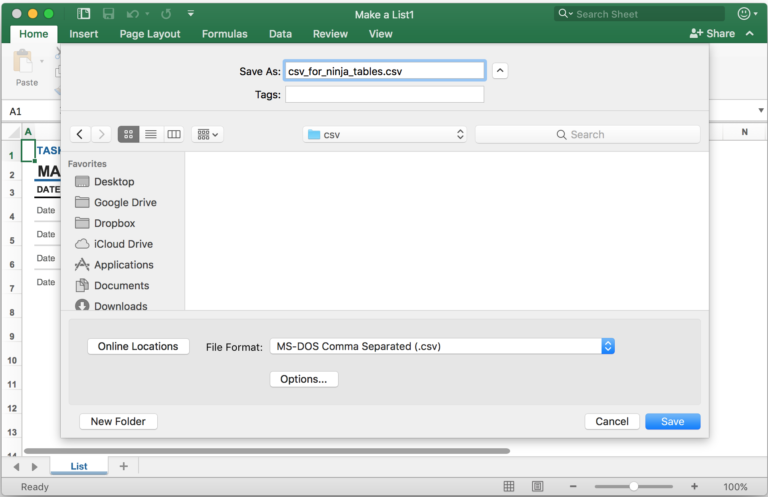
If encountering issues with CSV data imports, especially with blank values in cells, consider the following steps, particularly issues regarding MS-Excel:
- Export the CSV as MS-DOS Comma Separated Value (CSV) to address any formatting concerns.
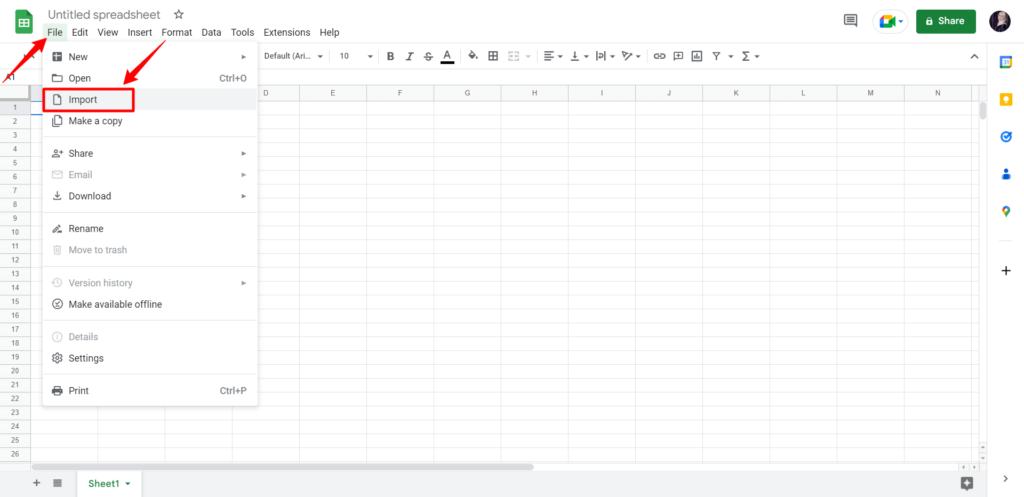
Alternatively, if the CSV file is not in the desired Comma-Separated format, you can convert it using Google Spreadsheet:
- Open Google Spreadsheet→ File→ click on Import, and a pop-up will appear.
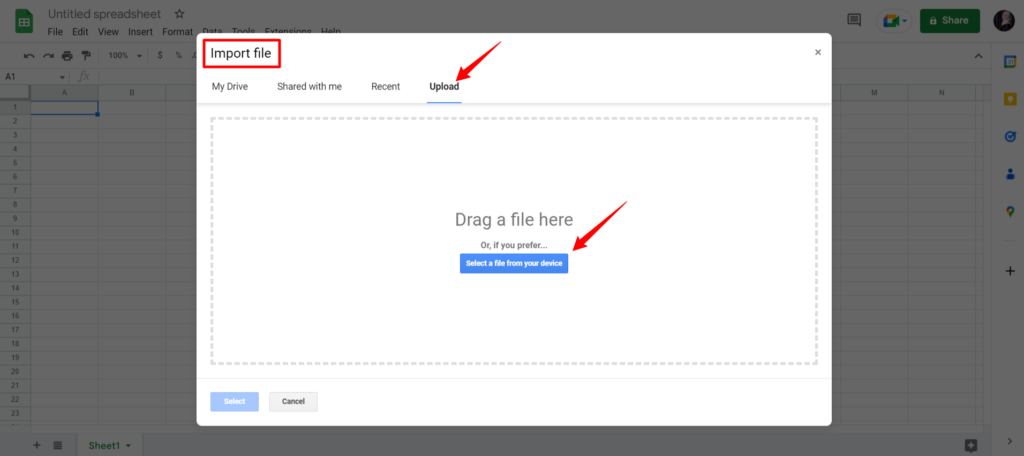
- Select the Upload button and add the CSV file.
- Name the columns as the table Column keys, save it as a Comma-Separated-CSV, and import it into your Ninja Tables.
Import CSV file to an existing table
Importing a CSV file to your Ninja Tables is easy:
- Go to the Ninja Tables dashboard and open the table where you want to import the CSV.
- In the Import-Export tab, use the ‘Choose file’ option to upload your CSV file (Comma Separated Values).
- By selecting ‘Replace Existing Data,’ the corresponding row in the CSV file will overwrite the table’s existing data.

- That’s it! Keep the CSV header structure identical with the table’s Column Key for smooth import.
Additional tips: You can simply download the sample CSV file by clicking on the Download Sample CSV button to find out about your CSV file header structure.
Import Ninja Tables JSON
To import an existing table from Ninja Tables:
- Choose the desired JSON format for your table (Exported From Ninja Tables).
- Set the Import Format as JSON (Exported From Ninja Table).
- Click “Choose File” to upload the exported JSON file.
For Drag & Drop Tables:
- Set the Import Format as JSON (Exported From Ninja Table).
- Upload the exported JSON/CSV file by clicking on the Choose File section.
- And now, let’s seal the deal by clicking the ‘Import’ button.
Here’s a useful tip: When you export a JSON file from Ninja Tables, you’re getting both the table data and its styling.
Import from other WP table plugins
Ninja Tables lets you expand your possibilities! In addition to importing tables from CSV/JSON files, this plugin works flawlessly with other WordPress plugins. Effortlessly display data from TablePress or Data Tables Generator by Supsystic by simply importing it.
Now you must be wondering, where to start!
Under the “Import Table” option, there’s a built-in “Import From Other WP Table Plugin” feature. For TablePress plugin integration, ensure you have TablePress installed and a table ready to work with.
Import table from the TablePress plugin
To import a table from the TablePress Plugin, you need the TablePress plugin pre-installed and a table ready to import.
Let’s have a look-
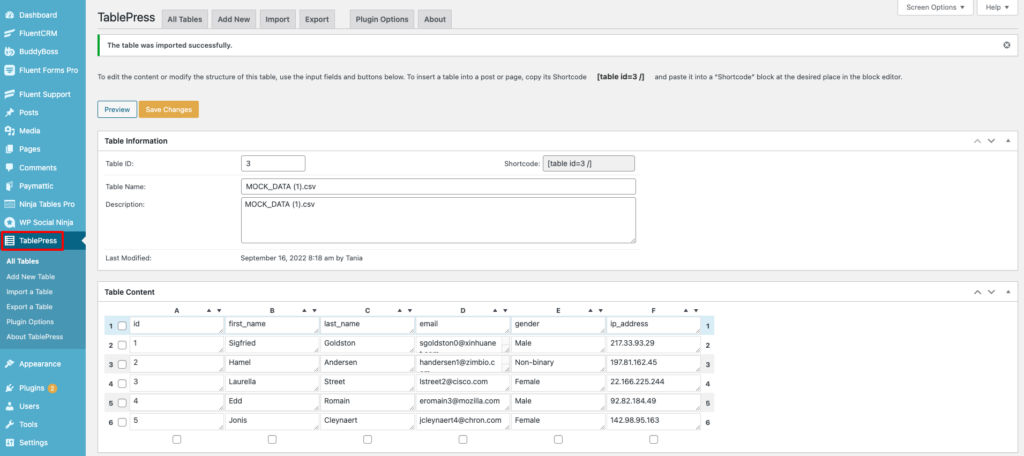
- First, create a table in TablePress and name it.
- Have a look at the screenshot below, which is a table made using TablePress.
- Now, go to the WordPress Dashboard → Ninja Tables → Tools → Import.
- A pop-up box will appear titled “Import from other WP table plugin” section, then select the option for TablePress.
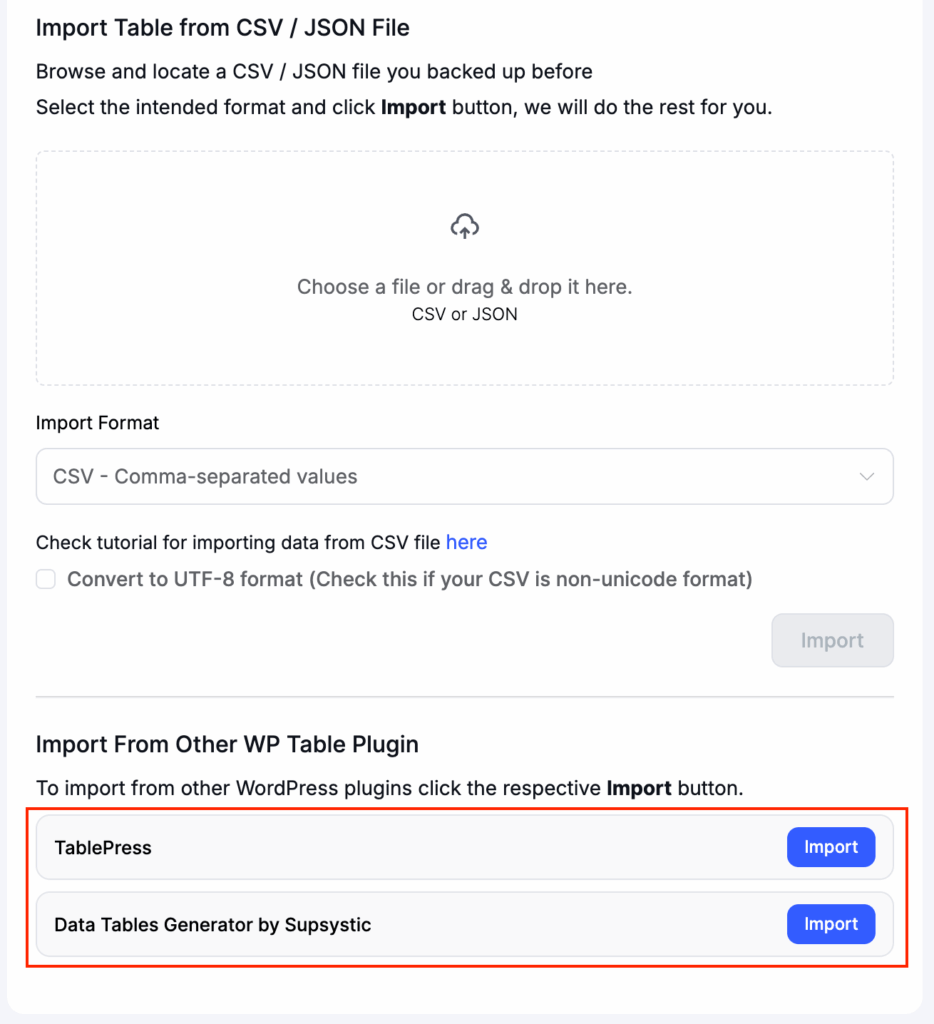
“You’ll only see these two options if you have Tablepress and Data Tables Generator by Supsystic installed in your plugin dashboard.”
- From the list of available Tables in TablePress, choose the table that you want to import into Ninja Tables.
- After the pop-up shows up, click on the Import button situated on the right side of the table.
- Once done, a new button will appear next to the Import button called “View Imported Table.” Click on this button to see the table that has been imported.

Now you’re done.
Data tables generator by Supsystic
Now, for this, the process is same as above. Create a demo table in the plugin, click on the import button beside it, and easily add it to Ninja Tables. It can’t get any easier than that.
Export Ninja Tables (CSV/JSON)
With a user-friendly interface designed to simplify processes and improve overall usage, Ninja Tables is focused on making the UX smooth and efficient.
- Begin by navigating to Ninja Tables’ All Tables section and selecting the desired table for export.
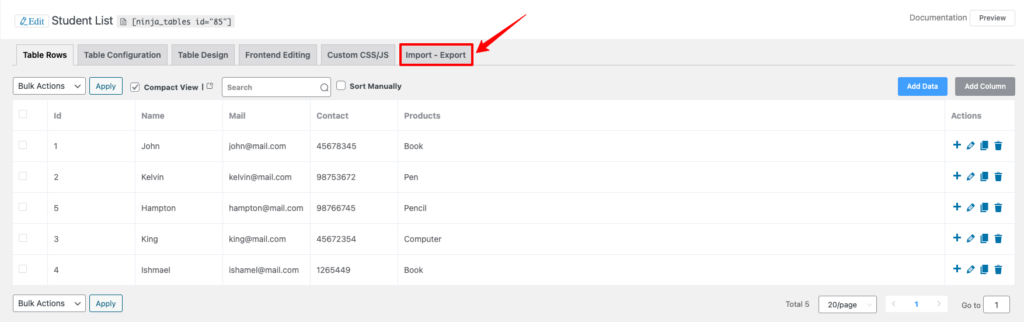
- Proceed to the Import-Export tab, where you’ll find the Export Data option besides the Import Data feature.
- Ninja Tables offers two file formats for export – CSV and JSON.
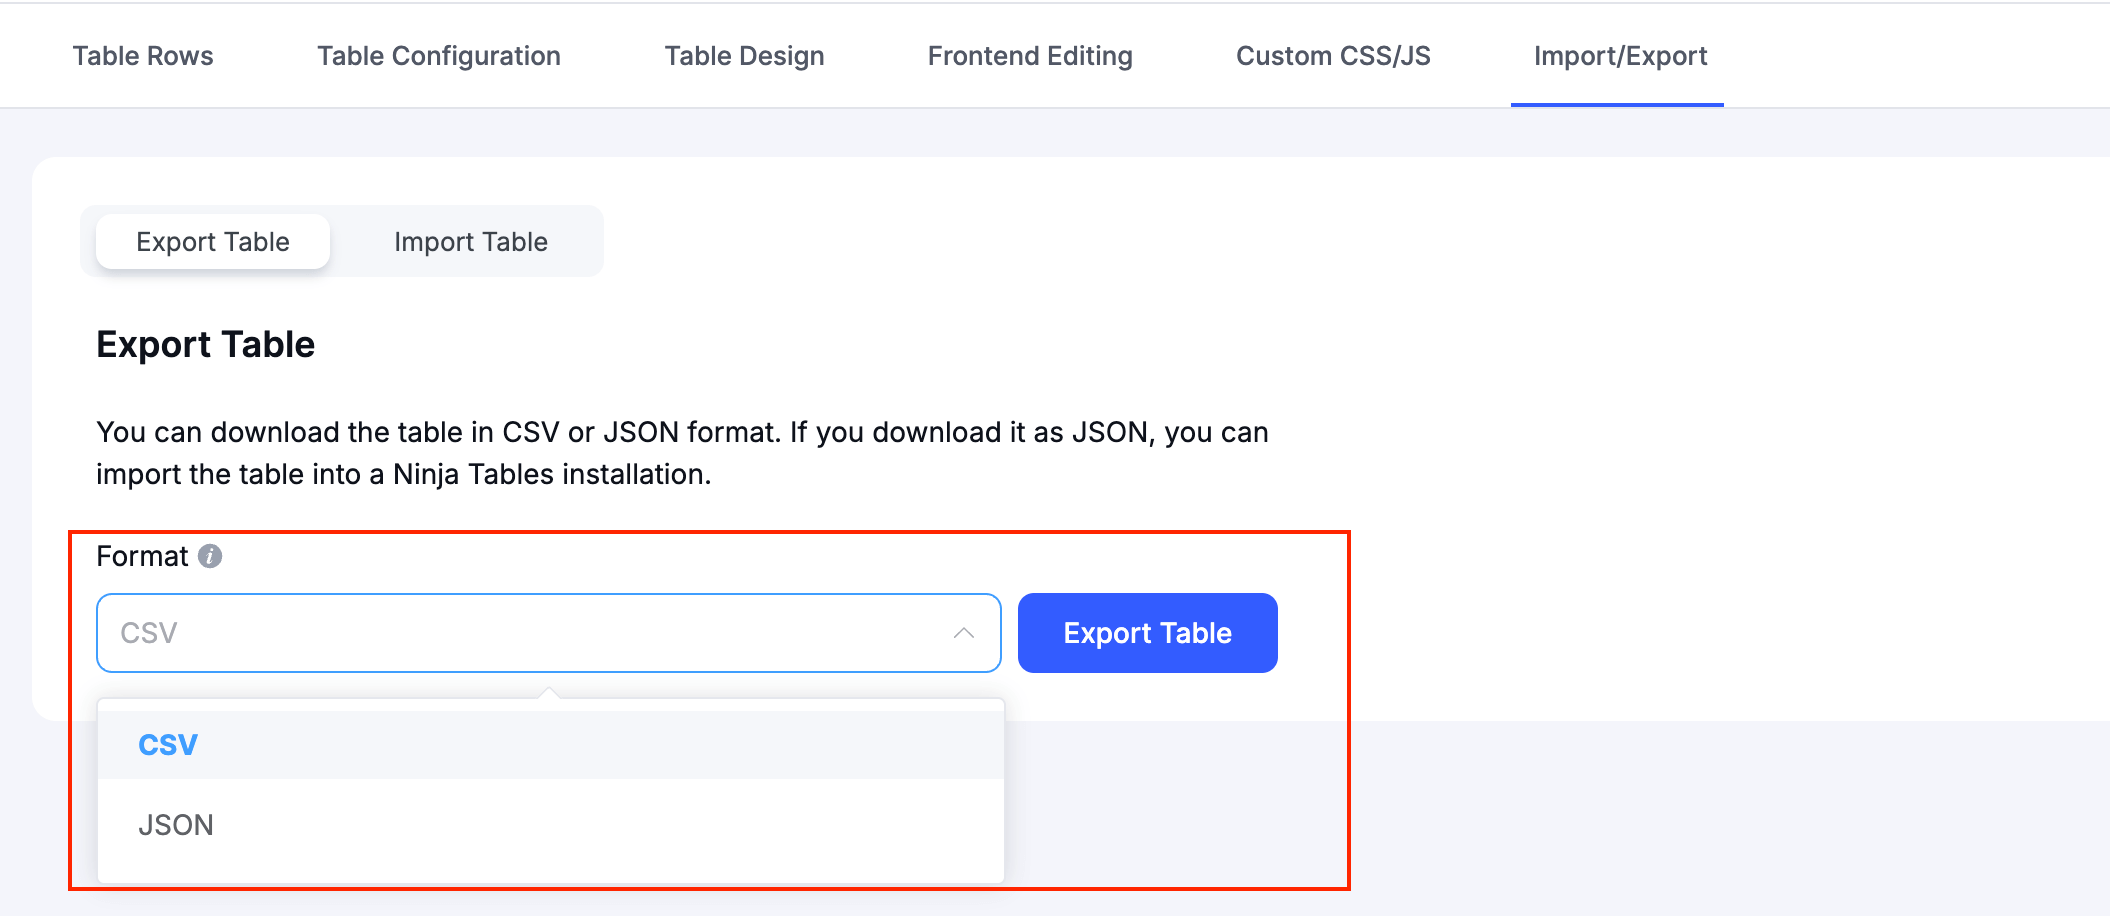
- Simply choose your preferred option.
- To complete the process, click the Export button to save the table data on your computer.
The process is more or less the same for Ninja Tables Drag and Drop. Move to the “Settings” tab first and scroll down to the “Export Table” option. Choose CSV/JSON and that’s it.
Tips: Exporting your table in CSV? That’s just the data. But if you hit JSON export, you not only get the table data but also keep the fancy Table Styling intact. No need to redo your table styling from square one – it’s like magic for your tables!
Conclusion
Ninja Tables emerges as the ultimate game changer, offering a streamlined answer to the time-consuming activities of updating, importing, and exporting tables.
The procedure of transforming existing tables on various websites into CSV or JSON files and importing them into your WordPress is easier than it sounds.
The plugin’s dashboard serves as the central hub for all table-related actions, offering a seamless and easy experience. Whether it’s selecting tables, importing or exporting data, or tweaking styles, Ninja Tables makes it all exciting.
In conclusion, if you’re looking for an all-in-one solution to elevate your WordPress table game, Ninja Tables is the answer.
Ninja Tables– Easiest Table Plugin in WordPress


Add your first comment to this post