
Image Gallery Plugin for WordPress: Create Awesome Galleries

An image gallery on your website lets you display more photos in a smaller space while making it simpler for users to browse them.
Ever wanted to create an image gallery in WordPress?
You can do it easily right from the WordPress dashboard. But there would be some limitations, like adding links or making them responsive.
This article will discuss creating an image gallery in WordPress with the Best Image Gallary Plugin for WordPress. And the most amazing thing is you don’t need to think about those limitations anymore.
Let’s dive in.
Create a Gallery in WordPress with an Image Gallery Plugin
Many plugins are available to set up and optimize a gallery in WordPress. When selecting one, you’ll want to check the ease of access, plugin speed, ratings, and additional features.
WPManageNinja offers an awesome table builder plugin that enables you to create a stunning photo gallery for WordPress website. Yes, that’s Ninja Tables, a table builder plugin for your WordPress website.
There are a lot of awesome features that put Ninja Tables out of the crowd.
- Advanced styling option
- URL adding
- Responsive gallery
- Stackable gallery
- Image Lightbox
- Shortcode to reuse the same gallery
Now let’s see how to Create a Photo Gallery in WordPress with Ninja Tables.
Getting started with Ninja Tables
Go to your WordPress dashboard. Install and activate Ninja Tables from the plugin section.
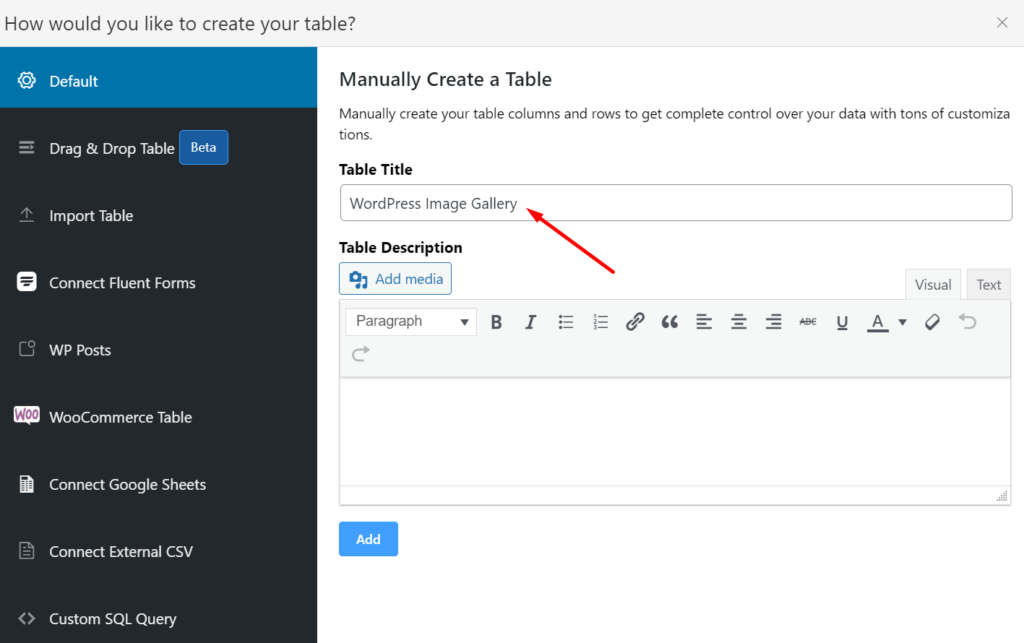
- Now, go to Ninja Tables from the left sidebar and click add table. Name your table title and click on Add.
- Click on Add Column and start adding your columns. First, add your column title. Your column key will be added automatically.
But, in the Data type field, you have to select the image/file/lightbox option as you want to add an image gallery.
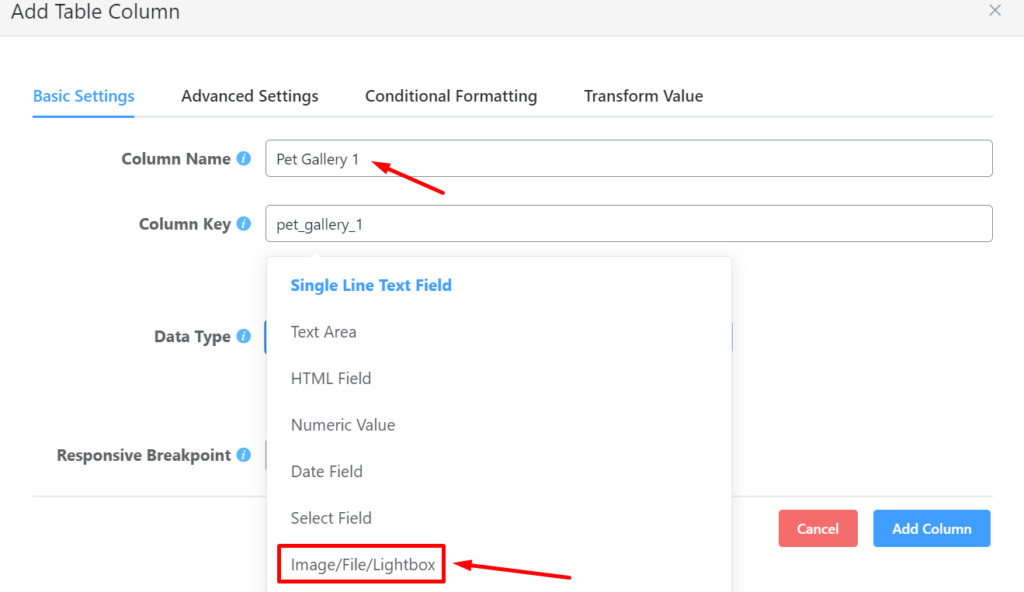
Selecting this data type will show you options for the image only/ image lightbox/ iframe lightbox/ link to URL.
Here, you can also set the responsive breakpoint for your gallery.
You can add as many columns as you want for your gallery.
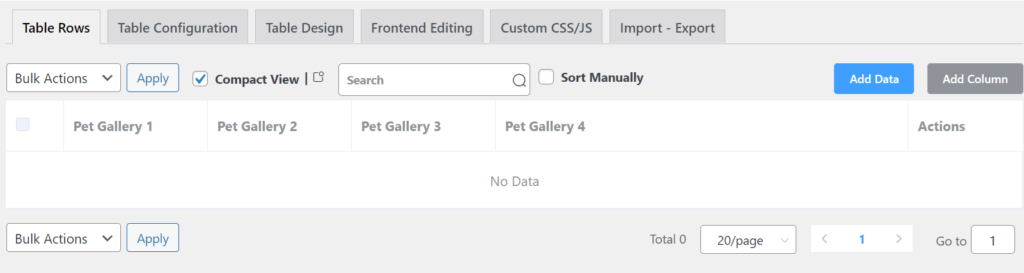
- Now, it’s time to add data(images) for your columns. For adding data, click the add data button and start selecting your images one after one.
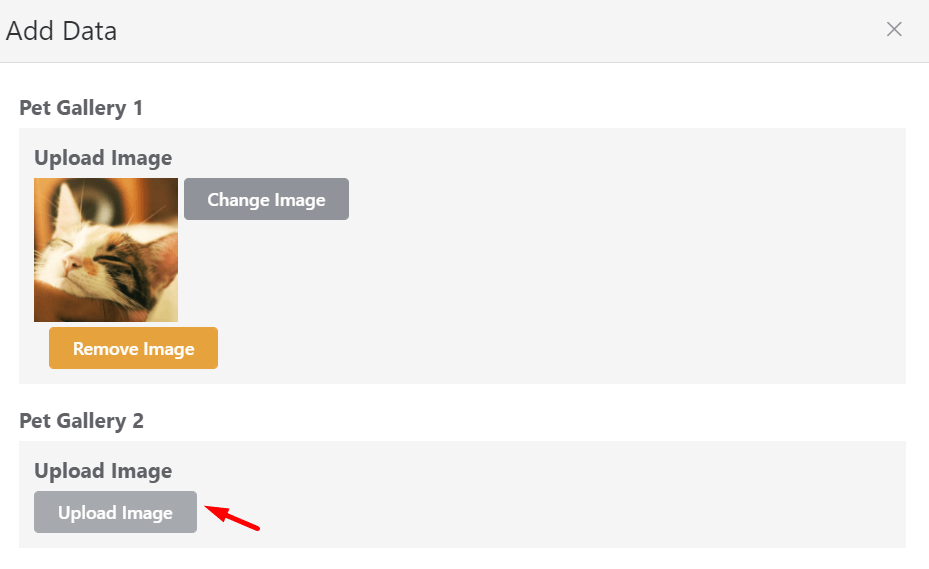
After selecting your images, just click on Add, and your photos will be added to the table.
Add other images to the other rows the same way above. And your table will be ready for an image gallery.
Now, set up the table setting as per your requirements. Ninja Tables lets you choose styles from 100+ tables styles. It also has the 3 most popular CSS libraries with unlimited color schema! The most featured styles are as follows:
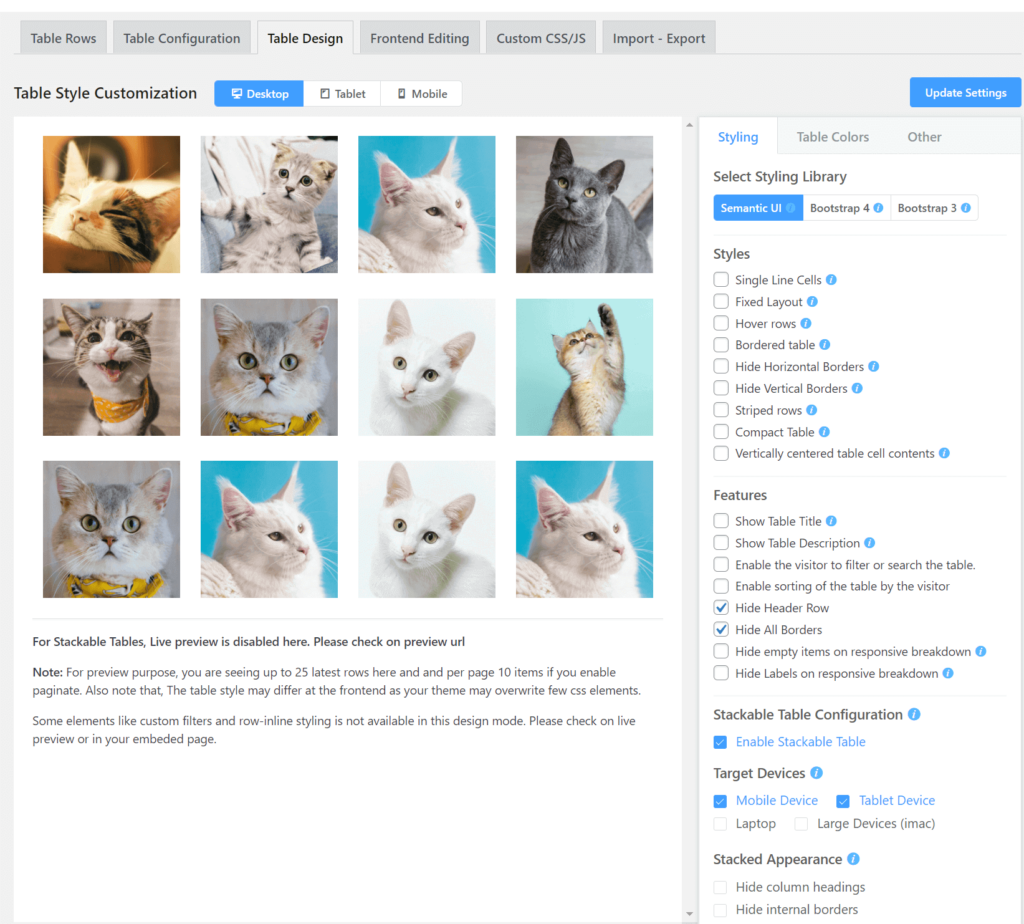
Set up your gallery, and finally, click the update settings.
Your image galley is ready to rock. Just copy the shortcode and place it wherever you want on your website.
Let’s see the gallery below,


The gallery above has some amazing characteristics, such as,
- Any image in the gallery can be clicked to open it in a lightbox popup.
- Your gallery will also look fantastic on a mobile device. The next or previous image can be viewed by swiping left or right after tapping on an image to make it larger.
Bonus from Ninja Tables
For your Image gallery, you can get a lot of other features from Ninja Tables. The table-making method you’ve seen here, you can also create by a drag and drop builder. There is a responsive option for both of the methods.
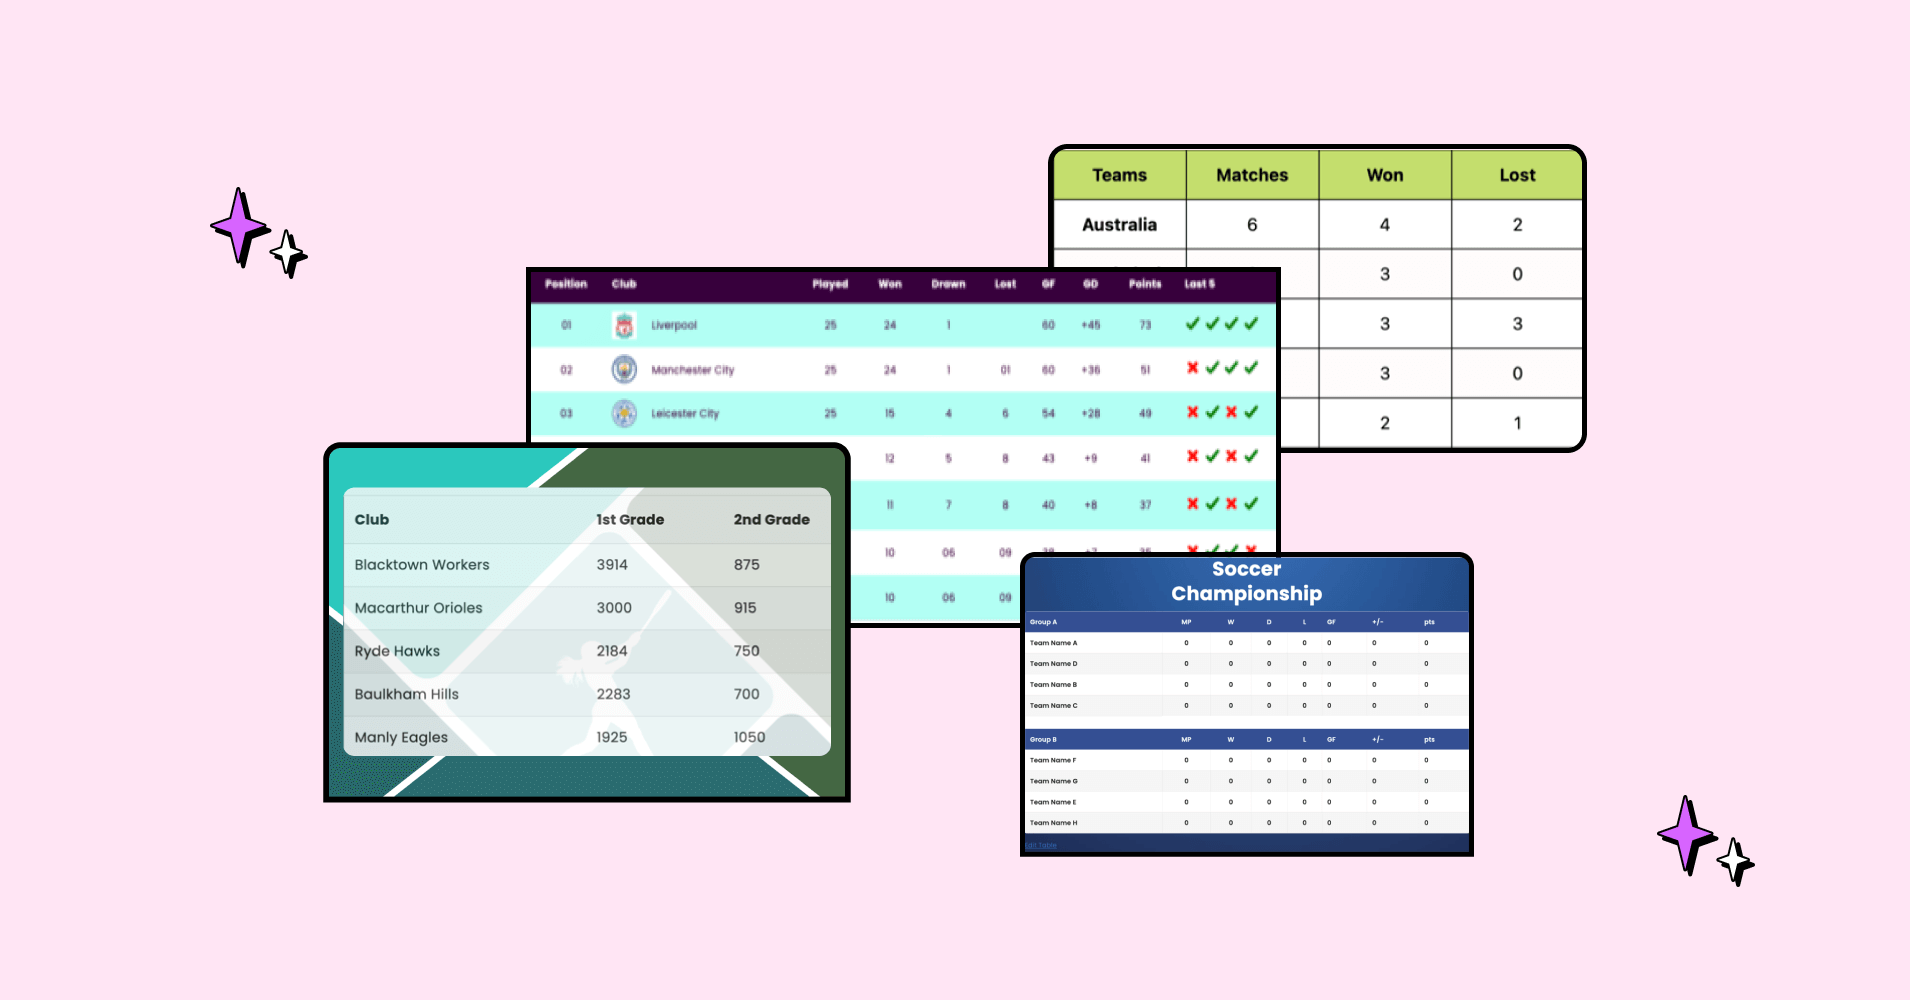
Ninja Tables is a robust table builder plugin with a lot of amazing features. You can build Any kind of data table with it.
- Data Table
- Comparison tables
- Pricing Table
- Responsive Product Specification Table
- Image Gallery
- Employee tables
- Charts
- Google Sheets integrated table
- WooCommerce Product Tables
- Amazon Affiliate Product Table
- League Points Table
Wrapping Up
How should you add an image gallery for WordPress?
If you are selecting which one you should choose for creating a WordPress image gallery, here is our verdict:
- For those who are more serious about gallery creation, want to add as many photos as your requirements, image lightbox, Iframe lightbox, responsive gallery, or want to link images, and more, you’d be better off with a plugin – Ninja Tables.
- The built-in WordPress gallery functionality might be suitable for your website for simple and basic galleries.
- And for the Ninja Tables users, Just rock on.
Ninja Tables– Easiest Table Plugin in WordPress
Hopefully, this article will assist you in deciding how to create an image gallery in WordPress. If you want to share your thoughts with us, please comment below.


Add your first comment to this post