
Fluent Forms Data in Ninja Tables

Online forms and tables are must-haves for WordPress websites. Forms can generate leads, and if you want all your online form entries in one place, you gotta get creative and display those form data in a table.
Thanks to smart plugins these days, you can easily create and show a form entries table in WordPress by integrating 2 things – A form and a table plugin.
So, we’ll explain how to connect Ninja Tables with the ever-popular WordPress form, Fluent Forms.
Why do we need this integration?
Table plugins are used to organize all kinds of data in tabular format. And form plugins are for reservations, reviews, surveys, plus more.
Suppose your business collects data for a survey, and you use forms for data collection. You can show the form data entries on the frontend in a clean and colorful online table.
You have 2 ways to do this.
- Manually copy the form submissions and paste those into the table.
- Export a CSV file of the form and import it into the table
But copying or importing takes time, not to mention the chances of spelling errors and stuff.
This is why WordPress tables with online form entries win. Form and table plugin auto-integration is necessary.
Thanks to Ninja Tables and Fluent Forms, creating a form and displaying entries as a table doesn’t take more than a minute!
Users can pull the form data automatically and place them in tables.
The table updates in real-time with any changes in the form, leaving no room for manual errors.
We’ll reveal some tricks to fetch Fluent Forms data in Ninja Tables and exhibit them on your WordPress website in a tabular manner.
WPManageNinja develops both plugins & this integration is available in the Ninja Tables free version.
Connect Ninja Tables with WordPress forms
How to display form data in a table?
The answer- Ninja Tables Fluent Forms integrations.
It unleashes lots of possibilities for online businesses. It’s also helpful for personal websites. Every subscription form submitted to a website can show up on a table. It’s easier to filter data from a table with custom filters and highlight cells with conditions.
Here’s how to display form data in a table with Ninja Tables and Fluent Forms in 3 simple steps-
Step 1: Create a form and submit
Fluent Forms makes it easy with multiple pre-made templates, including contact forms, newsletters, subscriptions, donations, applications, invitations, healthcare, etc.
You can also create a blank form from scratch. Just drag and drop the form fields you want.
It’s easy to create a form with Fluent Forms. You can still check out the documentation for any confusion.
Create forms with as much data as you need because both Ninja Tables and Fluent Forms support unlimited data entries.
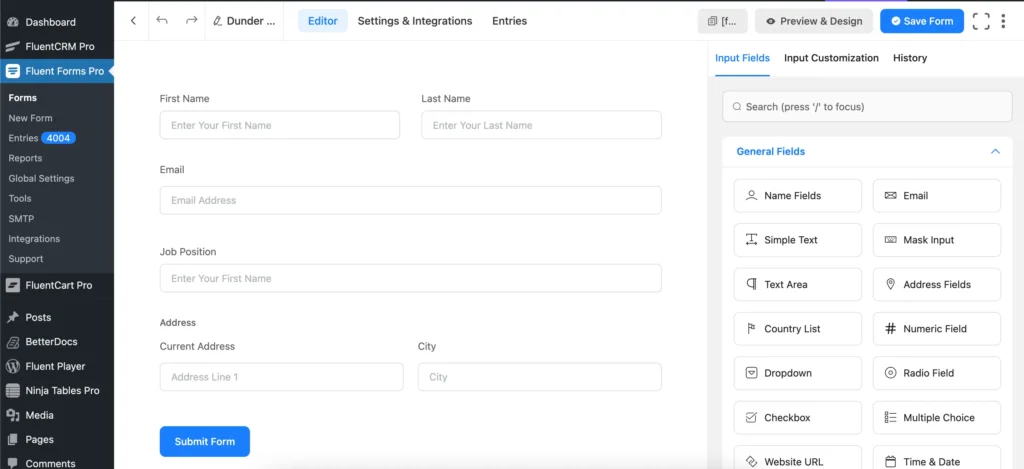
We made a “Dunder Mifflin Employees” form with only four fields- name, email, job position, and address.
These fields will be the columns of the table, and all the submitted form data will be table entries.
Save the form and submit data multiple times from the preview window. These data are the details of each Dunder Mifflin employee.
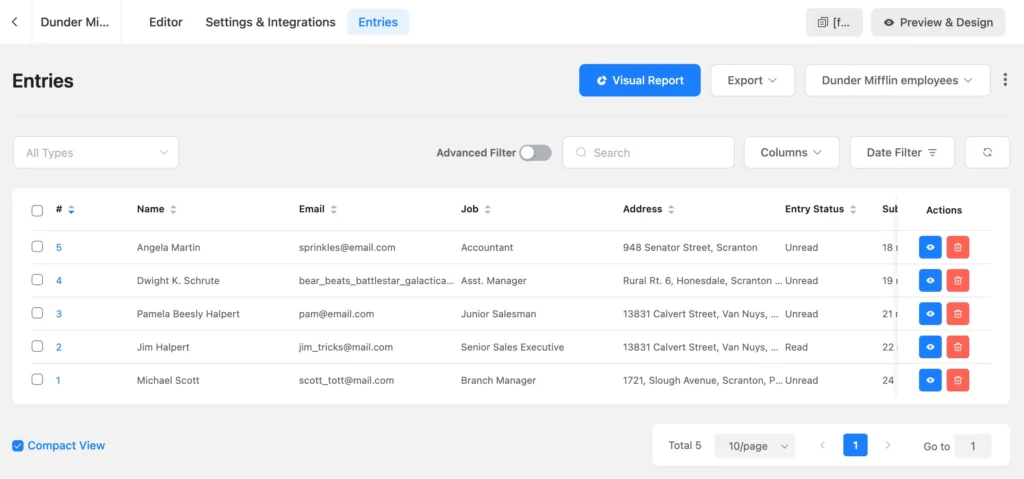
Here are the example forms submitted by five fictional “Dunder Mifflin employees.”
On your Fluent Forms “Entries” tab, many more form entries will appear as people submit forms.
To keep track of every form and sort/filter them easily, you can integrate with Ninja Tables.
Step 2: Connect Fluent Forms
Open the table creation menu from the Ninja Tables dashboard and click “Connect Fluent Forms.”
Give the table a title and select “Dunder Mifflin Employees” from the dropdown.
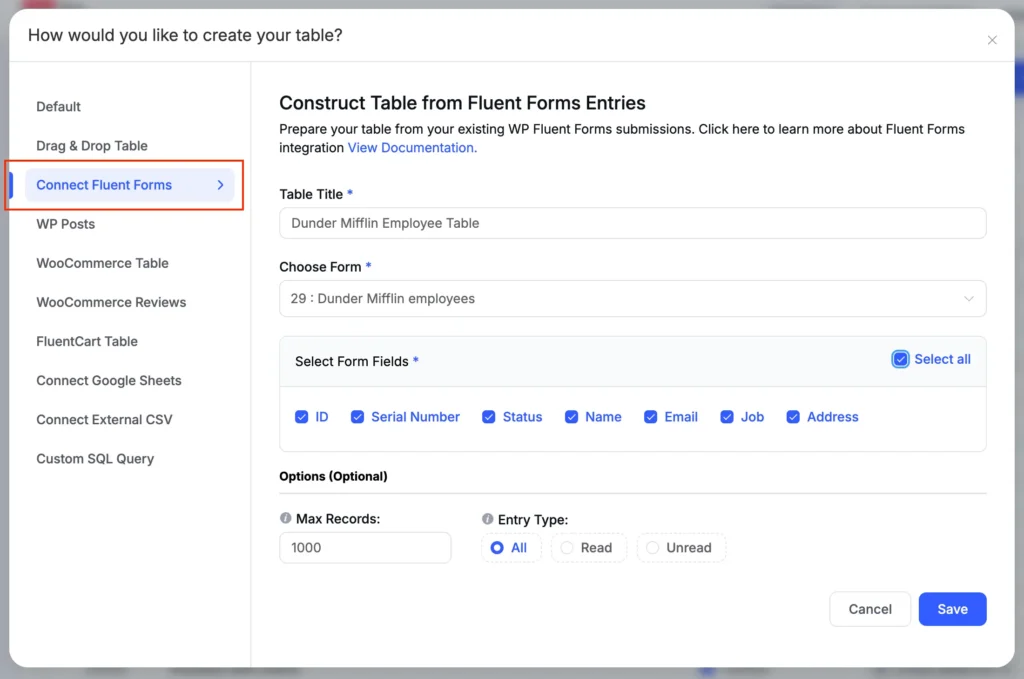
From the “Select Entry Fields” option, you can select the form entries you want to show on the table as columns.
That’s it!
Click save, and you’re done. This is how you can display online form data in WordPress tables.
Step 3: Edit with Ninja Tables features
Once you save the table, all the form entries you’ve selected previously will appear on a nicely organized table.
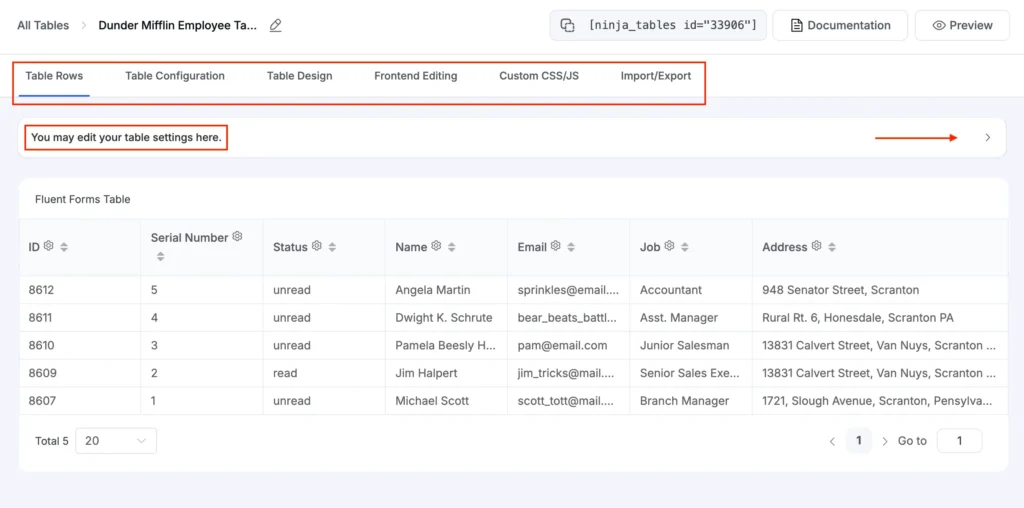
If you want to add or remove an entry, edit the table settings by clicking “You may edit your table settings here” section at the top.
Moreover, the tabs above the table are all open for a form entries table (except Frontend Editing and import).
From here, you can-
- Customize the table data type, width, and alignment
- Highlight cells with conditions
- Turn texts into clickable links with transform value
- Rearrange rows/columns by dragging
- Apply custom filter
- Color the table texts, background, header/footer, border
- Custom table style and responsiveness
- Tweak the table with custom CSS
- Export CSV/JSON file
Learn more Ninja Tables uses and benefits.

For example, here’s the form table customized with Ninja Tables colors and transform value features.
Is any “The Office US” fan seeing this?
Fun facts
- Any update in the form shows up on the table in real-time
- Unlimited entries and customization
- Zero coding knowledge needed
- Free and pro version users both can enjoy
- Documentation or the video tutorial
One more thing. The “Value Transformation” feature lets you add fillable forms in the table so that people can open and fill up forms in the frontend.
We’ll get back to you soon with another blog on this specific workaround.
Finishing notes
Everyone mentions at least one WPManageNinja product when discussing the best WordPress plugins.
And in every best table plugins or form plugins listicle, you’ll see Ninja Tables and Fluent Forms reigning effortlessly!
Connect Ninja Tables with WordPress forms using Fluent Forms and display form data in a table within a minute! Customize the tables however you want.
The best user-friendly features of the table plugin and responsive layout make this integration awesome.
Let us know how it helped your business, or just drop a suggestion.
Get in touch with Ninja Tables
Ninja Tables– Easiest Table Plugin in WordPress


how to edit my fluent forms entries in ninja table from frontend point view?
Hi revo! Sorry for this delay & thanks for your comment!You can embed Fluent Forms as a form page in the table using Ninja Tables’ “Transform Value” feature & an HTML code. This embedded link will let you fill-up the form in the frontend.
We’ll get back with a blog on this workaround as soon as we can. Thank you!