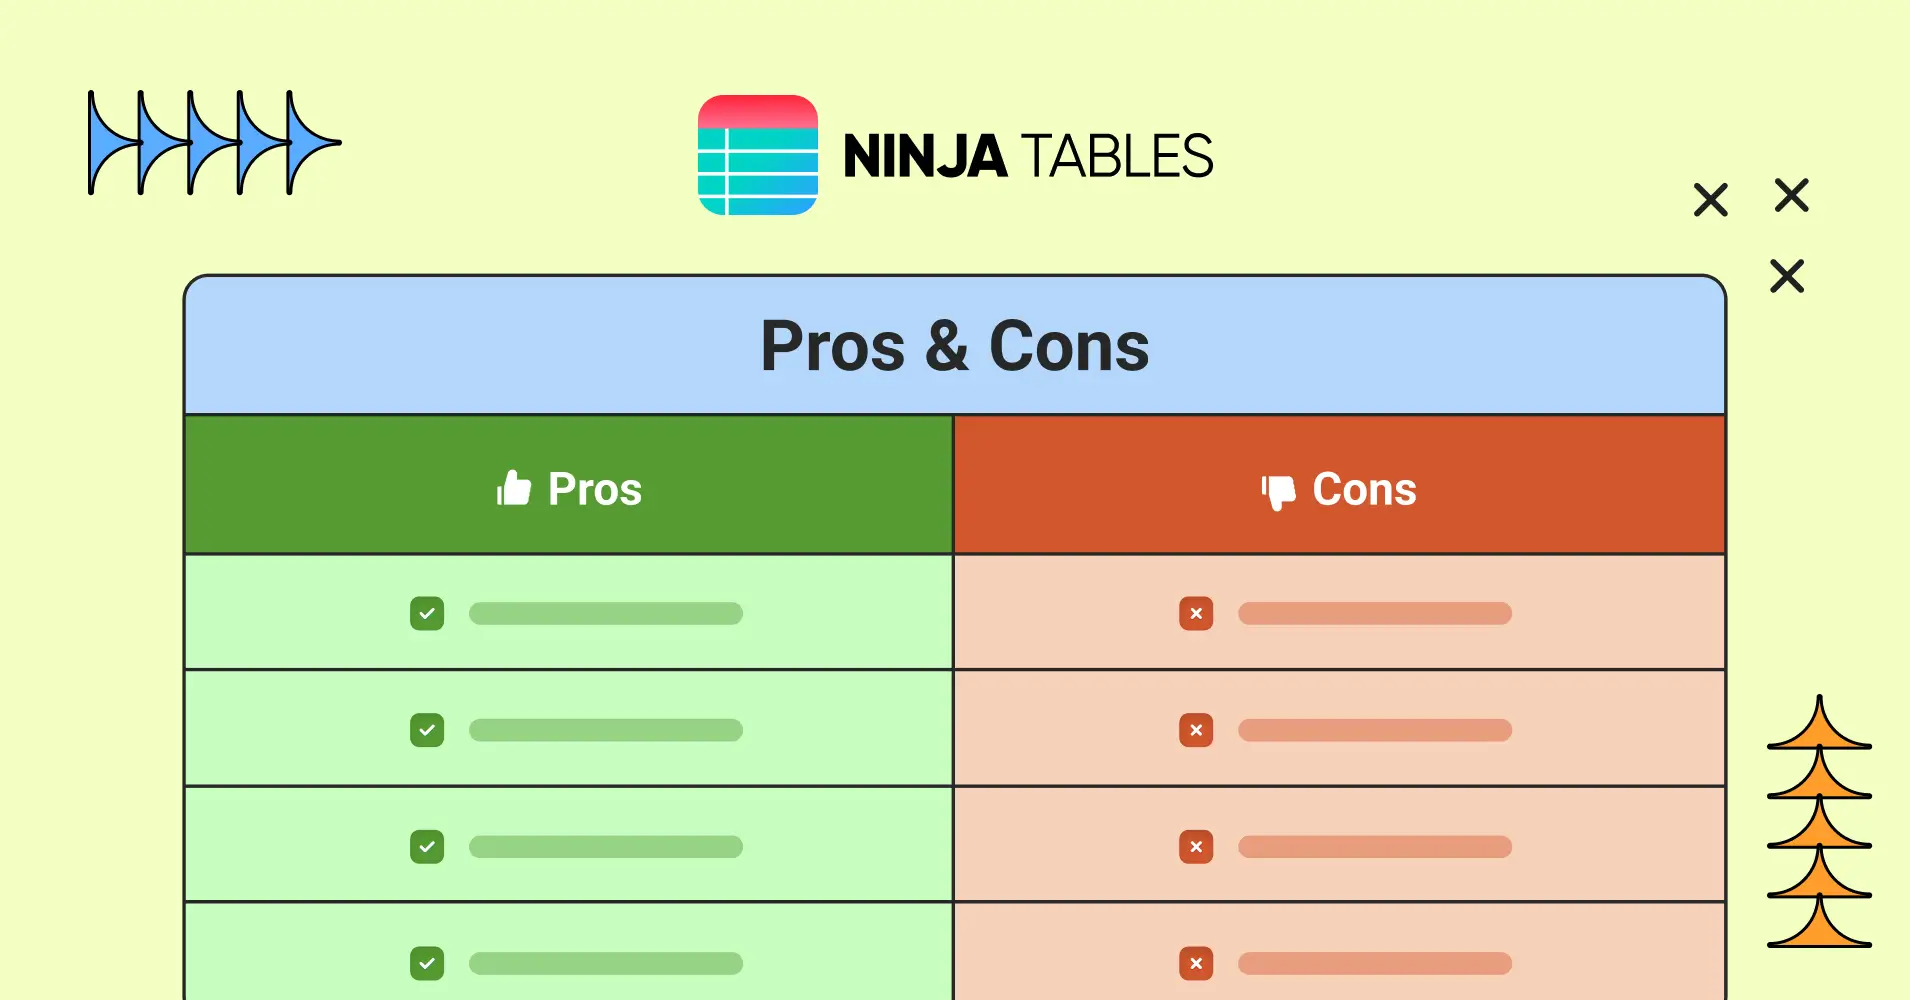
Simplify Your Decisions with Pros and Cons Tables
Ever feel overwhelmed by too many choices? Stuck in an endless scroll-hole trying to decide between products, services, or even vacation spots? Decision fatigue is real, but there’s a simple solution: Pros and Cons tables.
Remember that episode of Friends where Ross makes a list of pros and cons about Rachel? It was hilarious and awkward, but it helped Ross figure out his feelings. Similarly, a well-crafted pros and cons table can make decision-making a breeze for your audience- without the drama!
Why Create Pros and Cons Tables?
Imagine giving your audience an easy-to-read, at-a-glance summary that helps them make informed decisions without wading through paragraphs of text. Whether you’re reviewing the latest gadget, comparing software options, or weighing in on a hot topic, a pros and cons table can make your content pop and keep your readers hooked. It gives your readers a quick, at-a-glance summary of the table and its contents.
On your WordPress site, pros and cons tables can make your content shine. Give your audience the tools to make informed choices, and they’ll keep returning for more.
Here’s why they rock:
Clarity: Break down complex information into bite-sized chunks.
Engagement: Keep your audience hooked with an easy-to-read format.
Informed Decisions: Help your readers choose wisely to avoid getting lost in paragraphs of text.
Easy comparison: Simplistic, comprehensive way of comparing between choices.
Best Practices for Designing Pros and Cons Tables
To ensure your pros and cons tables are as effective and engaging as possible, follow these design best practices:
- Keep It Simple: Use a clean and straightforward design. Avoid clutter to make sure your readers can easily scan the information.
- Use Clear Headings: Clearly label your pros and cons sections so readers can quickly distinguish between the positive and negative points.
- Consistent Formatting: Use consistent fonts, colors, and spacing to create a cohesive look that aligns with your website’s design.
- Highlight Key Points: Use bold or different colors to highlight the most important pros and cons. This draws attention to the critical information you want to emphasize.
- Balance the Content: Ensure that the number of pros and cons is balanced to provide a fair comparison. If one side is much longer, consider summarizing to keep the table visually balanced.
- Responsive Design: Make sure your table looks good on all devices. Ninja Tables provides responsive design options to ensure your table is accessible on desktops, tablets, and smartphones.
- Use media: Use related media, images, product links, or any other intuitive features in the list to show the exact differences or comparisons you’re talking about.
Pro tip: Easily spice up your tables with Ninja Tables! Drag and drop icons like ticks, crosses, arrows, and images to make your visuals pop and your message crystal clear.
 | |
PROS | CONS |
Affordable pricing plan | No free trial |
No Ad interruption | Buffering/low video quality |
Lots of content choices | Regional content limitation |
Original tv shows and movies | Delayed release |
Varied audio/subtitle options | Unsatisfactory dubbing |
Multiple platform choice | Account Sharing Challenges |
How to Create a Dynamic Pros and Cons Table on WordPress?
This blog post will walk you through the process, using plugins and built-in features to craft visually appealing and highly effective pros & cons tables. We’ll explore Ninja Tables, share insider tips for making your tables shine, and guide you step-by-step to transform your posts into user-friendly, interactive masterpieces. Ready to make your content more dynamic and engaging? Let’s dive in!
Choose the right table plugin
WordPress offers a variety of plugins specifically designed to help you create pros and cons tables. Some popular options include:
Ninja Tables: Ninja Tables is one of the leading WordPress plugins, and it is now more advanced and dynamic than ever.
WP Table Builder: This drag-and-drop table builder is user-friendly and customizable.
TablePress: Known for its wide functionality, TablePress is made for detailed data display.
Visualizer: This plugin offers charts and tables ideal for visual data presentation.
Feature | Ninja Tables | WP Table Builder | TablePress | Visualizer |
Ease of Use | Pros: Extremely intuitive, easy to use. | Pros: Drag-and-drop interface, very intuitive. | Pros: Simple, user-friendly UI. | Pros: User-friendly, powerful options. |
Cons: May have a learning curve for advanced features. | Cons: Limited to table creation, not for charts | Cons: May require some time to learn advanced features | Cons: Can be complex for advanced features. | |
Customization | Pros: Highly customizable with built-in features | Pros: Various elements like text, images, buttons | Pros: Highly customizable with CSS and HTML | Pros: High level of customization for charts |
Cons: Some advanced customization requires premium | Cons: Most customization options need premium | Cons: Requires CSS knowledge for advanced styling | Cons: Overwhelming and complex styling for beginners | |
Data Import/Export | Pros: Supports CSV, JSON, Excel, Google Sheets, Media attachments | Pros: Supports CSV, Excel, JSON | Pros: Supports CSV, Excel, Google Sheets | Pros: Supports CSV, Excel, Google Sheets |
Cons: May have issues with very large datasets | Cons: May have issues with large datasets | Cons: Limited to supported formats | Cons: Compatibility issues with formats | |
Responsiveness | Pros: Fully responsive, adaptive design | Pros: Fully responsive feature | Pros: Mobile-responsive by default | Pros: Fully responsive |
Cons: Complex tables need manual adjustments | Cons: Responsiveness can be tricky with complex designs | Cons: May need adjustments for complex tables | Cons: Heavy visualizations may affect responsiveness | |
Interactivity | Pros: High interactivity, feature- filtering, pagination and sorting | Pros: Basic interactive element | Pros: Basic sorting, filtering | Pros: High interactivity with charts |
Cons: Advanced interactions need premium | Cons: Limited to basic interactions | Cons: Limited without custom coding | Cons: Requires more resources for complex interactions | |
Integration | Pros: Integrates well with prominent plugins and themes | Pros: Integrates well with other page builders | Pros: Integrates with various plugins | Pros: Integrates with chart libraries and plugins |
Cons: Some advanced integrations need premium | Cons: Integration options may need premium version | Cons: Limited to supported plugins | Cons: Complex integrations may require technical knowledge | |
Styling Options | Pros: Extensive styling options with templates | Pros: Basic interactive element | Pros: Basic sorting, filtering | Pros: High interactivity with charts |
Cons: Advanced interactions need premium | Cons: Limited to basic interactions | Cons: Limited without custom coding | Cons: Requires more resources for complex interactions | |
Best For | Versatile tables with high customization and interactivity | Creating detailed tables with various elements easily | Simple tables with basic interactivity needs | Advanced users needing interactive charts and tables |
Ratings |
Get Started with Ninja Tables
It takes a lot of work to make decisions when choosing one option over the other, especially when there are multiple factors to consider. If only there were a simple way to break down the good and bad of a product or service on your WordPress site.
Well, Ninja Tables is your ultimate solution for this. Here’s how you can get started with this WordPress table plugin and make your desired pros and cons table the way you want.
How to install and activate Ninja Tables plugin?
Installing Ninja Tables is similar to any other WordPress plugin.
- Go to the WordPress Admin Dashboard → Plugins → Add New.
- Search for Ninja Tables, click on the ‘Install Now’ button, and then Activate it.
Alternative Method
- Another way is to download the .zip file by clicking on the Download button.
- Navigate to your WordPress Admin Panel → Plugins → Add New → Upload Plugin.
- Click on Choose File, upload the .zip file, and click on Install Now.
Drag-and-drop table
From the menu on the side, we’ll pick Drag & Drop Table. Then you’ll see a window pop up with options for you to name your table and add rows and columns as you prefer.
- Name Your Table: Enter a name for your table, such as “Comparison Table,” select as many columns or rows as you like, and click “Create.” Don’t worry, you can add more later!
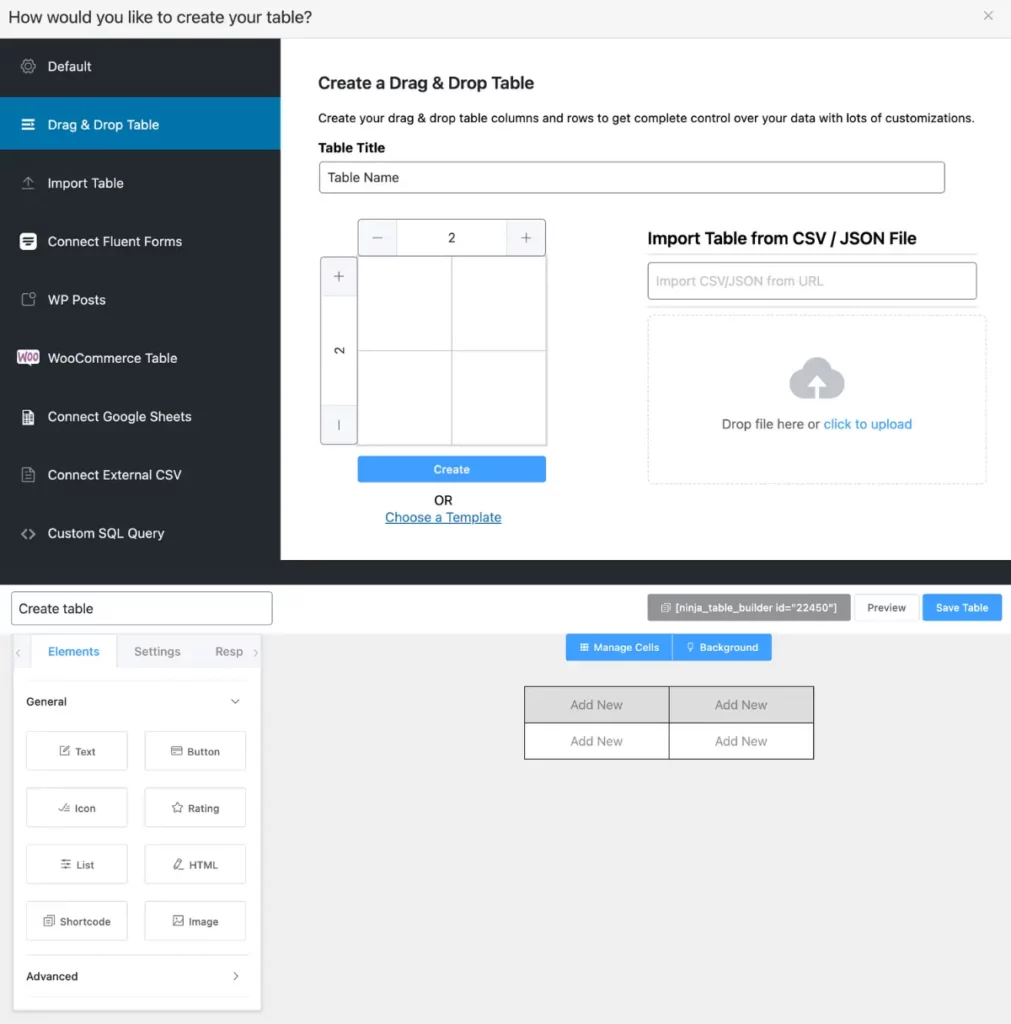
- Define Your Columns: Click on the “Add New” button to create columns for each item you are comparing, including one for “Pros” and one for “Cons.” Or you can simply drag the text or any other icon from the left tab.
- Enter Your Content: Fill in the rows with your comparison points, listing the pros and cons for each item.
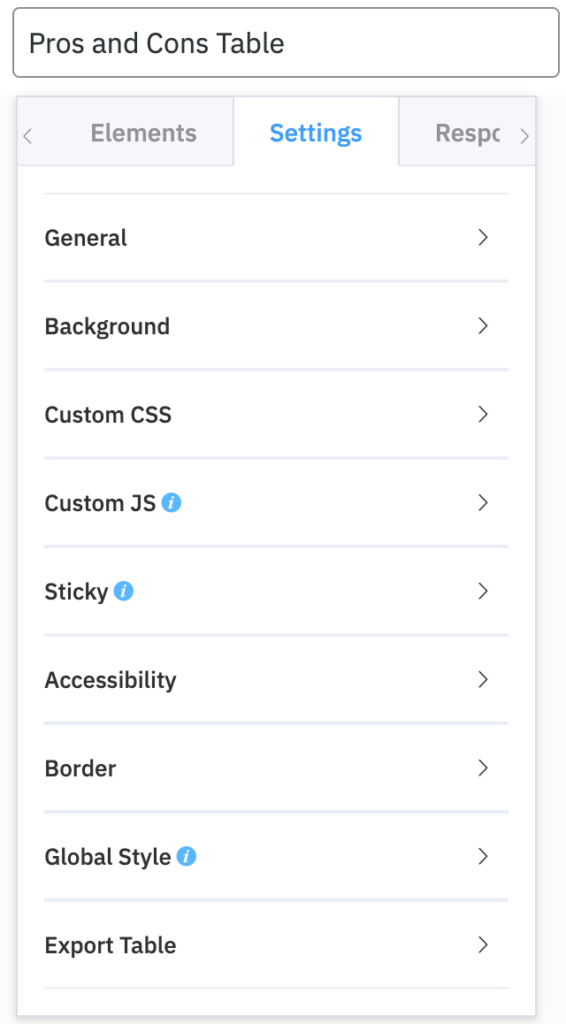
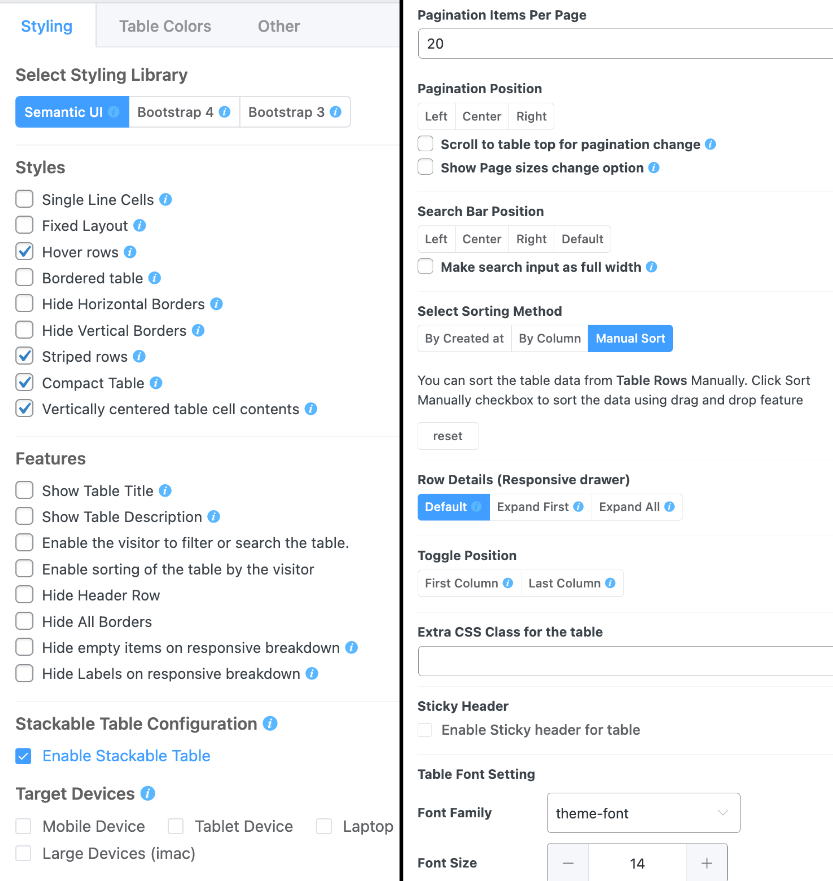
- Customize the Design: Navigate to the left tab to adjust the table’s appearance. You can modify colors, fonts, and table styles to match your site’s aesthetic.
From pre-built templates in the plugin
The new addition of the Ninja Tables is the free templates page. There you can find all the free designs for your every need. You can select one after viewing it, then download the zip file. You can find a demo image, text, and a JSON file there. Simply import the file into the Ninja Tables dashboard and customize it further to suit your needs.
You can find your favorite pros and cons table design from our free templates page under the category of the comparison table.
Advanced table (Classic table design)
Here you can generate a table using the Ninja Tables manual table builder system.
Simply click the add table button, then a window will pop up with the default table creation menu. Then proceed to do the following-
- Enter the table name (e.g. Comparison table/ Pros and Cons table) and description (optional).
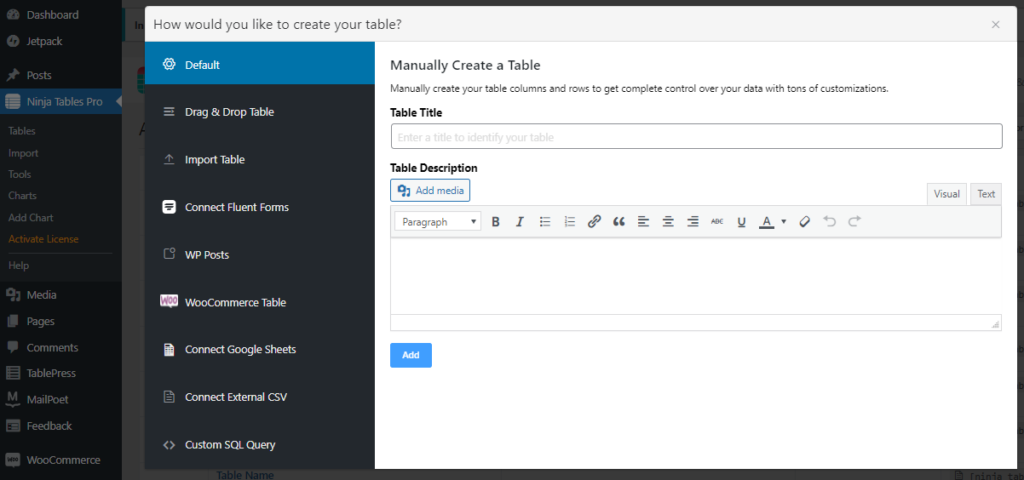
- Hit the Add button to create a new table, and the ‘Table Rows’ tab will open.
- Click on the Add Column button to create columns.
- In the popup, enter the Column Name and Column Key.
- Select your data type (e.g., text, numeric) from the options.
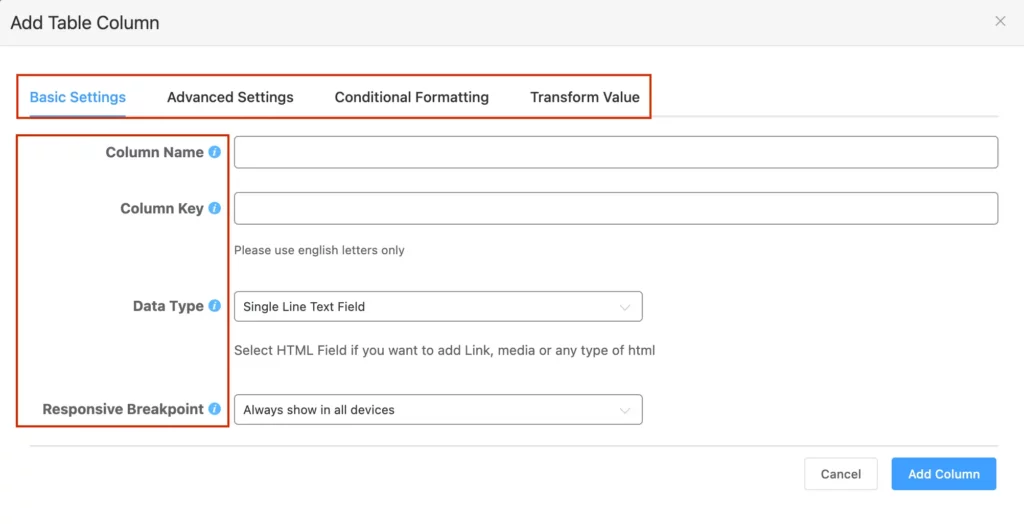
- Then click the blue Add Column button to confirm.
- Use the ‘Add data’ to input information.
- Finally, customize it as you want.
Wrapping up
Dynamic pros and cons tables are a fantastic way to enhance your WordPress site, making your content more engaging and easier to digest. By providing clear, concise comparisons, you help your readers make informed decisions quickly and easily.
Don’t let decision fatigue get the best of you or your readers. Add some flair to your content with a suitable dynamic pros and cons table. Your readers will thank you.
So, channel your inner Ted Mosby with his yellow legal pad—but in a much cooler, modern format—and start creating pros and cons tables that will keep your audience coming back for more!
Ninja Tables– Easiest Table Plugin in WordPress


Add your first comment to this post