Google Sheets Integration In WordPress Table

We might be messy ourselves, but we do love to see things organized! Likewise, it’s not a pleasant sight if the data on your WordPress website look messy. Not all data look good on a Google Spreadsheet.
So, you might wanna embed Google Sheets in WordPress tables. Is that absolutely necessary?
Well, sometimes it is!
You, as a web developer, might find it easy to develop a data table in WordPress or to customize it and maintain data from time to time. But your client, the end-user for whom you’re developing the website, might get cold feet trying to update data. They might want to stick to Google Sheets, which they are comfortable with.
But plugins that pull data from Google Sheets to a WordPress table can slow your site performance. Besides, there’s no guarantee the tables will be SEO-friendly.
You simply need a fast and reliable table plugin with Google Sheets integration.
Embed Google Sheets in WordPress using a table plugin
Be skeptical all you want, but it’s only an online table plugin that can keep all sorts of data organized and clean in a tabular format. So, importing your Google Spreadsheet data into a table is a pretty smart thing to do.
Plus, an ideal WordPress table is fully customizable with colors, filters, conditions, or code.
One such perfect example is Ninja Tables!
But don’t worry. You don’t need to be a coding expert to use this table plugin and definitely not while getting Google Sheets data into a table.
Here’s how to embed Google Sheets in WordPress with Ninja Tables-
- Step 1: Create and publish a Google Spreadsheet
- Step 2: Connect the sheet to Ninja Tables
- Step 3: Select fields
- Step 4: Check and edit
Watch this short tutorial if you’re in a hurry!
Step 1: Create and publish a Google Spreadsheet
Suppose you need to show an employee data sheet on your WordPress website in tabular format.
First of all, create a table in Google Sheets and publish it.
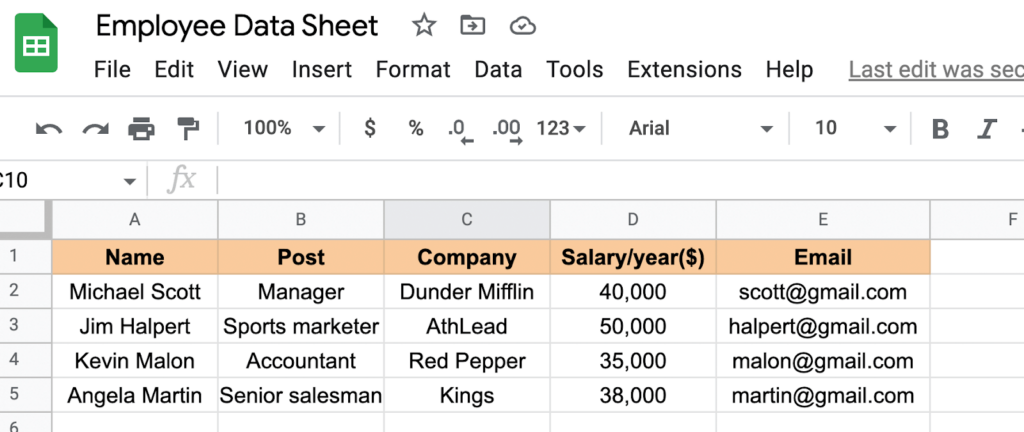
We’ve made a sheet that contains data on employees of a company.
To customize the data in a WordPress table, you only need to publish the sheet to the web.
Go to the “File” option and click “Publish to web.”
You’ll see a window appear with the sheet’s link, the file format you want it to be published in, and some more relevant options.
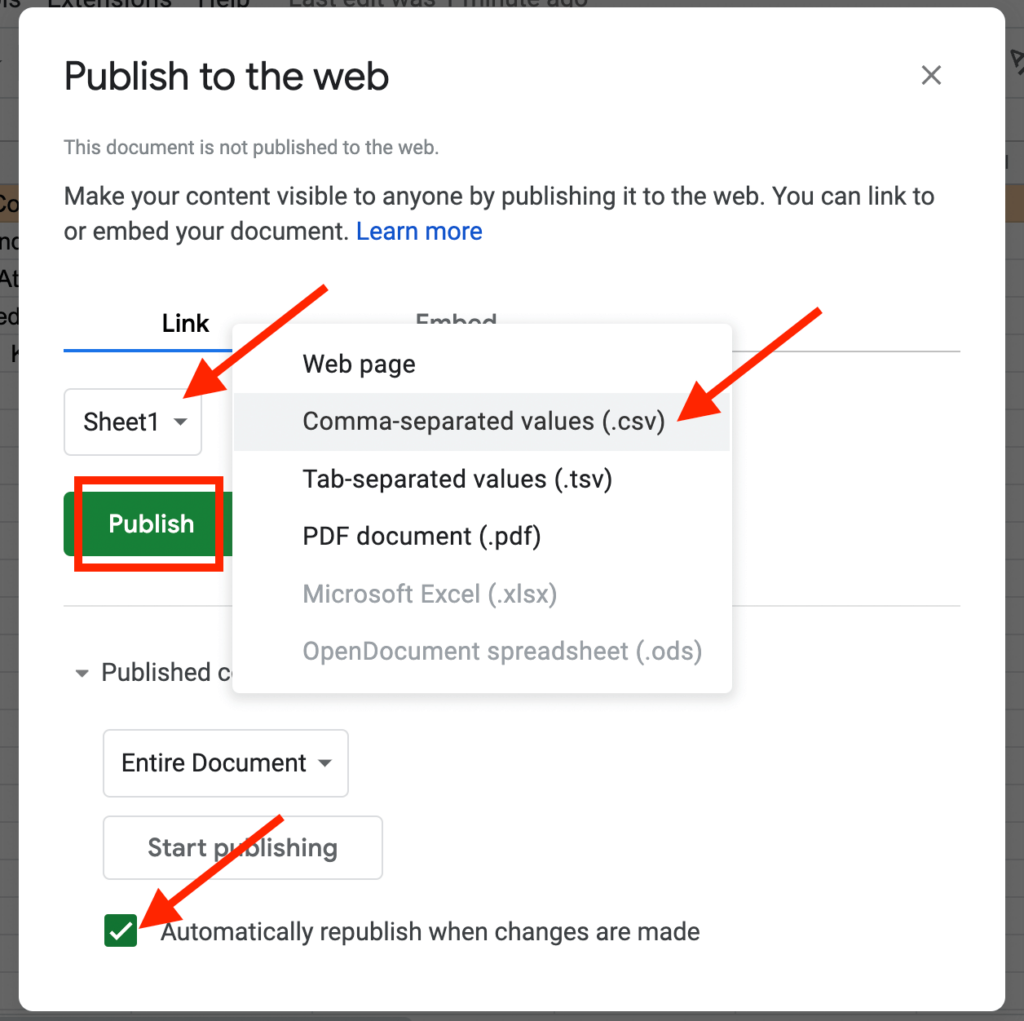
Select a format from the dropdown.
The bottom-most checkbox says, “Automatically republish when changes are made.” It will be enabled anyway, but it’s best to check. This feature auto-publishes any changes to the sheet even after you’re done publishing.
Hit the green “Publish” button and copy the URL that arrives after that.

This link will later fetch all the Google Sheets data to your WordPress table.
Step 2: Connect the sheet to Ninja Tables
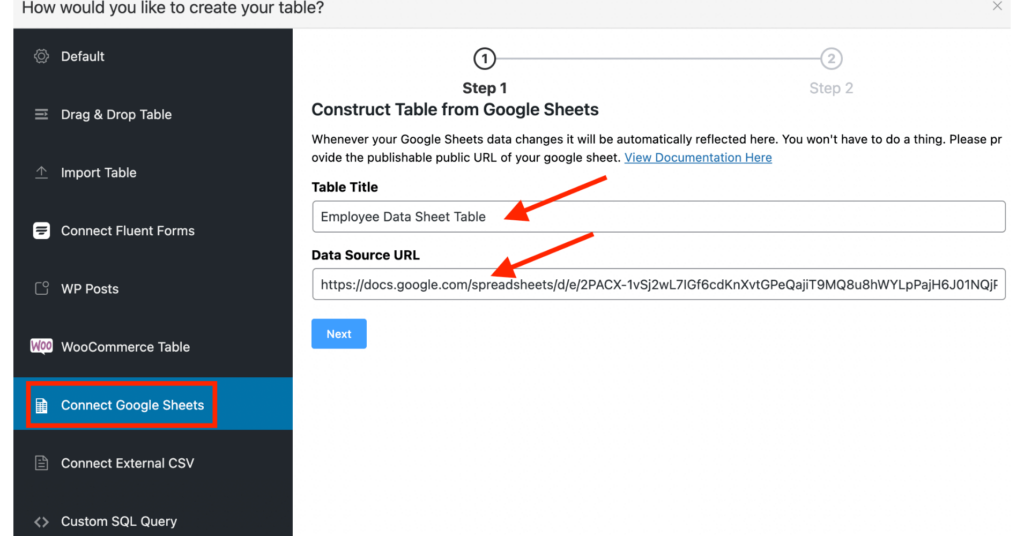
Move to the Ninja Tables dashboard and open the table creation options menu.
Click “Connect Google Sheets” and paste the URL of the spreadsheet in the “Data Source URL” box.
Step 3: Select fields
Choose the entry fields and hit save.
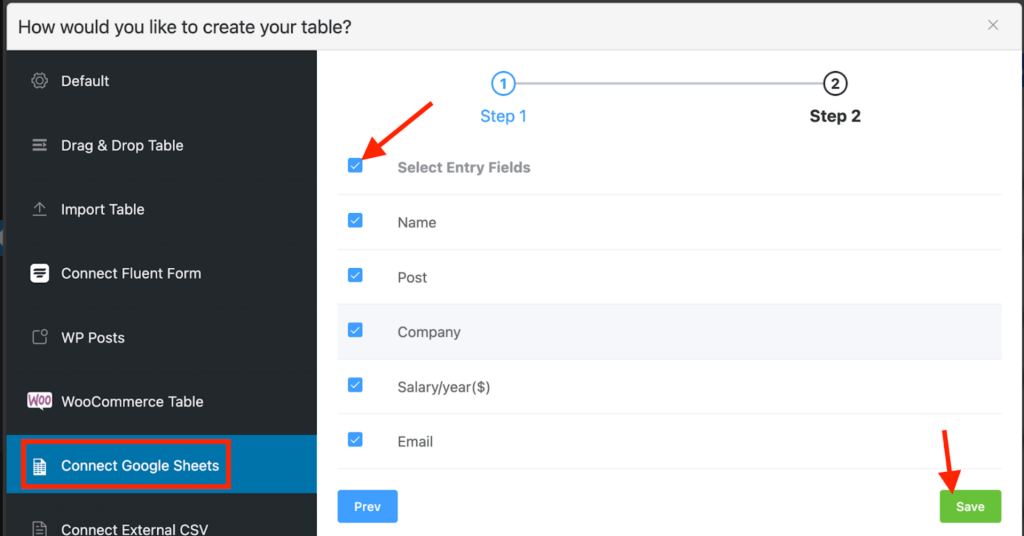
After you save the table, all the selected entry fields will create columns for the table and show up with respective data from the published Google Sheets.
This is the table made with data from Google Sheets. You can edit it with the Ninja Tables features.
Step 4: Check and edit
Click the “Edit” bar to change entry fields or move to the tabs on top to customize the table.
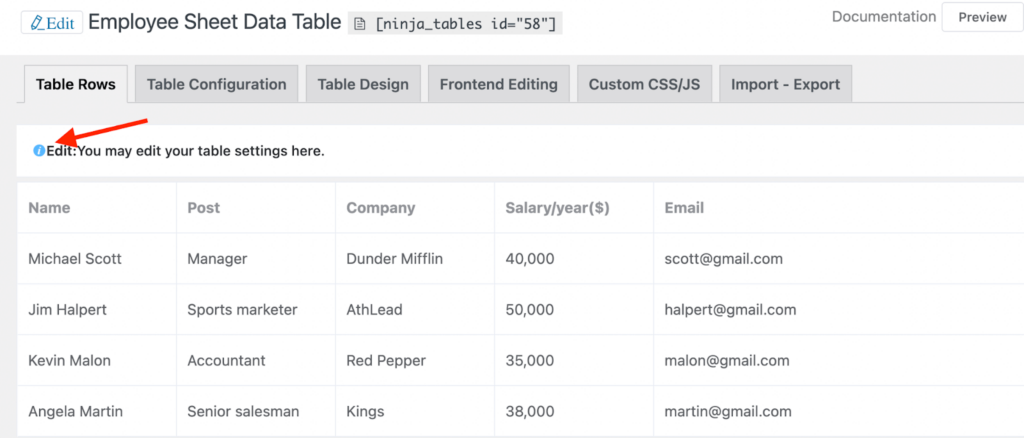
You can use any option from the tabs except “Frontend Editing” and “Import-Export” since Google Sheets is an external data source.
More facts
- If you update the sheet, wait 5 minutes for the edit to show up on the table because that’s how long Google takes to update the data store.
- Copy the table shortcode and embed it anywhere you want on your website.
- The previous version of Ninja Tables couldn’t bring hyperlinks, URLs, and images from Google Sheets automatically. Those were restored using Transform Value. In the latest update, you only click “HTML Field” for the Data Type option of each column, and the links and images appear.
- Try the documentation.
- Check out the reviews on this integration from real users.
Live example
The following table includes restaurant data that come from a Google Spreadsheet.
The Google Sheet data and this table contain no real data. It’s an example to show restaurant booking details from Google Sheets in Ninja Tables.
Get the dummy sheet to try:
We also have listed some popular use cases of Google Sheets data table that our users love.
How Ninja Tables helps with customization
Once you’re done creating the table with Google Sheets data, the real fun begins with Ninja Tables’ customizable features!
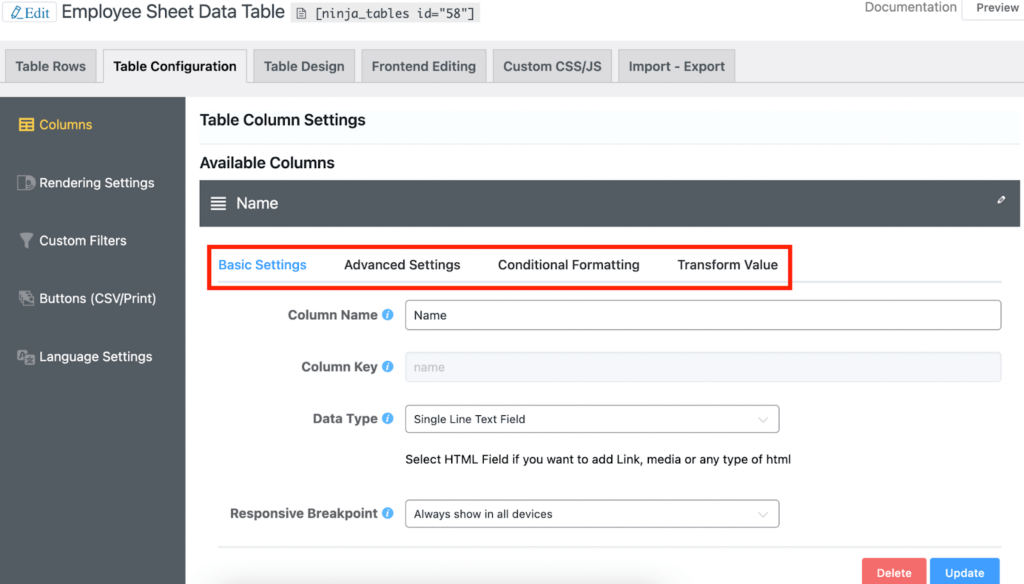
Configure each column by adding conditions, changing data type, or transforming the value of cells. Or tweak the basic and advanced column settings.
You can also decide if you want the column hidden.
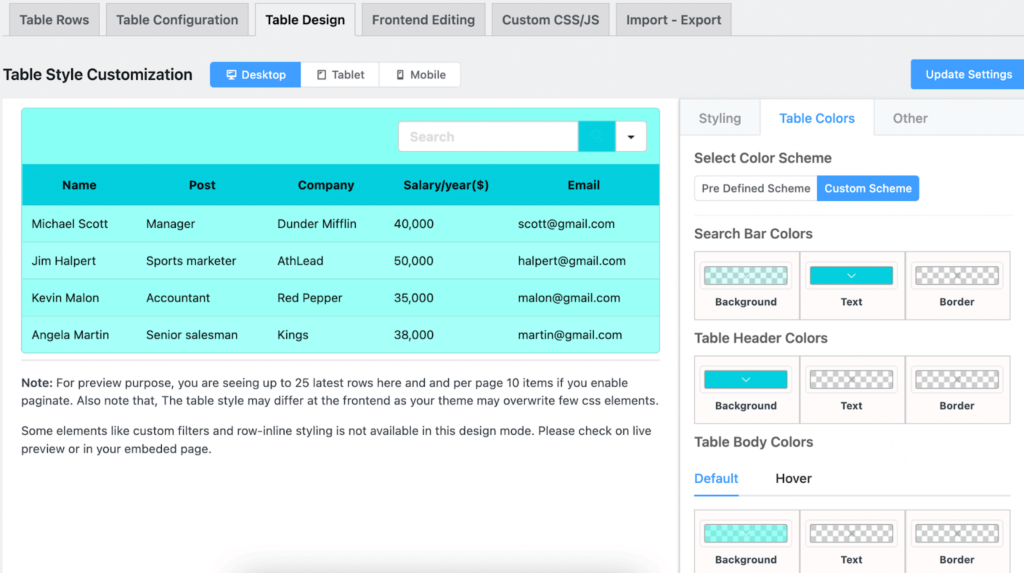
The “Table Design” tab lets you color the tables with any color you want! And the Custom CSS/JS window is for anyone who wants to try out their coding skills.
End note
Human eyes crave visual presentation. So, a big spreadsheet with lots of data does not look good every time.
📌 See How to Make a Table in Google Sheets.
📌 Or, How to Make a Chart/Graph in Google Sheets.
📌 Or, Best Plugins with Google Sheets Integration.
Ninja Tables brings the easiest and smartest option to help with that- Google Sheets in WordPress tables.
Import Google Sheets data faster and showcase them in a customizable table format on your WordPress website.
Use Ninja Tables to create a table with Google Sheets data and make changes to fit your taste. Go with CSS or custom colors or whatever; it’s all under your control!
Ninja Tables– Easiest Table Plugin in WordPress





Add your first comment to this post