
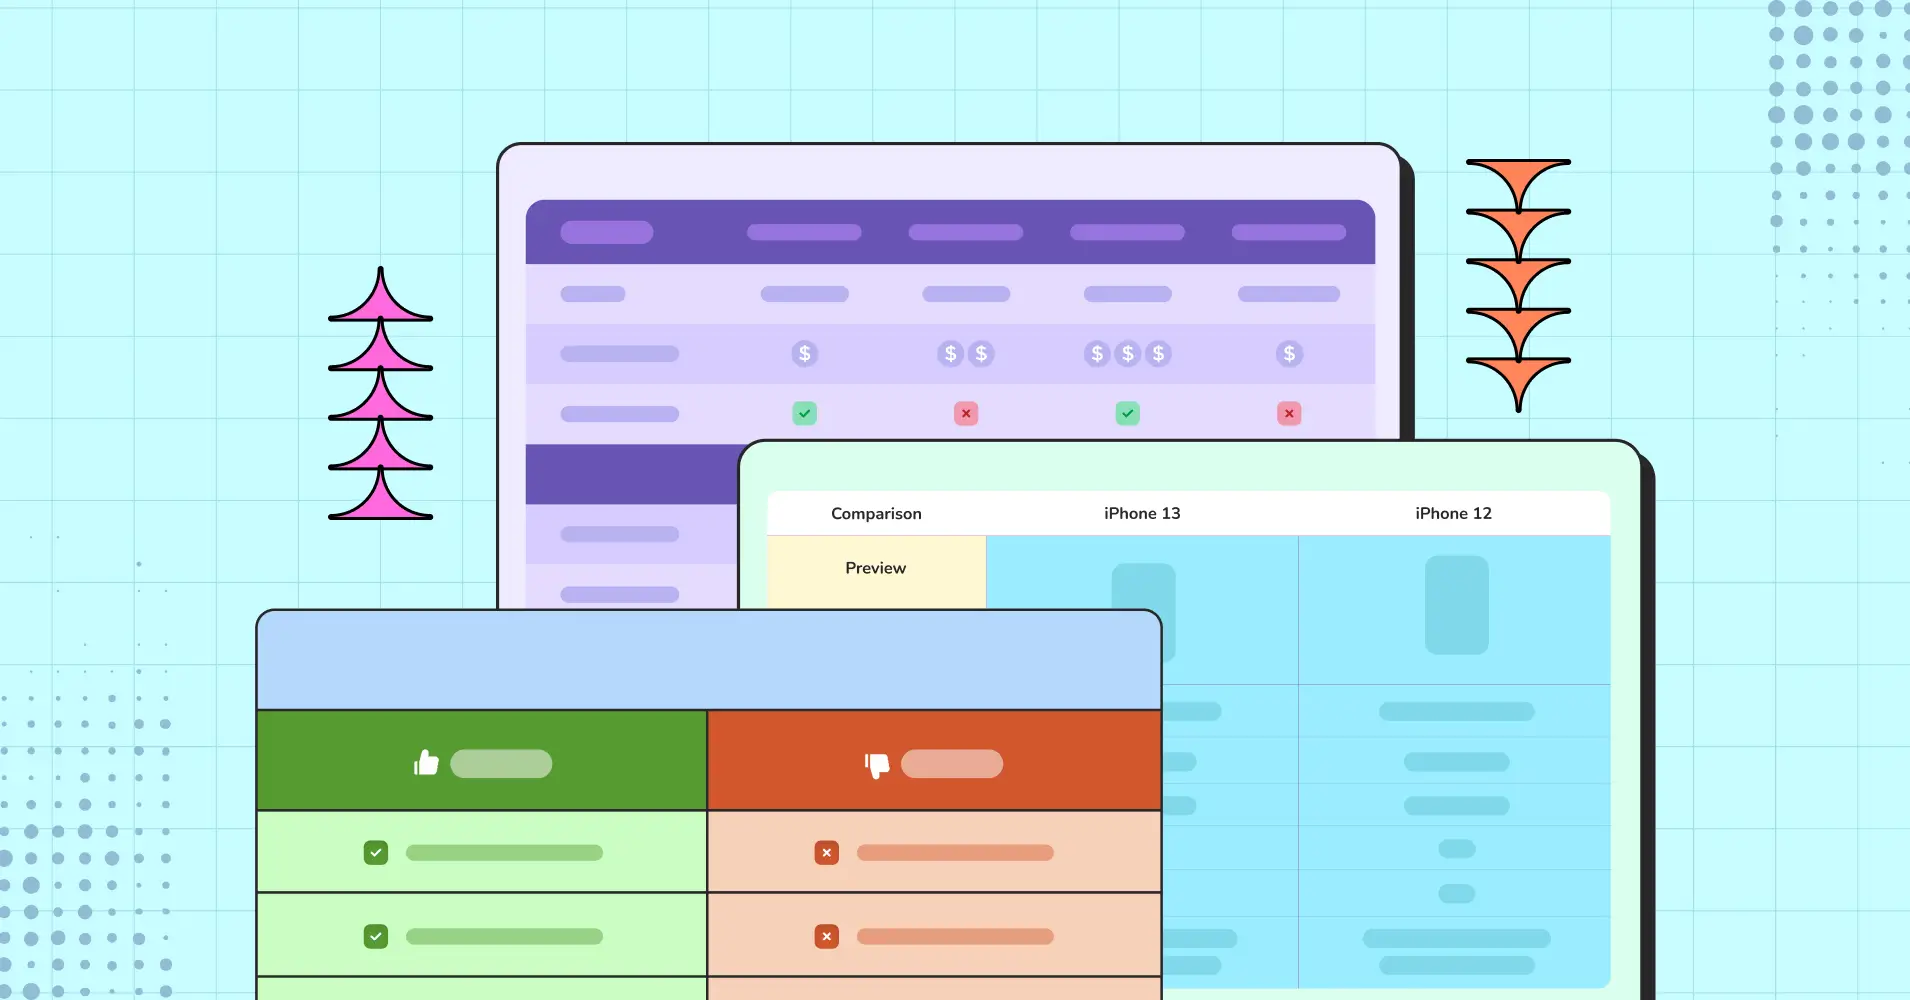
Design The Perfect Feature Comparison Table in WordPress
A feature comparison table is like speed dating— quick, efficient, and no small talk required! Instead of swiping left on endless product specs, you get a side-by-side showdown highlighting the pros, cons, and quirks of each option.
Whether navigating tech gadgets or hunting for the perfect product, comparison tables let you see who truly deserves all the attention.
Why waste time on lengthy product descriptions when a quick table can give you all the answers in one glance?
In this guide, we’ll explore how Ninja Tables helps you design the perfect feature comparison table that not only informs but also engages your audience. Let’s dive in and start comparing!
When You Need a Comparison Table
Sometimes, the choice between two (or more) options isn’t clear-cut. Your confusion is stacking up like a Jenga tower—one more piece, and it might all tumble down!
This is where a feature comparison table shines—when details matter, but you don’t have time for endless research.
Now let’s see some use cases for this.
Feature breakdown
A feature comparison lets customers quickly evaluate their options and see how products stack up based on criteria like price, features, and ratings, helping them find the best fit for their needs.
Discover what matters
A WordPress product comparison table doesn’t just benefit your customers, either. It can give you insight into what features your customers value most in a product. You can use this information to improve your offerings and increase conversion rates.
Competitive analysis
You can use a feature comparison table to beat out the competition. It’s not just about highlighting differences—it’s about showing customers why your product is the smarter choice. Lay out features side by side, so they can see where your product excels.
Create transparency and credibility
For SEO these tables are goldmines. They engage visitors longer, improve bounce rates, and can boost rankings. Plus, transparent comparisons build trust and credibility, potentially leading to a higher loyal customer base and conversion rates.
What Makes a Good Feature Comparison Table
Driving the purchase motivation and decisions of any customer can be done from your end! Designing a feature comparison table isn’t just about listing features; it’s about presenting them in a way that’s easy to understand. Here are some key elements to consider:
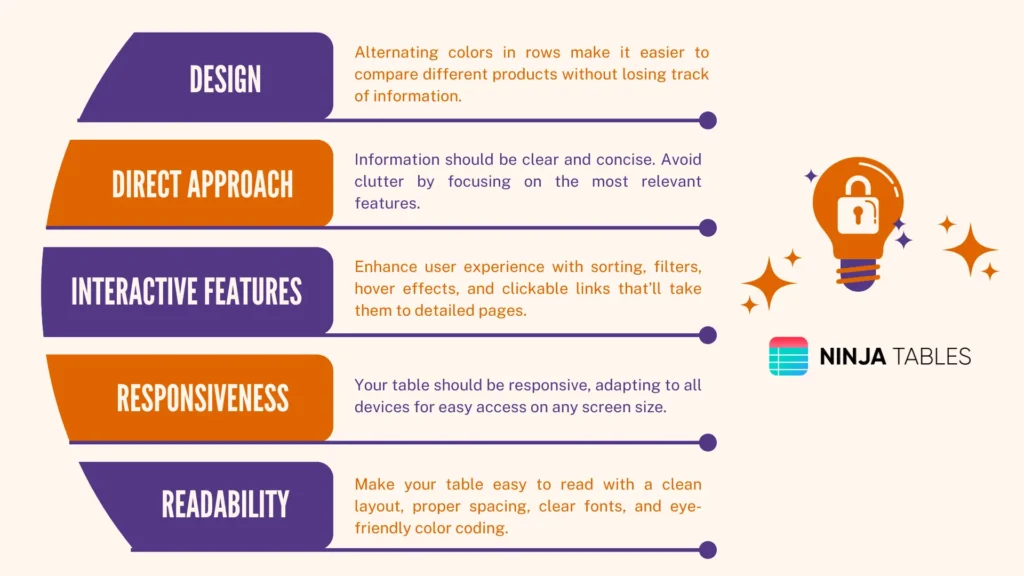
By focusing on these key elements, you’ll create a feature comparison table that looks great and excels in clarity, engagement, and functionality.
How to Create a Feature Comparison Table
How can you quickly showcase your product’s strengths and highlight what sets you apart from competitors? Well, that’s where a feature comparison table swoops in to save the day. When designed well, it does more than just place features side by side—it streamlines decision-making. Let’s see how to get started!
Using WordPress plugins
The easiest way to create a feature comparison table is by using a well-off WordPress table plugin. Advanced plugins allow you to build these tables without specialised coding expertise.
However, when selecting a plugin, consider your needs and experience. Do you want a user-friendly plugin that requires no coding skills? Or maybe you’re looking for a table builder that offers a sleek, modern design without bringing the whole site down with traffic load.
Well, Ninja Tables is your friend in need. It is an excellent choice if you want a user-friendly, feature-rich plugin that offers both advanced and drag-and-drop features.
With Ninja Tables, you can create tables that are not only functional but also a major asset to your website’s performance.
Feature Comparison Table with Ninja Tables
Ninja Tables has the best tools to visualize data in a feature comparison table with all the necessary insights. To create a feature comparison table you need to install the Ninja Tables plugin in your WordPress dashboard first.
With Advanced table
- Click Add Table, name your table, and select Create Table to get started.
- Add Columns to create categories like product features, prices, and ratings, and then input your data into the relevant cells.
- Customize your table’s appearance using the built-in styling options.
- Add features like hover and sorting options for a more interactive experience.
- To use more styling tools read the blog on Ninja Tables advanced features.
- Once done, copy the shortcode and embed it into any page or post where you want the table to appear.
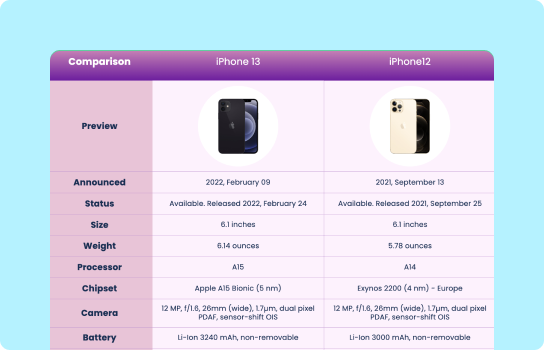
| Faetures | K-Elite | K-Duo | K-Duo Plus |
|---|---|---|---|
| Keurig image |  |  |  |
| Brew Sizes | 6, 8, 10, 12 oz | 6, 8, 10, 12 oz | 6, 8, 10, 12 oz |
| Strength Control | ✅ | ✅ | ✅ |
| Energy Saver | ✅ | ✅ | ✅ |
| Water Reservoir | 75 oz | Removable-60 oz | Removable- 60 oz multi-position |
| Drip Coffee | ❌ | ✅ | ✅ |
| Iced Setting | ✅ | ❌ | ❌ |
| Programmable Carafe Auto Brew | ❌ | ✅ | ✅ |
| Carafe Type/Heating Plate | ❌ | Glass carafe & heating plate | Stainless Steel thermal carafe |
| Box Includes | Water filter handle, water filter | Glass carafe | Stainless Steel thermal carafe, gold tone mesh filter |
Courtesy of Ninja Tables
With Drag-and-drop table
- Once you hover over the Ninja Tables drag-and-drop section, you’ll see some pre-built demo tables. There, you can easily select the feature comparison table.
- Customize the text fields, with your desired data and inputs.
- You can also customize color, pagination, text colors, and all the styling options.
- Simply click on the elements, drag it to the desired position, and drop it in place.
- As you adjust your table, you can instantly see how it looks, and fine-tune your layout on the fly.
There’s a beginner’s guide to Ninja Tables drag and drop builder for more detailed instructions which will help you better utilize all the necessary tools with ease.
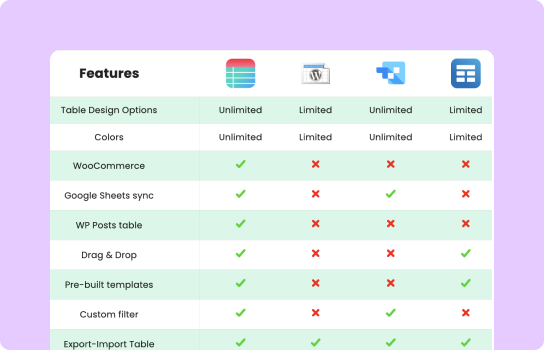
Features | Ninja Tables | TablePress |
Unlimited data | ||
Media attachment | ||
WooCommerce product table | ||
Drag & drop table builder | ||
Google Sheets Auto-sync | ||
Sort and filter | ||
Fluent Forms integration | ||
Charts | ||
Conditional formatting | ||
Pre-built templates | ||
Frontend editing | ||
Cell merge |
Courtesy of Ninja Tables
With free templates
- Go to our templates page.
- Input your email address to proceed with the zip file download process.
- The zip file has a Txt file with instructions, a table image, and a JSON file.
- Import the JSON file to your Ninja Tables dashboard.
- Select the import format according to the table mode (Advanced or Drag and Drop).
- Hit import and customize the imported table with colors, filters, more entries, and more of everything!
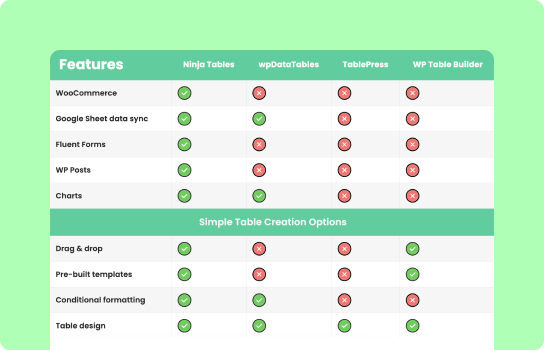
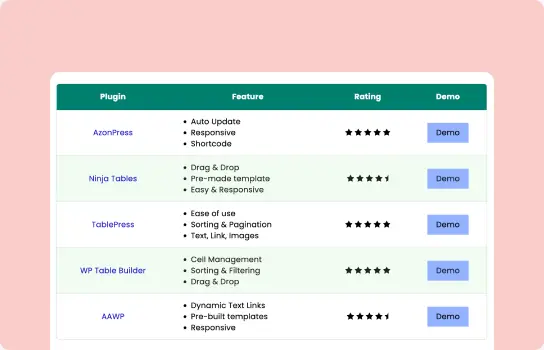
| Features | Ninja Tables | wpDataTables | TablePress | WP Table Builder | ||||
|---|---|---|---|---|---|---|---|---|
| WooCommerce |  |  | | | ||||
| Google Sheet data sync | | | | | ||||
| Fluent Forms | | | | | ||||
| WP Posts | | | | | ||||
| Charts | | | | | ||||
| Simple Table Creation Options | ||||||||
| Drag & drop | | | | | ||||
| Pre-built templates | | | | | ||||
| Conditional formatting | | | | | ||||
| Table design | | | | | ||||
Courtesy of Ninja Tables
Explore more ready-to-use comparison tables in our free table templates collection. Download any design, customize it to fit your needs, and embed it into your site in just a few clicks.
Some Great Feature Comparison Table Examples
A great feature comparison table does more than just throw product features at visitors—it’s like a friendly guide, showing exactly why one product outshines the others. If your table doesn’t make the differences pop, you’re leaving potential customers scratching their heads—and likely clicking away never to return.
The best tables out there aren’t just functional—they’re fun, easy to navigate, and do the work. They don’t overwhelm users with clutter; rather highlight the key features that matter most. It’s all about making the decision process smooth, engaging, and, dare we say, even enjoyable.
Amazon
Amazon’s comparison tables are built for clarity, and let you instantly compare key specs like price, reviews, and tech features for multiple products. Side-by-side feature comparisons help to spot the best deal with just a glance—no unnecessary scrolling.

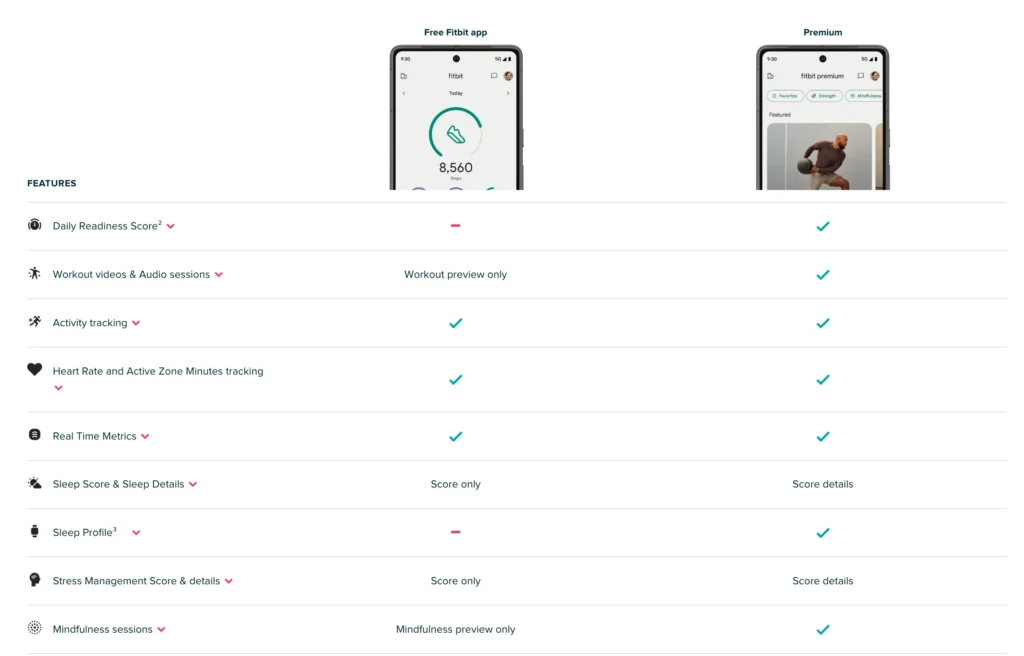
Fitbit
Fitbit nails feature comparison by highlighting the health tracking metrics that make the biggest impact: heart rate, GPS, and battery life. They make the decision process faster and more personalized.
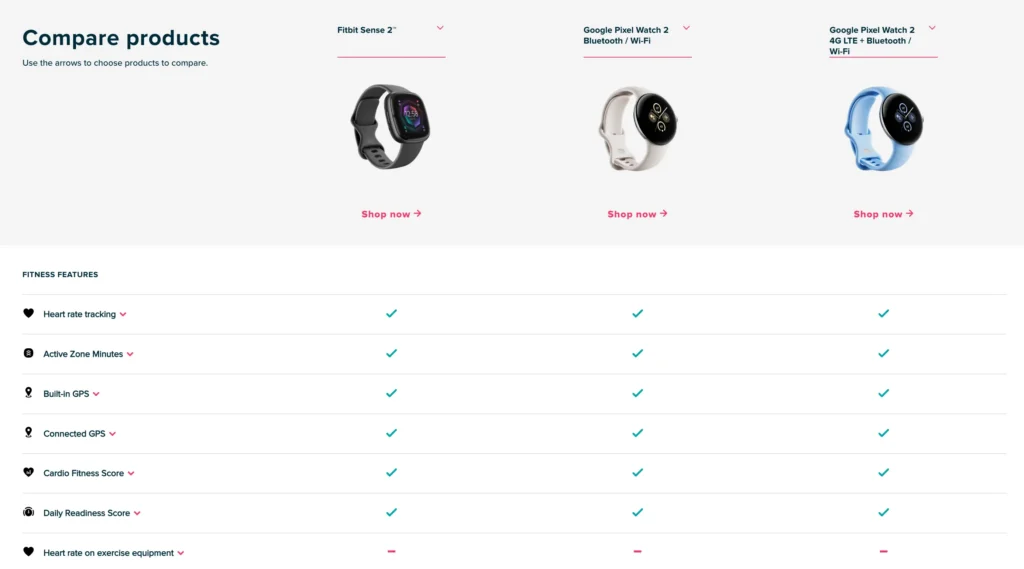
Source: Fitbit’s comparison table image
Their table also simplifies comparing service packages.
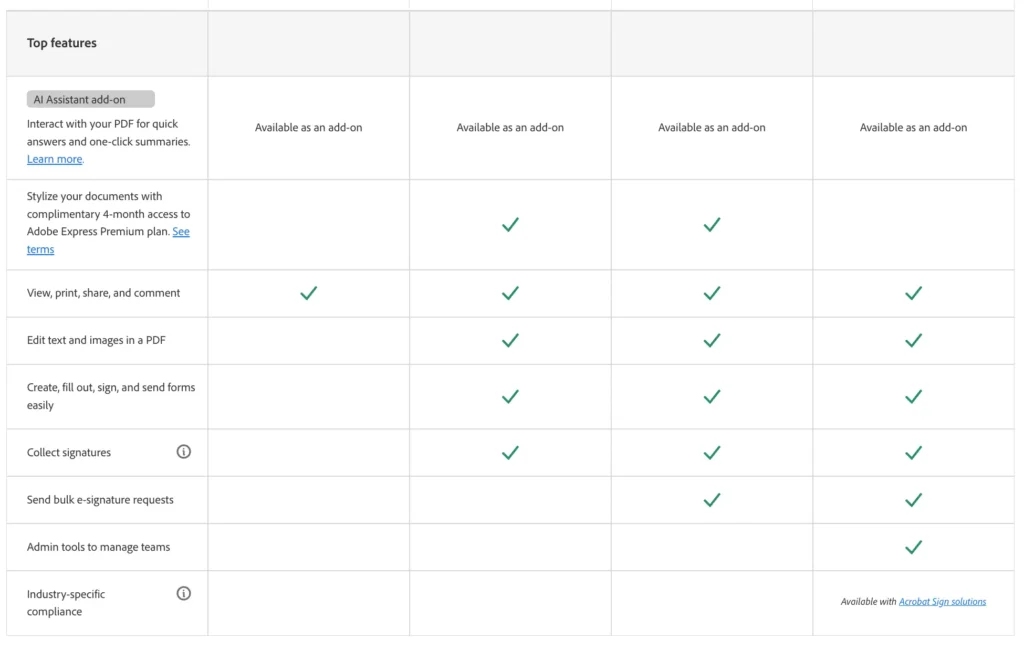
Adobe
Adobe’s tables compare software and package bundles, making it easy to see which plans fit your needs. Clear pricing and tool breakdowns help you decide fast.
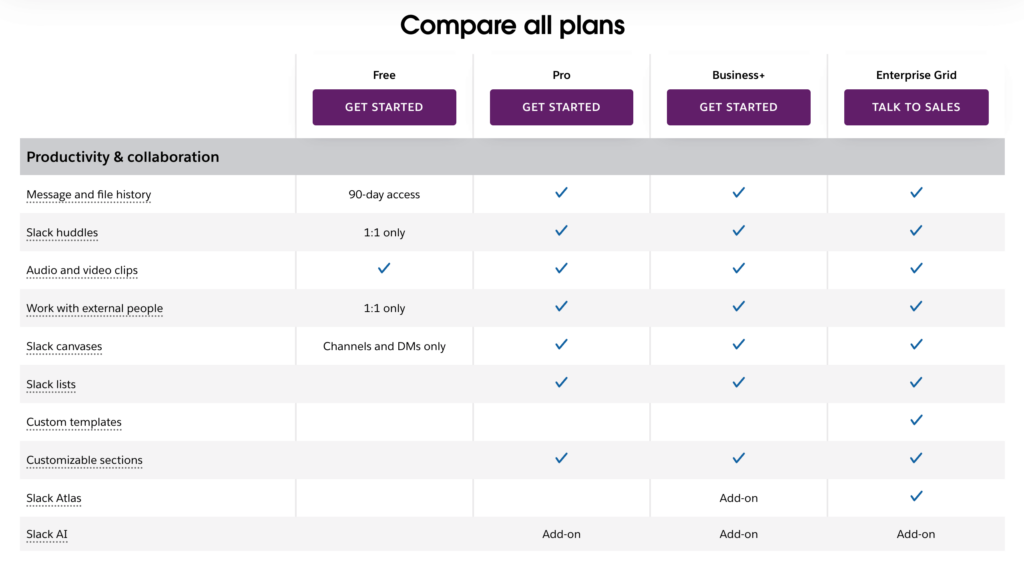
Slack
Slack’s feature comparison table tables show differences between plans—message limits, integrations, and admin tools—so you can pick the right fit for your team quickly.
Even after checking every box, product comparison pages sometimes fall short. Some comparison pages don’t convert because:
- They use equal visual hierarchy for unequal factors
- No context to show why the difference matters
- Overloaded with specifications/features
Here are a few more feature comparison tables (Courtesy: Ninja Tables).
Feature Comparison Table Ideas

3-column Comparison
Products Comparison
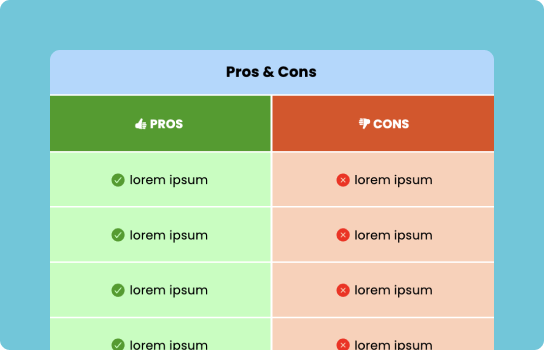
Pros and Cons Comparison
Feature Comparison
Features Compare with Icons
Price & Feature Comparison
Product Features Comparison
Pro-tips for best feature comparison table
In an era where choices abound, your audience seeks clarity and transparency. A well-designed comparison table can do more than you expect. Here are some effective tips to create the best feature comparison table:
- Highlight key differences to help decision-making.
- Limit the columns between 3-5, so it’s easy to scan.
- Use ‘Sticky Headers’ to maintain clarity on long tables.
- Add links to direct users to feature pages if needed.
- Maintain consistent formatting for better readability.
- Design with mobile optimization in mind for ease of use.
- Use visual cues like color or hover to highlight your top product.
- Make CTAs accessible for easy purchase decisions.
- Include customer reviews to add credibility.
- Colors emphasize key points better than plain columns.
- Pinpoint information by using bullet points, or short keywords.
- Avoid too much technical jargon that might confuse readers.
- Keep it simple to avoid overwhelming the user.
| The Golden Rule of Comparison Tables To summarize: Make life easier for your customers. Keep tables concise, clear, and easy to understand. Don’t make users memorize too much or look things up elsewhere. Simplify their decision-making, and everyone wins. It’s really that simple! Ninja Tables helps you to make a responsive dynamic table without breaking a sweat. |
Simplify Customer Decisions
When faced with a handful of options (usually 5 to 7), people often use compensatory decision-making—where they weigh the pros and cons of each choice. This process can be simplified with a feature comparison table, which lays out the key details side by side, helping to cut through decision fatigue. They’re more than just lists of pros and cons—they’re handy tools that make comparing choices a breeze.
With Ninja Tables, you can create comparison tables that not only show differences but also visually highlight the most crucial features. This added clarity can make all the difference, turning hesitation into confident action.
So, why leave decision-making to chance? Let Ninja Tables do the heavy lifting, guiding your customers to the right choice with ease and boosting your conversions while you’re at it. After all, a well-crafted table isn’t just informative—it’s the cherry on top of decision-making process!
Ninja Tables– Easiest Table Plugin in WordPress


Add your first comment to this post