
3 Steps To Create An Amazon Product Comparison Table

You spent a whole weekend on a “best air fryers” roundup. You tested the products, dug through reviews, and wrote honest notes on each one. The post goes live, traffic starts coming in, and then… almost nobody clicks your Amazon links.
Most of the time, the writing isn’t the problem. Your reader just didn’t want to scroll through 3,000 words to figure out which air fryer has the bigger basket.
They’re already in comparison mode. According to Jungle Scout, 57% of U.S. consumers start their product search on Amazon. If your page doesn’t help them compare quickly, they’ll go back to Amazon and do it themselves. Your affiliate commission goes with them.
That’s exactly what an Amazon product comparison table solves. It puts products side by side, shows the differences at a glance, and gives readers a clear reason to click.
The best part? You don’t need to code or design anything from scratch. In this guide, I’ll show you how to create an Amazon product comparison table in just 3 steps using a ready-made template.
Let’s get into it.
TL;DR
Who Needs an Amazon Product Comparison Table?
Anyone who recommends products and wants people actually to buy them. But here are the folks who’ll get the most out of an Amazon comparison table:
- Amazon affiliate marketers: If your income depends on clicks to Amazon, a comparison table is one of the best spots on your page for affiliate links. It sits right where readers make their decision.
- Product review bloggers: Writing “best X for Y” posts? A table gives skimmers a summary up top, while your detailed reviews serve the readers who want the full story.
- Niche site owners: Whether you run a site about camping gear, kitchen gadgets, or pet supplies, comparison tables make your content look more organized and trustworthy.
- Amazon sellers with their own website: If you sell multiple variations or models, a table helps buyers pick the right one without emailing you a dozen questions.
- Tech and gadget reviewers: Specs like battery life, storage, and screen size are hard to follow in paragraphs. They’re super easy to follow in columns.
If you see yourself in any of these, keep reading.
Why Do You Need a Comparison Table?
You might be thinking, “My reviews are already detailed. Why add a table then?” Fair question. Here’s why a product comparison table is worth the few minutes it takes to set up.
People skim before they read
Most visitors scan a page first to see if it has what they need. A table gives them the answer in seconds, which keeps them on your page instead of hitting the back button.
It makes decisions easier
When products are side by side, the differences jump out. “Oh, this one has a bigger capacity but costs a bit more.” That kind of quick realization is exactly what pushes someone to click “Check price.”
It gives your affiliate links a natural home
Instead of scattering links through long paragraphs, you can put a clear button in every row. More visible buttons usually mean more clicks.
It builds trust
A clean, organized comparison table shows you’ve done the homework. Readers are more likely to trust a recommendation that’s backed by a clear side-by-side comparison.
It works great on mobile
A lot of your readers are scrolling on their phones. A responsive table keeps all the important info readable on small screens, without making people pinch and zoom.
It helps your content stand out
Search results are full of review posts that look the same. A well-structured table can make your page more useful than the competition, and readers (and search engines) reward that.

Get Exclusive Tips, Updates, and Inspirations in Your Inbox!
How to Create an Amazon Product Comparison Table
Here’s the fun part. Creating an Amazon product comparison table takes just 3 steps:
- Download the comparison table template
- Install Ninja Tables and import the template
- Customize it and publish with a shortcode
That’s really it. No coding, no messing with HTML, no hiring a developer. Let’s walk through each step.
Step 1: Download the comparison table template
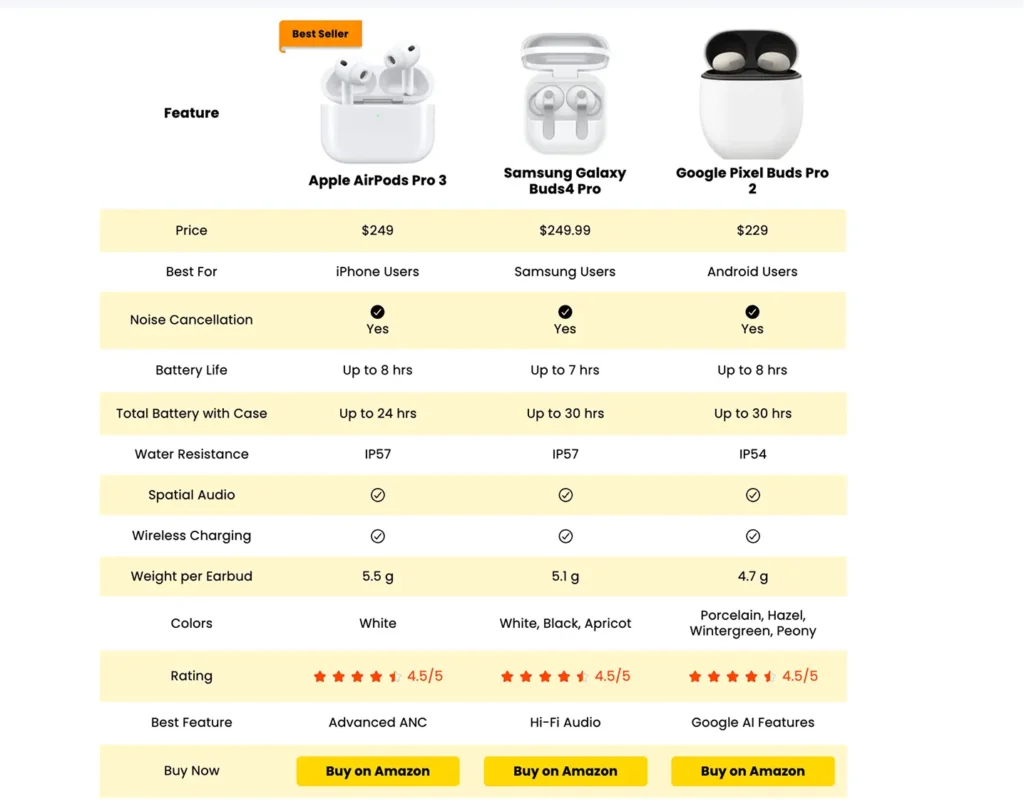
Instead of building a table from a blank screen, start with a ready-made comparison table template.
It already has the columns most Amazon comparisons need, like product image, product name, key features, rating, and a “Check price” button.
Head over to the Amazon product comparison table and hit the download button. You’ll get a small ZIP file that you’ll import in the next step.
Or, download the template from here:
Unzip it; the file has clear instructions included on how to import it.
Starting with a template saves you a lot of time. You skip the setup and go straight to adding your own products.
Step 2: Install Ninja Tables and import the downloaded template
Now you need a table plugin to bring the template to life. We’ll use Ninja Tables, a table builder for WordPress that’s easy to use even if you’ve never built a table before.
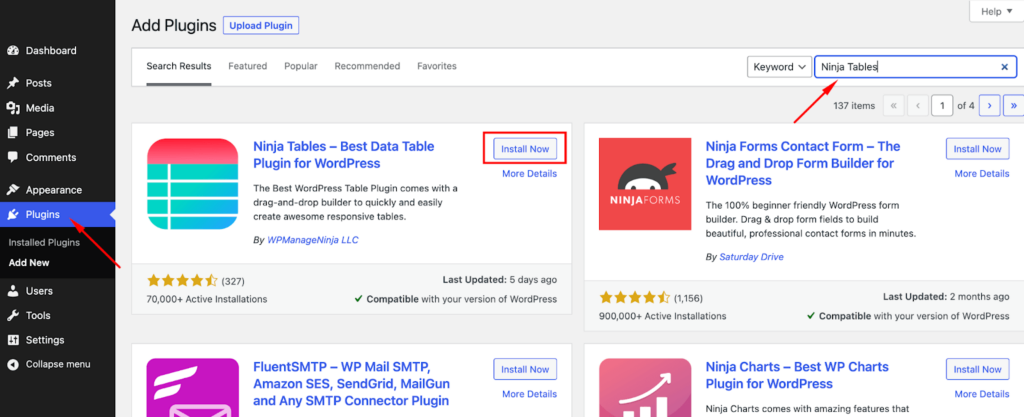
To install it:
- Log in to your WordPress dashboard.
- Go to Plugins → Add New.
- Search for “Ninja Tables.”
- Click Install Now, then Activate.
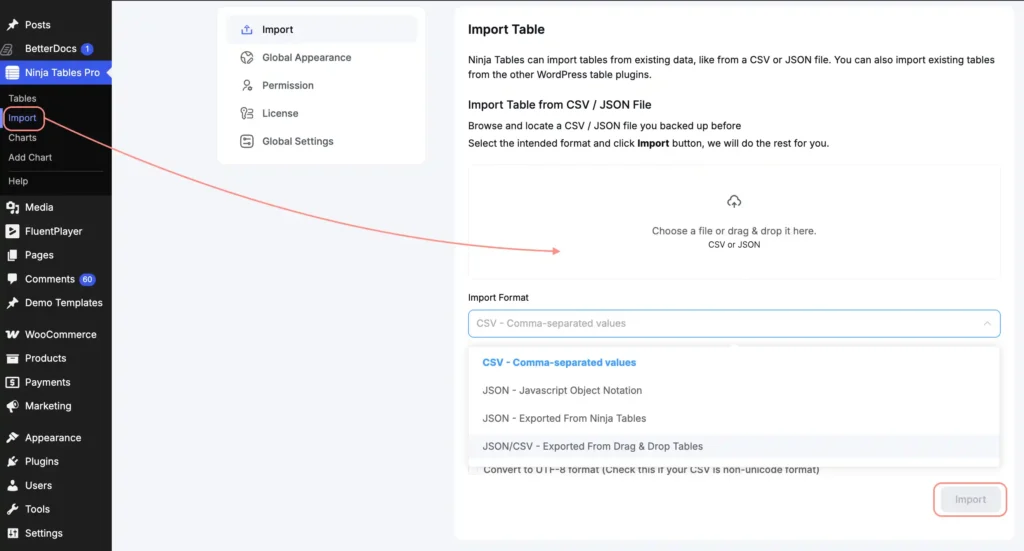
Once it’s active, it’s time to import your template:
- Go to Ninja Tables from your dashboard menu.
- Click on the Import option.
- Upload the unzipped JSON file you downloaded in step 1.
- Choose your import format as exported from drag-and-drop tables.
- Click Import.
Your new table will show up in your tables list with all the columns and sample content already in place.
Step 3: Customize it and publish with a shortcode
Now make it yours. Open the table and start swapping the sample data with your own products. Here’s what you’ll want to update:
- Product images: Add a clear photo for each product so readers can recognize it instantly.
- Product names and features: Keep the features short and focused on what actually matters to buyers. Think of “5.8 qt basket” instead of a full sentence.
- Ratings: Add your own rating or a simple score so readers can quickly see your top pick.
- Affiliate links: Paste your Amazon affiliate link into each product’s button.
- Colors and styling: Match the table to your site’s look so it feels like part of your content, not something pasted in.
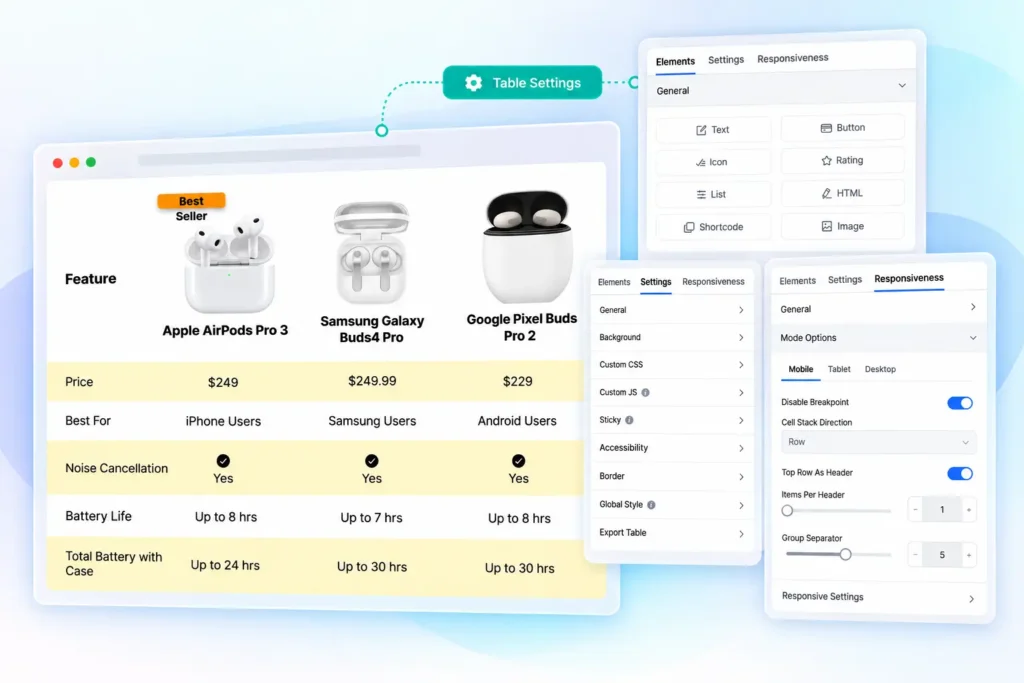
A quick tip from experience: avoid typing exact prices into the table. Amazon prices change all the time, and Amazon’s Associates rules are strict about showing outdated prices.
A “Check price on Amazon” button is the safer bet, and it often gets more clicks anyway because people are curious.
Once everything looks good, save the table and preview before going live. Ninja Tables gives you a shortcode that looks something like this:
[ninja_tables id="123"]
Copy that shortcode, open the post or page where you want the table, and paste it in.
You can also add it with the Ninja Tables block if you use the block editor. Hit Publish or Update, and your Amazon comparison table is live.
Product Comparison Table Template
Want to see what the finished product looks like before you build one? Here’s a live product comparison table built with Ninja Tables using the same template from this guide.
Take a look at how the products line up side by side, how the buttons stand out, and how it adjusts when you view it on your phone. It’s a good reference if you’re looking for Amazon product comparison table examples to model your own after.
Feature | Best Seller 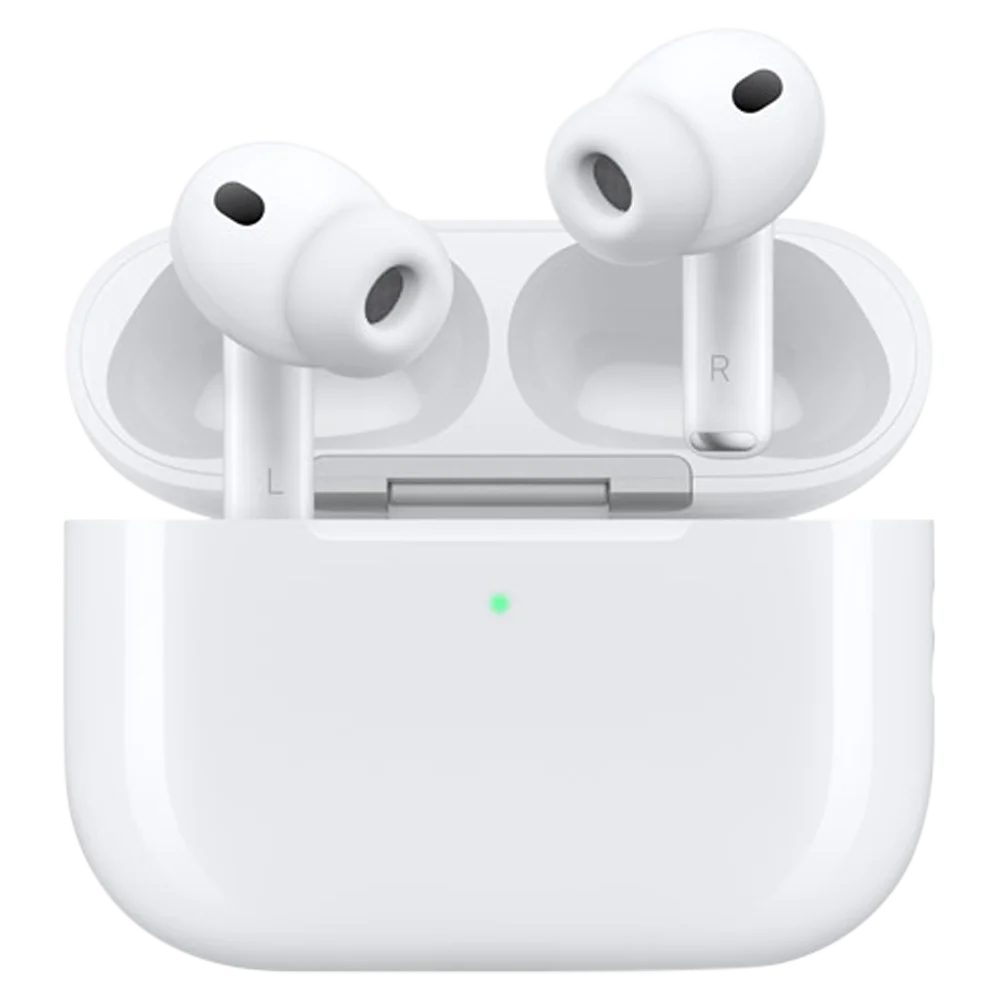 Apple AirPods Pro 3 | 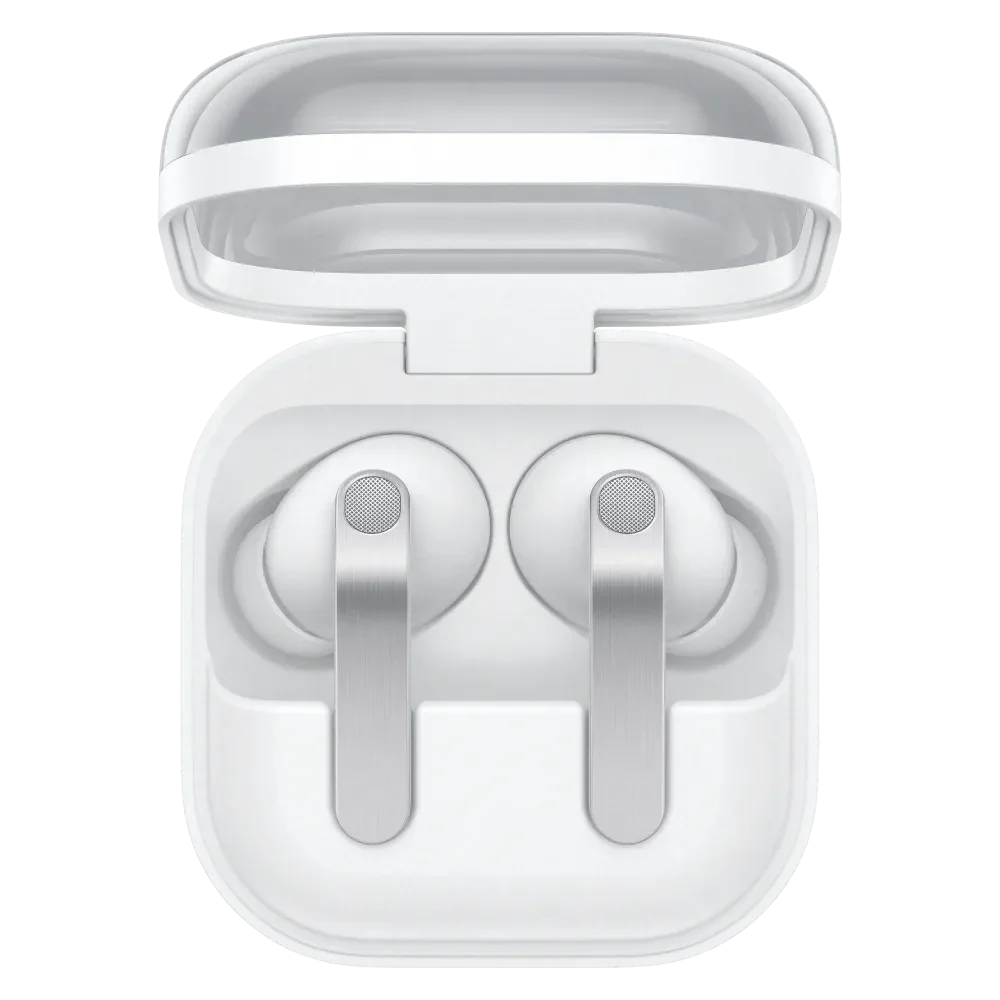 Samsung Galaxy Buds4 Pro | 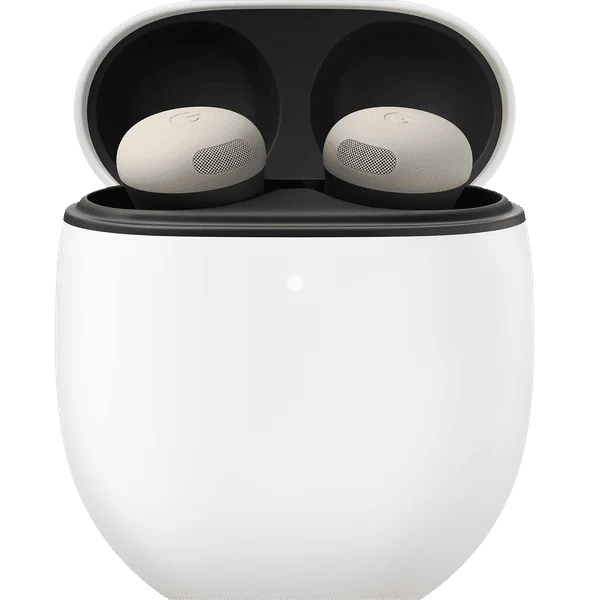 Google Pixel Buds Pro 2 |
Price | $249 | $249.99 | $229 |
Best For | iPhone Users | Samsung Users | Android Users |
Noise Cancellation | Yes | Yes | Yes |
Battery Life | Up to 8 hrs | Up to 7 hrs | Up to 8 hrs |
Total Battery with Case | Up to 24 hrs | Up to 30 hrs | Up to 30 hrs |
Water Resistance | IP57 | IP57 | IP54 |
Spatial Audio | |||
Wireless Charging | |||
Weight per Earbud | 5.5 g | 5.1 g | 4.7 g |
Colors | White | White, Black, Apricot | Porcelain, Hazel, Wintergreen, Peony |
Rating | |||
Best Feature | Advanced ANC | Hi-Fi Audio | Google AI Features |
Buy Now |
Feel free to use this layout as it is, or tweak it to fit your niche. Swap out the columns, add a “Best for” row, or highlight your top pick with a different color. The template is just your starting point.
Create Your Amazon Comparison Table Now
Every review post without a comparison table is leaving clicks on the table. Your readers are ready to buy. They just need a faster way to decide.
So don’t save this for later. Pick your best-performing review post, grab the free template, and give your readers the side-by-side comparison they’re looking for. You can have it live before your next coffee break.
Need more ideas? Browse the Ninja Tables template library for more comparison table examples you can use for pricing plans, product specs, and more.

Ninja Tables– Easiest Table Plugin in WordPress




Add your first comment to this post