
A WordPress table is engaging when the data is dynamic. Using the Transform Value feature in Ninja Tables you can concat any column value easily into any valid HTML and show it as a computed value.
Let’s dive into this simple guide that’ll teach you how to Transform Values easily in any specific table’s column.
Transform Value is HTML, CSS & Excel supported!
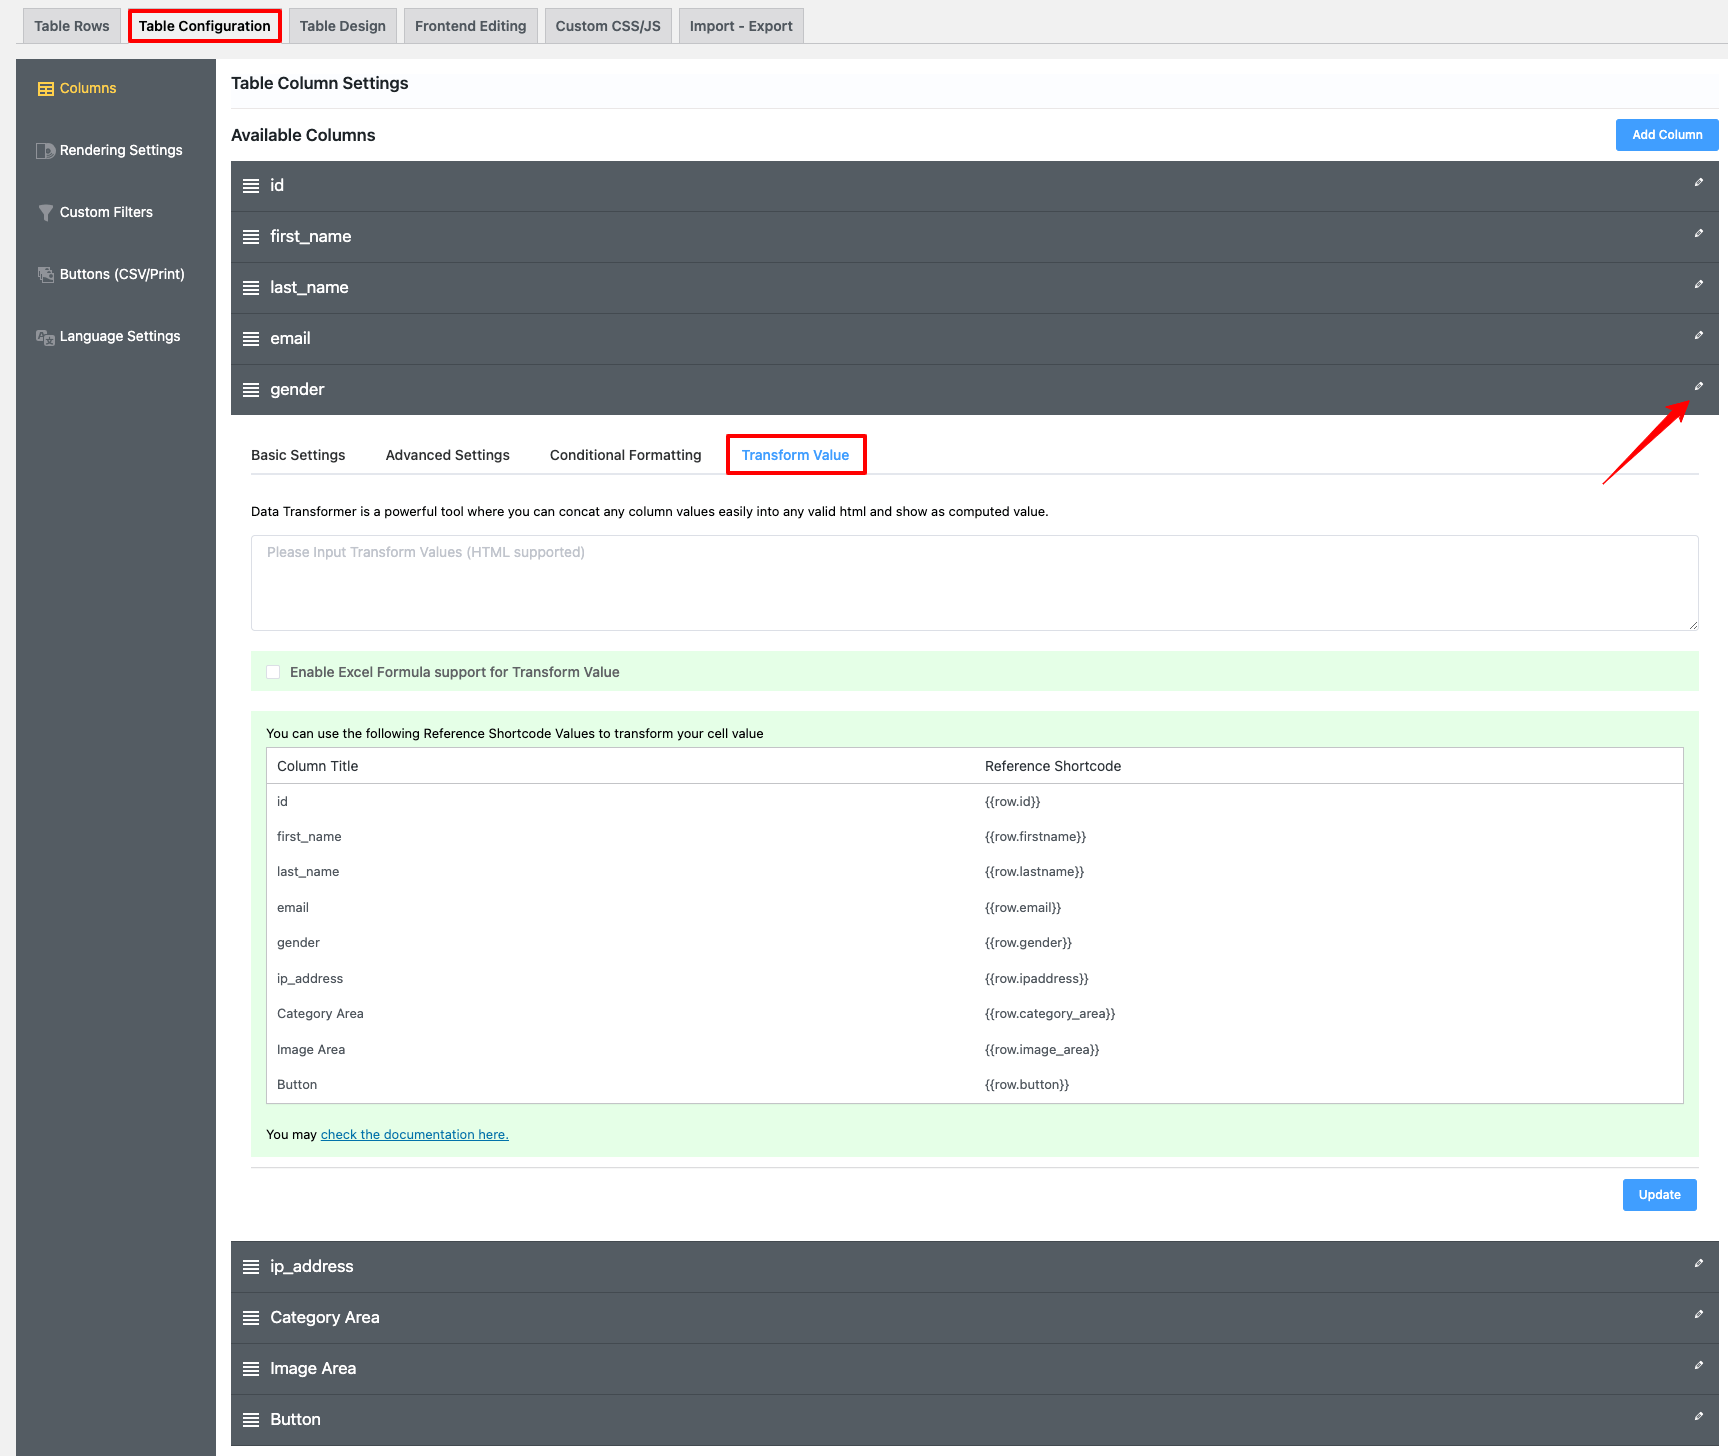
- Go to the Table Configuration tab → Click on the Edit icon (Pencil Icon) on the right side of the column and you will notice a drop-down.
Let’s go over the Transform Value functionality step by step.
Transform Value Box #
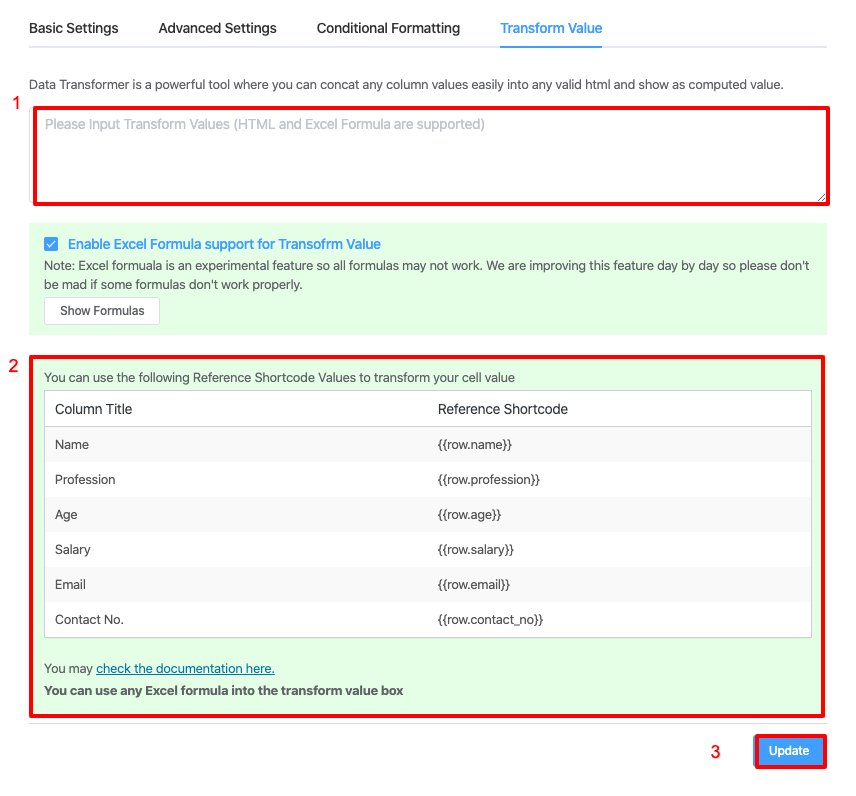
This box is where you will type your HTML code or use the Excel formula to transform the data value of the corresponding column.
You can use any HTML, CSS & Excel formula in the transform value box.
Show Formulas #
When you click on the Enable Excel Formula Support for Transform Value, you will get a Show Formulas button, which you may click to acquire the formulas you want.
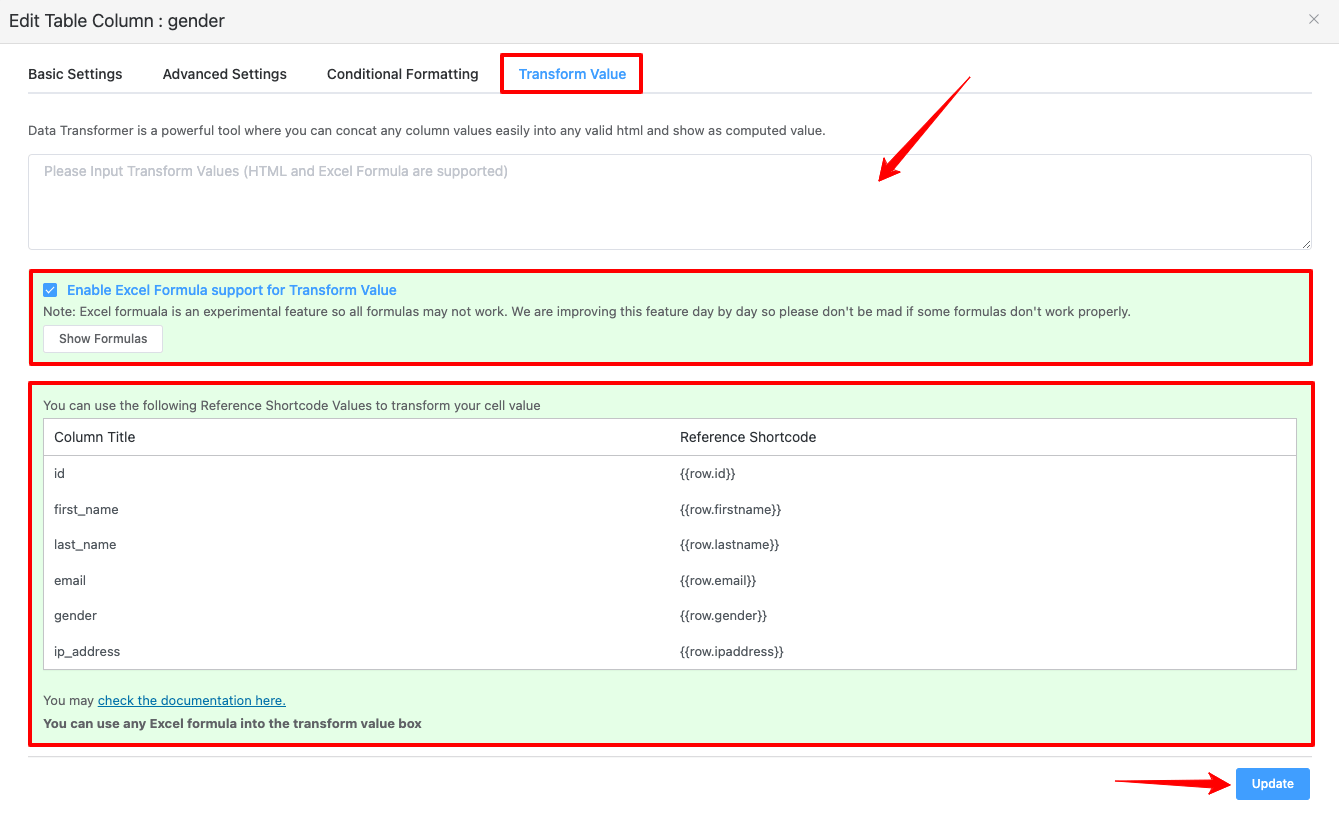
Reference Shortcode #
There will be a Column Title and a Reference Shortcode. Reference shortcodes will generate automatically based on the Column name.
You can use the following Reference Shortcode Values to transform your cell value.
- Here, there are three steps to complete. Look at the example below to learn about these steps.
Turn Text Into Hyperlink #
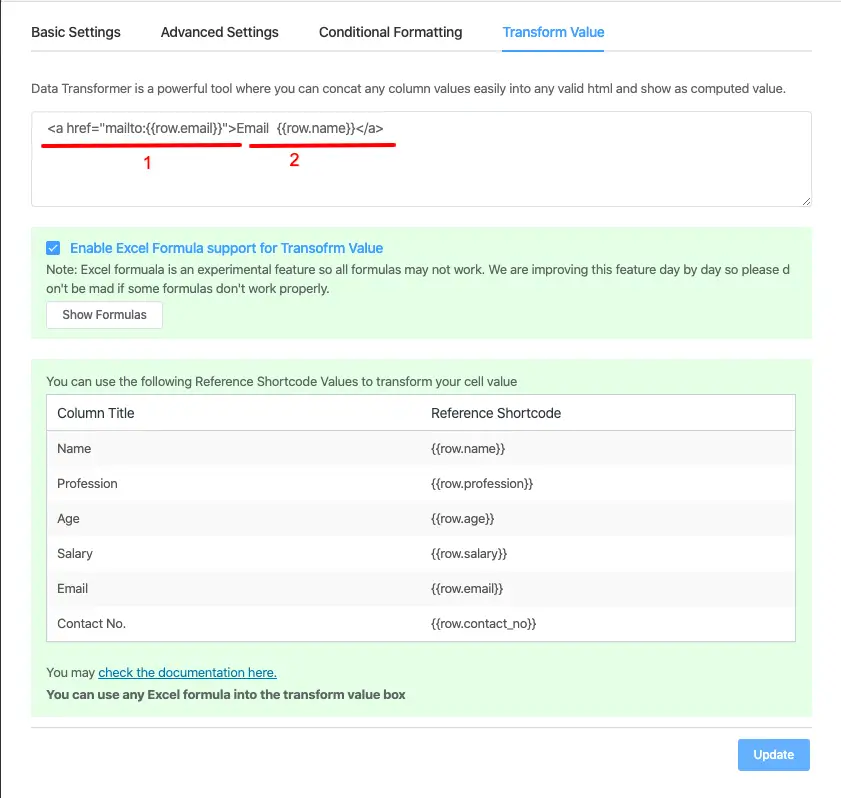
- Write the HTML code (< a href= ……….) on the transform value box.

- You don’t have to modify the first piece of the code. But the 2nd part can be changed to whatever suits your needs.
- Custom words can also be written for the second part. Copy & paste the email shortcode inside the anchor tag, and do the same for the email shortcode.
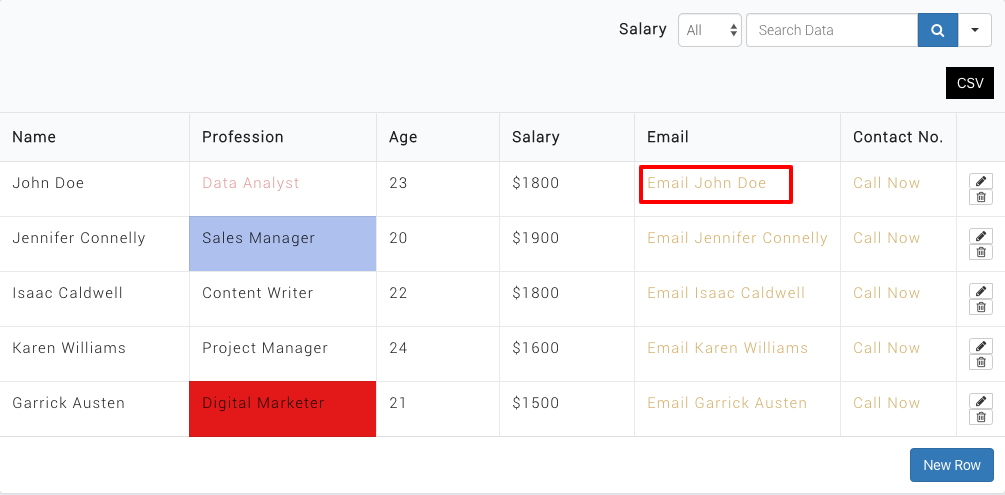
See the example below for viewing the output of the transform value.
- In this case, the Email Name has been used before the closing tag of the HTML. You can also transform values for all the other columns similarly. In the example below, Contact No. is used to call people directly by clicking on the link –
Let’s go with another example for better understanding.
- If you want to replace the cell value Female from the gender column with a link (for example, https://google.com), you can follow the formula –
=IF(“{{row.gender}}”=”Female”,”<a href=’https://google.com’>{{row.gender}}</a>”,”{{row.gender}}”)
where reference shortcode for the gender column is – {{row.gender}}
Note that you can use as many IF Formulas as you want in the transform value box.
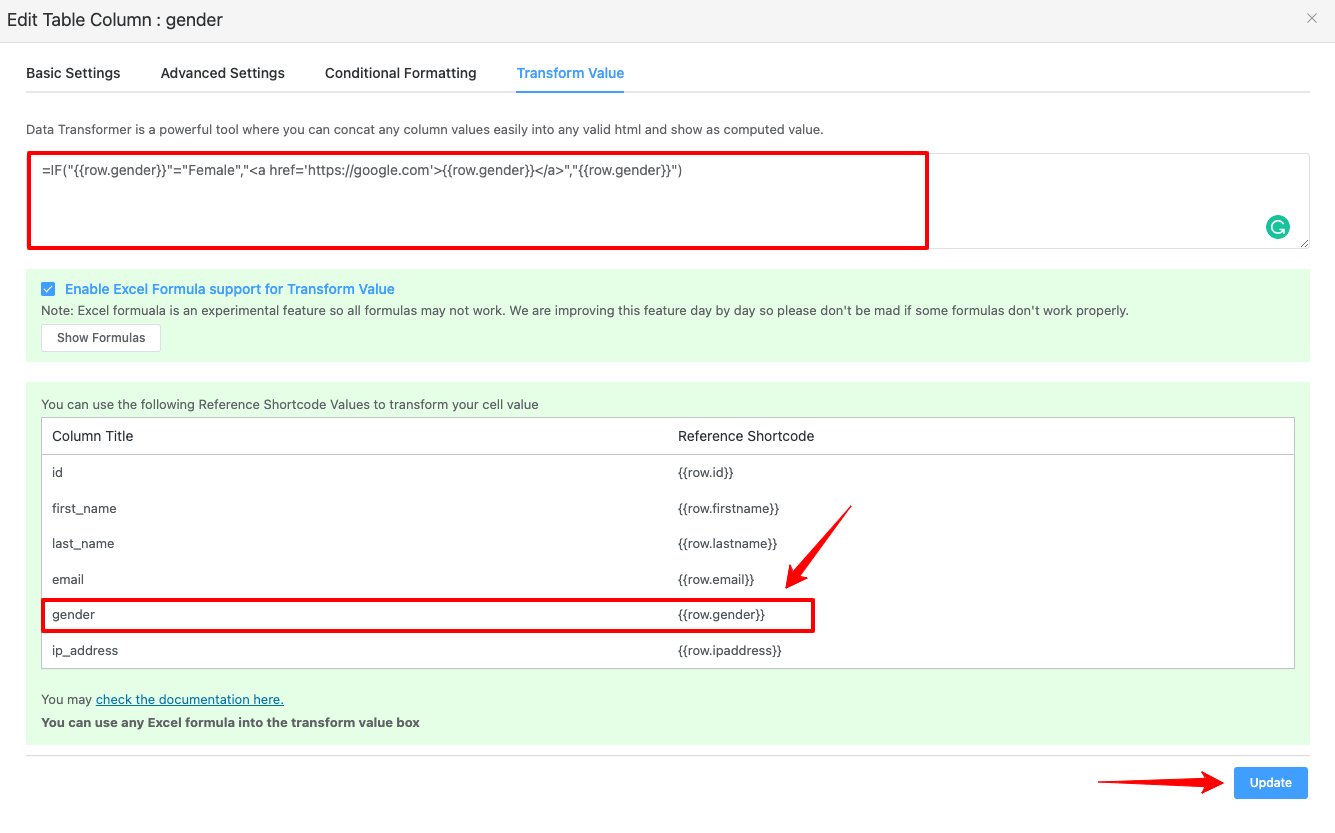
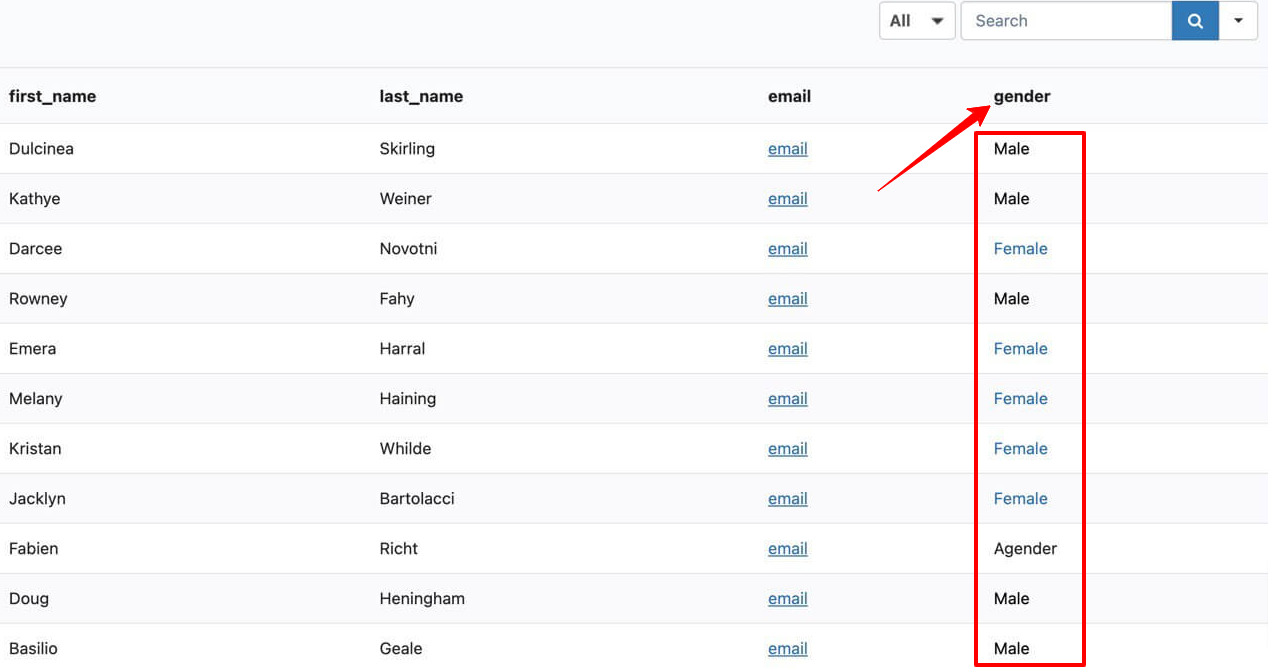
- See the below screenshot to get how it works-
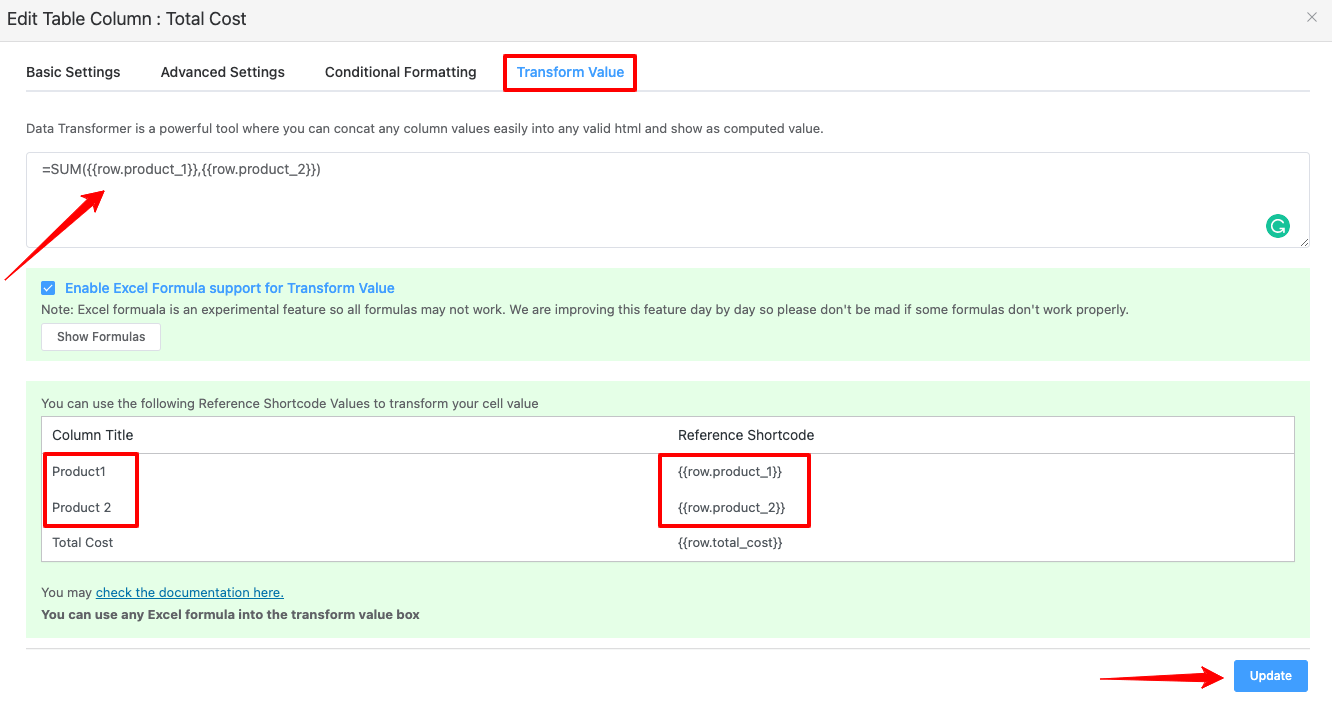
Number Calculation #
- To execute number calculations, we must pick the number fields for each column, and the Data Type for each column must be a Numeric Value.
- See the screenshot below, where Product 1 and Product 2 are numeric fields, and the third column is utilized to display their results.
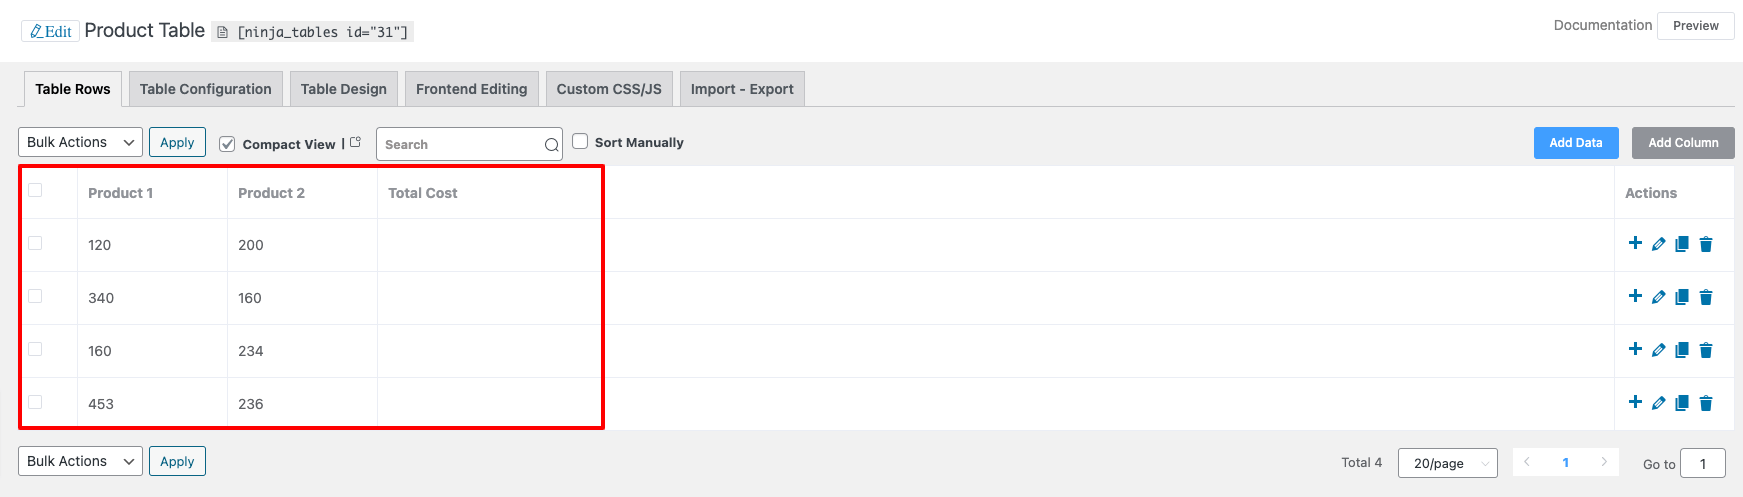
- Now, go to the Transform Value of the third column if you want to add column 1 and column 2 together and display the result in the third column (Data type must have a Numeric Value).
- Give this below formula to the transform value box to add the cell value of column 1 and column 2.
=SUM({{row.product_1}},{{row.product_2}})
where reference shortcode for the product 1 and product 2 columns is – {{row.product_1}} and {{row.product_2}}
- Lastly, click on the Update button when you are done with your configuration.
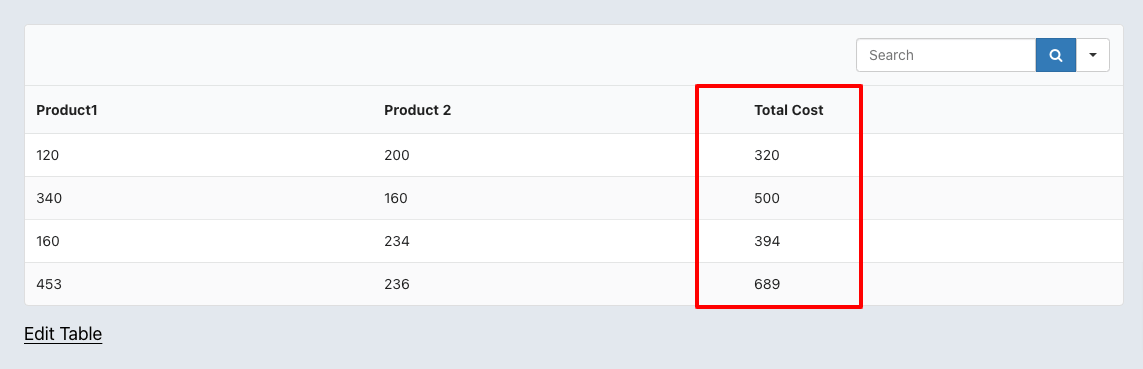
- Below is a screenshot of the Preview Table that will show how it works –
By following this easy and simple guide, anyone can work with Transform Value!


Hello.
How can we add pre-build and customizable elements from drag-n-drop table, such as:
progressbar, rating, button
to use for Woocommerce products Table columns ?
I’m sorry. Ninja Tables Drag and Drop module doesn’t support WooCommerce integration. So it’s not possible. But you can add custom columns to show ratings/buttons in an WooCommerce product table built in the advanced module.
How do I calculate the average of a column?
For example (how do I reproduce the “Average” row seen below):
Day Hours
M 4hrs
T 5hrs
W 12hrs
Average: 7hrs
Hi Jerome. I’m afraid I can’t quite understand your query. Please open a support ticket(https://wpmanageninja.com/support-tickets/) and send us the details of your problem. We’ll see to it ASAP.
Hi,
How can I setup a count function where my text entries in a column can be totaled at the bottom. Text, not numerical.
I want to count how many data entries i have within the column.
Thanks
If you need the numerical total data at the at the bottom of the table just to see for yourself as an admin, you already have it in advanced table builder module. If you want to showcase that on the front end, you have to go through some work arounds from our support agents. Create a ticket here: (https://wpmanageninja.com/support-tickets/)
It is possible to have a cell show an email address but have that address be the email link, rather than the word “email”?
Hi Jonathan,
It is possible to have a cell show an email address but have that address be the email link, rather than the word “email”. Use this Email in your transform value box of the column on your table. Contact the support team for advanced assistance- https://wpmanageninja.com/support-tickets/
Thanks.
How can I transform a column containing dates into current ages and only display the ones that are having their birthdays today?
Hi,
Thanks for reaching out to us!
As for your query here’s a possible solution for you.
You can display the current date rows using the filter shortcode. First, configure the date column’s data type as “Date Field” and set the required date format. In the “Column Conditional Formatting” tab, you will find the format for today’s date. Simply copy today’s date from there and use it with the table shortcode.
For more details please open a support ticket here(https://wpmanageninja.com/support-tickets/), and we’ll be more than happy to assist you.