
Ninja Tables offers you a powerful feature known as Custom Filters, which lets you filter data from tables in various ways.
Custom Filter is a Pro Feature!
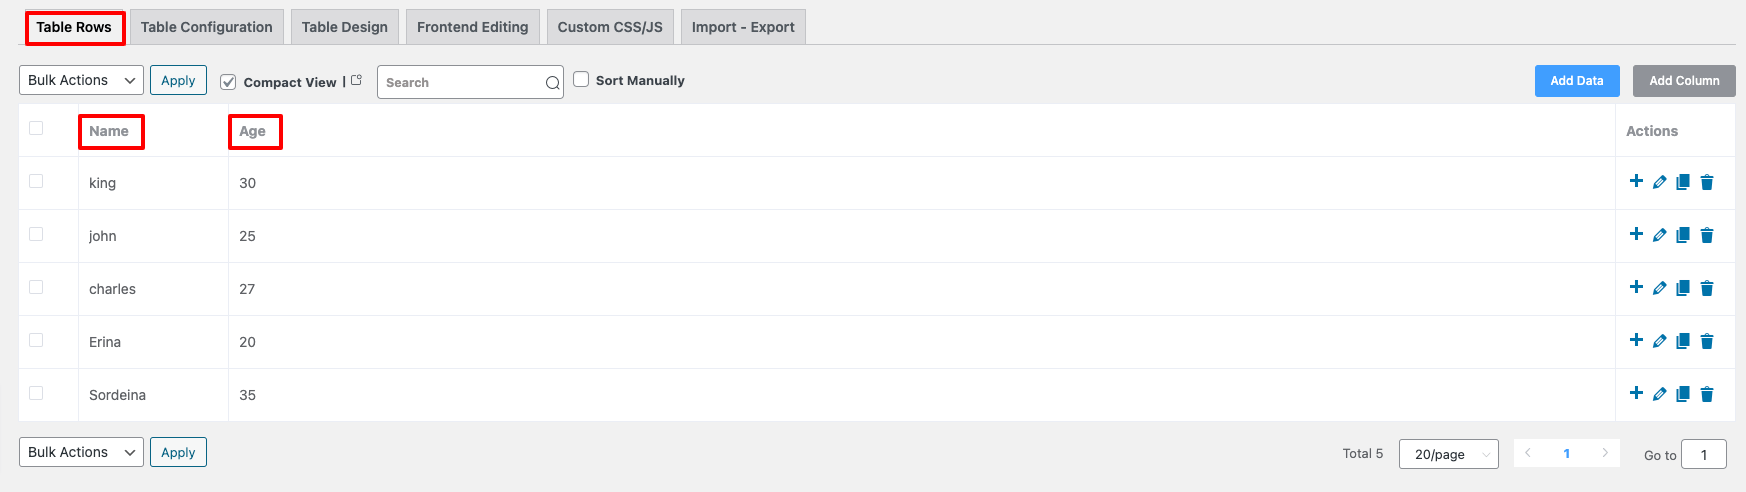
- First, go to the Ninja Tables dashboard and select a your table to add filters.
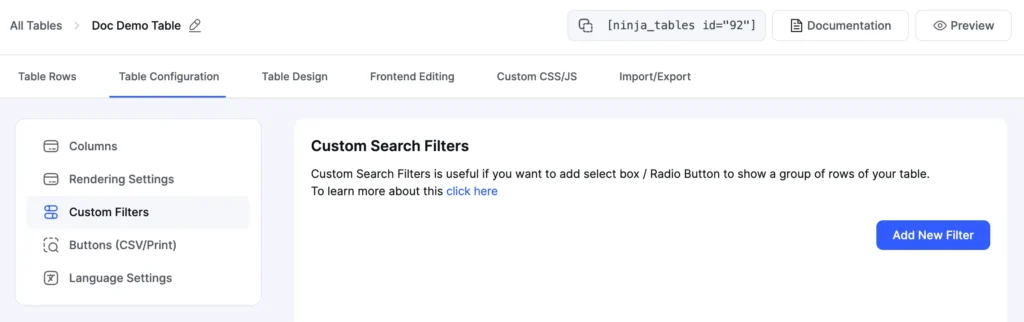
- Next, click the Table Configuration tab and pick Custom Filters from the left menubar.
Add Custom Filters #
- Click on the Custom Filters, there a new tab will open with an Add New Filter button.
- Now, click the Add New Filter button, then a pop-up form with a set of configuration options will appear.
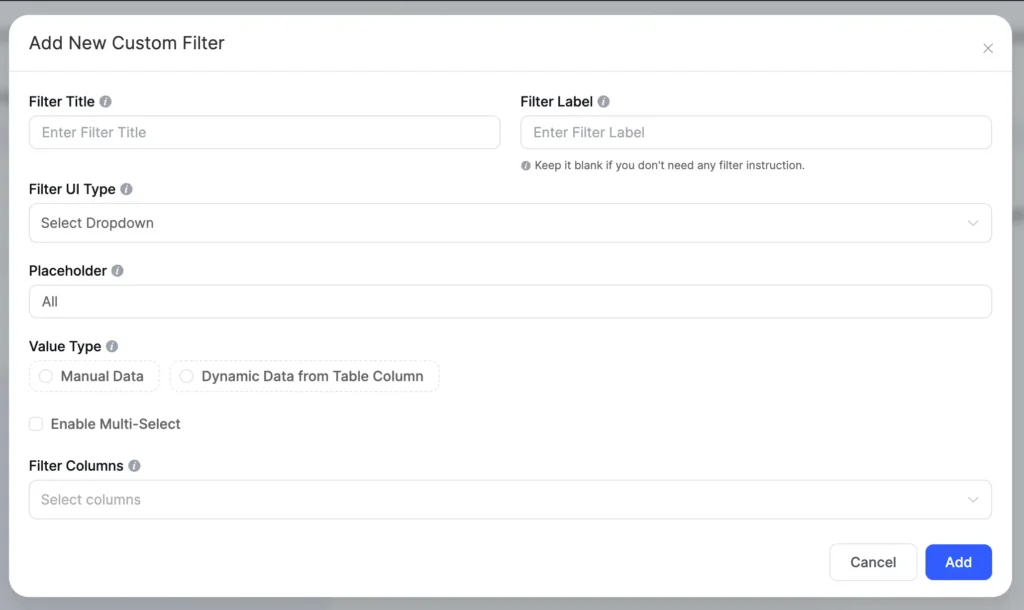
This pop-up has various options to choose from to make your table’s filter more interactive. The following options can be found in the custom filter pop-up form –
Filter Title #
This input field is for the filter title, which determines the filter name.
Filter Label #
This input field is used if you want to add a label to your filter. Keep it blank if you don’t need any filter instructions in the frontend.
Filter UI Type #
You can choose the filter type to display the filter’s base in the frontend. There are 8 subsets in the Filter UI type.
Such as:
-Select Dropdown
-Radio
-Checkbox
-Text Input
-Date Picker
-Date Range
-Number Range
-Reset Filter Button.

Placeholder #
The default placeholder is All. But if you want to change the text, you can type in your desired text.
Value Type #
Select How the value will be populated to the select dropdown. There are two types of Value types, including Manual Data and dynamic Data from the Table.
Manual Data #
When you choose Manual Data, some options will appear below.
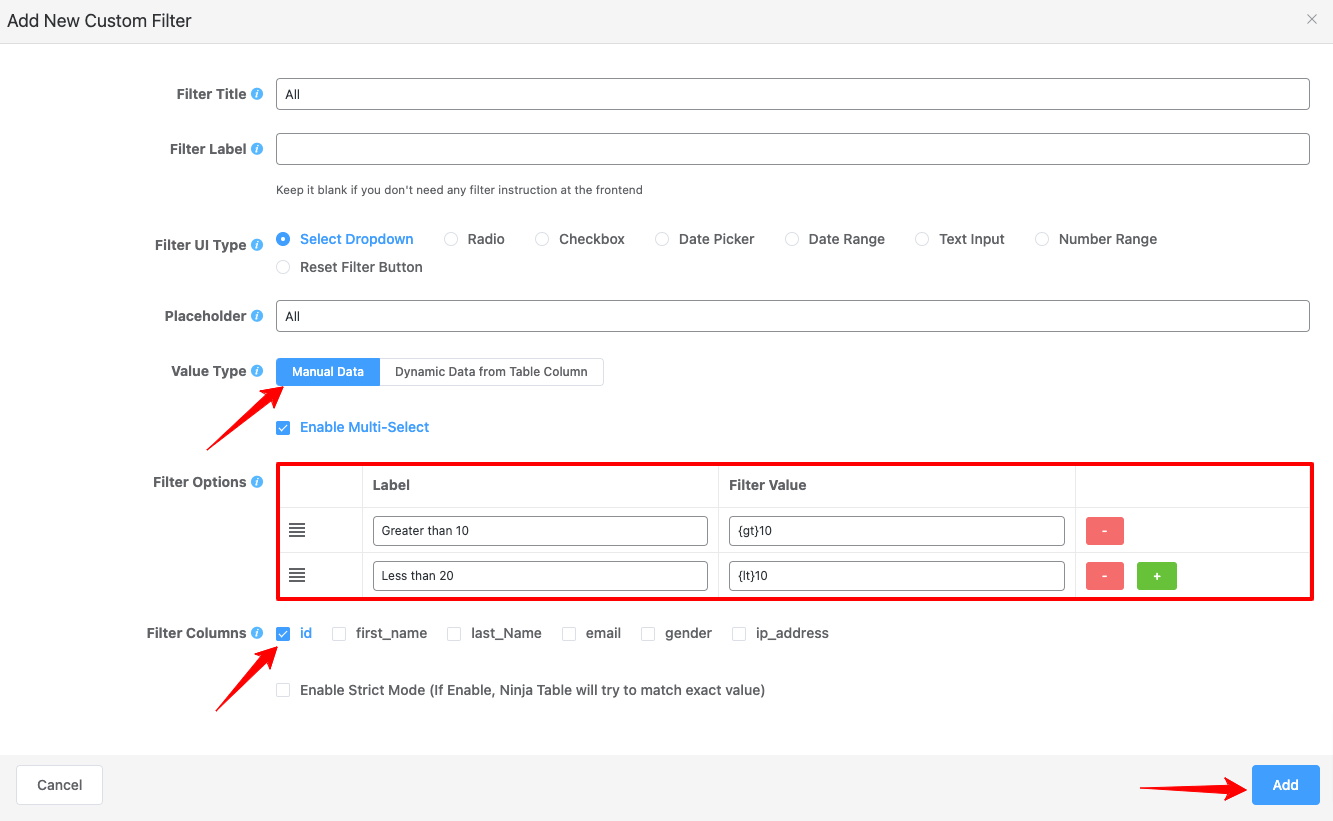
Filter Options #
This lets you place the value through which the filter will be implemented. Put your desired values to display on the frontend, be aware that those values need to match your cell data on that table. Filter options feature three sequential fields called Label, Filter Value, and Action Button.
- Label: The label of the filtered value is entered in the Label field.
- Filter Value: Put the value you want filtered in the Filter Value field.
- Action Buttons: There are 2 action buttons to add (+) and delete (bin icon) in each of the Label and Filter Value fields.
Dynamic Data from Table Column #
When choosing Dynamic Data from Value Type, more options will appear below.
- Target Column: This option enables you to select the column that you want to populate data.
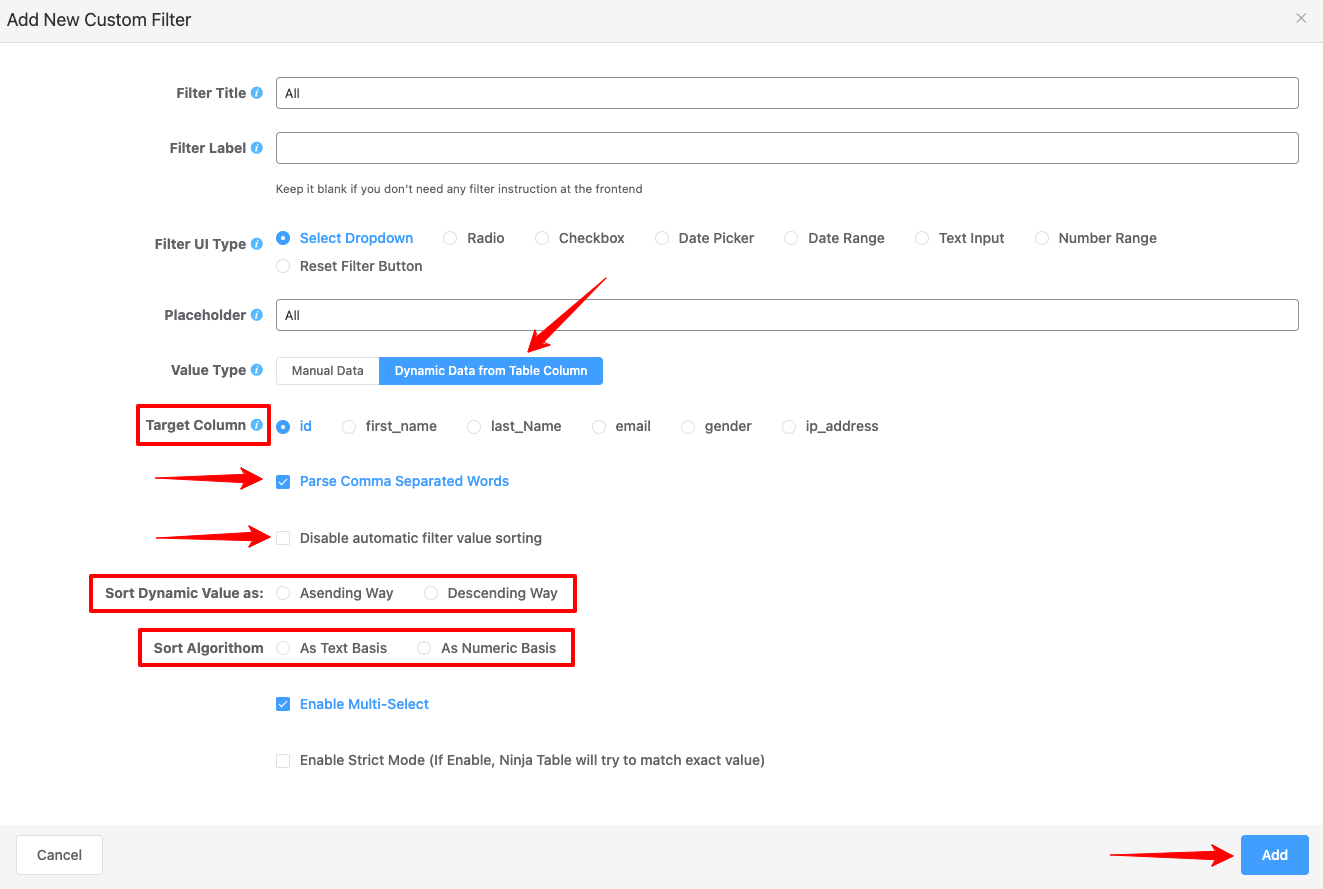
- Parse Comma Separated Words: If you enable this option, and you choose multiple value types, values will be shown with Comma.
- Disable automatic filter Value sorting: By default, value sorting is disabled. The value sorting option will also be activated if you select this option.
- If Disable automatic filter value sorting is unchecked, then two more options will appear below, such as Sort Dynamic Value as & Sort Algorithm.
- Sort Dynamic Value as: By this option, you can select either an Ascending order or Descending order.
- Sort Algorithm: You can sort the algorithm as a text basis or a Numeric basis.
- Enable Multi-Select: Enable this select field if you want to choose the multi-select value type.
- Strict Mode: Enable this mode if you want the results to be accurately matching the values.
Filter Columns #
This option is to pick the columns you wish to apply the filter. You can choose any single column, or you can pick multiple columns.
Example of Custom Filters #
Let’s have a look at an example where you could better understand Custom Filters.
- If you have a table like this with a numeric column (data type must need to as Numeric Value) and you would like to include the option to filter by selecting the range, then you can quickly do it.
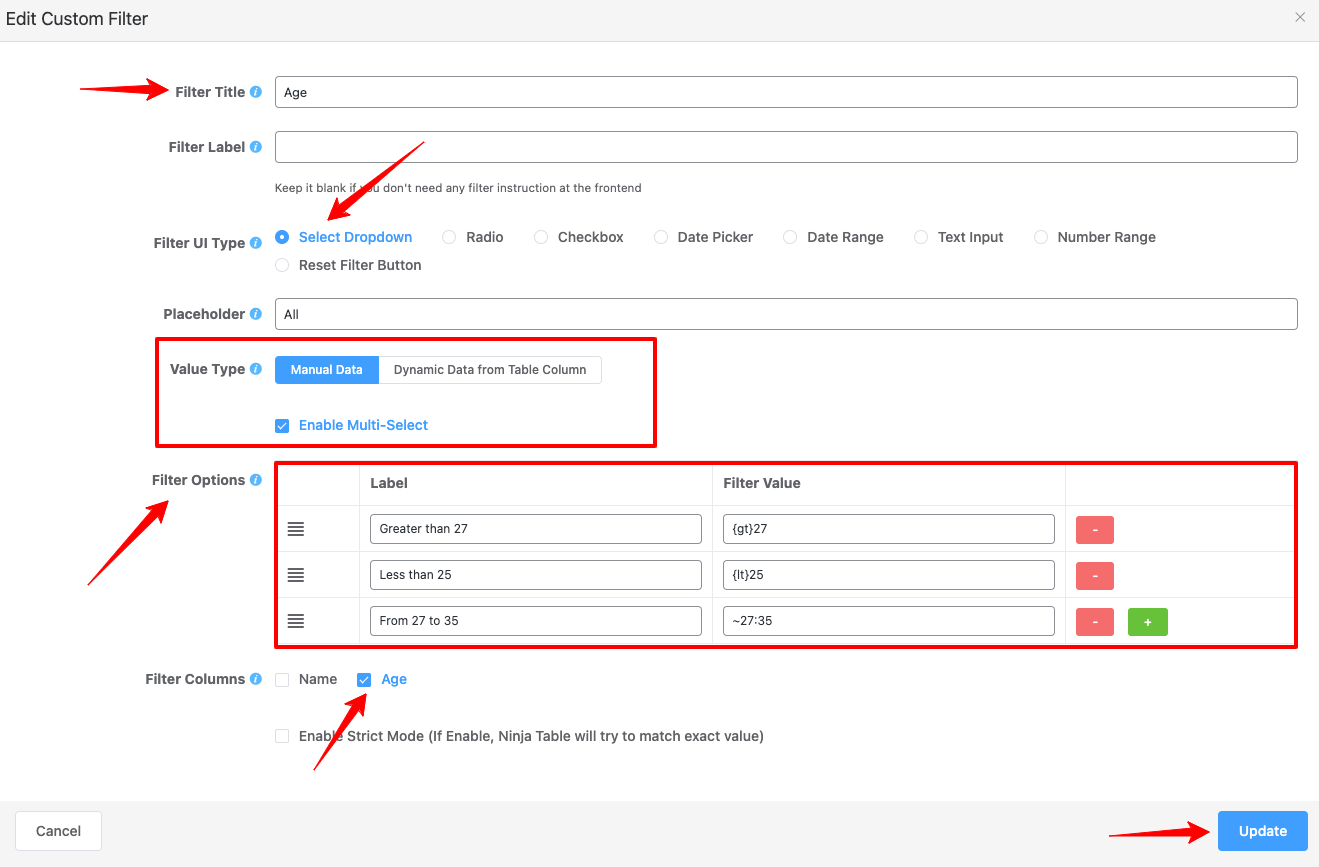
- You can add a new filter by selecting the Add New Filter button under Custom Filters. Next, enter a filter title, choose the filter UI type and value type, and provide the filter label and value in the filter options. Choose the Column to which you wish to apply the filter as well.
- Here, For Greater than = {gt} yourValue
- For Less than = {lt} yourValue
- From firstValue to lastValue ~firstValue: lastValue
- Don’t forget to click on the Update button when you are done with your configuration.
Filter Appearance #
Once you’ve set the filter, go to the main “Custom Filter” tab.
You can choose any option in Filter Appearance between Show Filter inputs as Inline and Show Filter inputs as Columns.
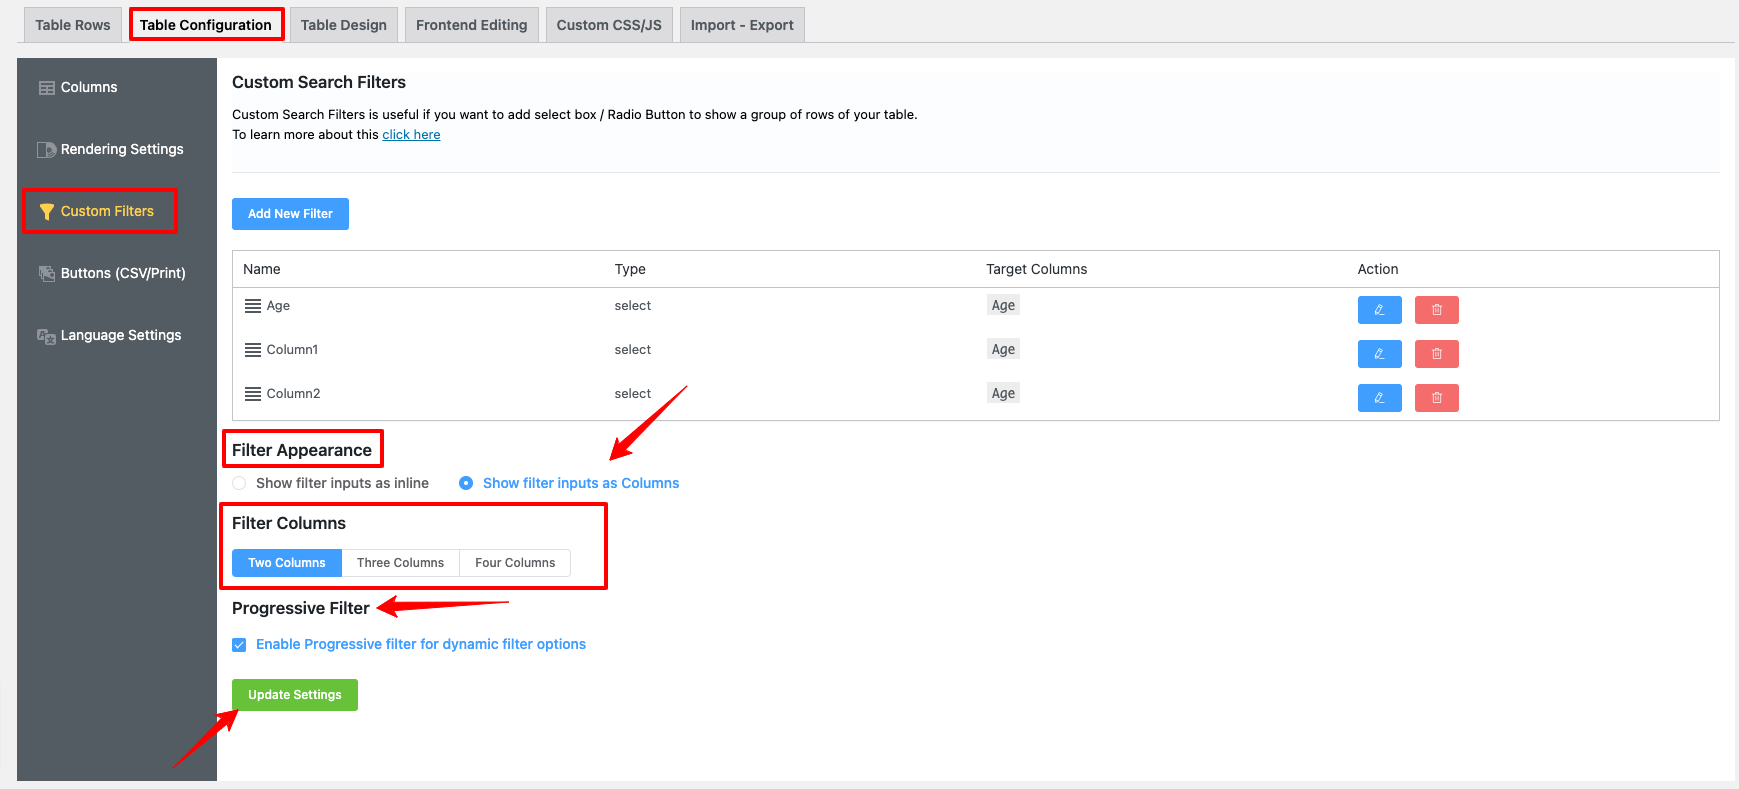
- Show Filter inputs as Inline: It will show the filter inputs in a row.
- Show Filter inputs as Columns: The filter input area will be displayed as a column.
See how Filter Appearance works in the table.
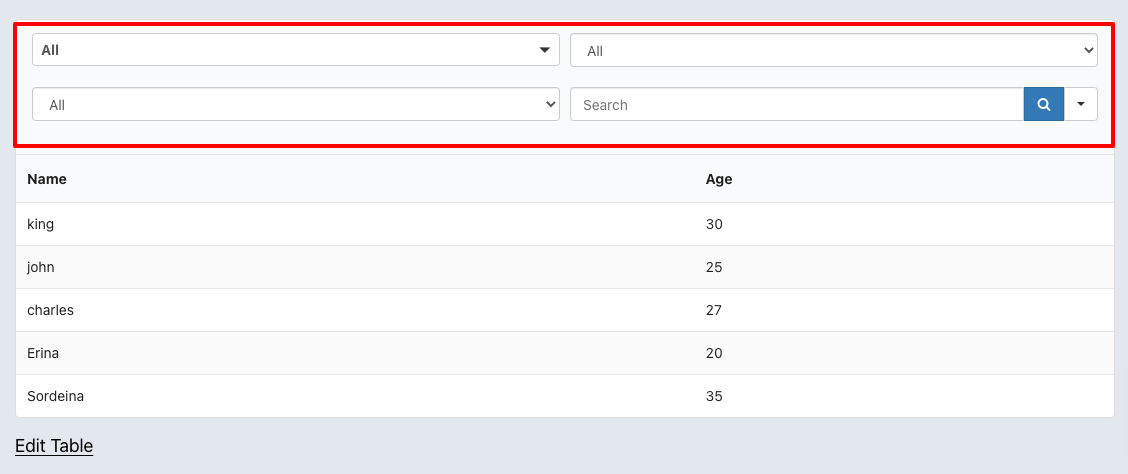
Here’s a WP Posts table created with Ninja Tables. It has custom filters enabled. The filter UI type is “checkbox.” You can select a checkbox and the corresponding filter will apply to the table.
Progressive Filter #
The user can filter any dynamic options in Progressive Filter to quickly access his specific requirements or desires. This option is enabled by default.
Let’s see how this works!
This is how you can use Custom Filters in the table step by step!


Hi, I’ve loved Ninja Tables thus far but have one question. When using the checkbox custom filters, is there a way to filter for items using AND? Currently, checking multiple boxes on my site will match any rows that match one of the check-boxes, in an OR fashion. If using AND is not possible, could it be considered for a future update? Thanks!
Hi Spencer. Thank you for loving Ninja Tables. I’ve forwarded your query to the team to add it as a feature request.
Como puedo ocultar la paginación de mi tabla?
Tengo 100 filas y solo muestro 3 final de ejemplo y de ahi el usuario busca. Pero no quiero que salga la paginación, como lo oculto
Gracias por comunicarse con nosotros aquí.
Puede ocultar fácilmente la paginación de su tabla desde la pestaña de diseño de tabla del panel del generador de tablas.
Ir a Diseño de tabla=>Otro
Encontrará el botón de alternancia para encender o apagar.
Para cualquier otro tipo de asistencia, puede abrir un ticket de soporte aquí: https://wpmanageninja.com/support-tickets/
I want to buy the Pro version, but I need to know if there is a way to hide the logs and only show the log with the search, this is limited to 10 searches, for example.
Hi ILLidan,
Thank you for reaching out! 😊
Ninja Tables offers an amazing advanced shortcode feature. Check the below doc, maybe it will satisfy your query,
https://ninjatables.com/docs/advanced-shortcode/
Feel free to reach out if you have any more questions or need assistance!
Thank you.
Hi,
Is it possible with NinjaTables to filter filter based on row values rather than column values?
In other words, say for table of products, could have the data for the products in columns rather than rows, and create filters that could filter out columns rather than rows?
Hi Wade,
Thank you for reaching out.
Yes, it is possible with NinjaTables to filter based on row values rather than column values. You will need a bit of custom coding for that and luckily, we’ve already drafted it!
Please open a support ticket here(https://wpmanageninja.com/support-tickets/), and we’ll be more than happy to assist you.
Thank you!
How i can add the counter of rows for each option inside a custom filter?
Temporally i had to trick the javascript to do it, but should be nice an option to show from the original plugin code.
Thanks in advance
Hi there! Thanks for your comment. We don’t have a feature like this unfortunately. But I will be forwarding this to the R&D team so they can look into it. If you have any problem using JS, do open a support ticket for an extra set of hands in help. Cheers!
The filters are not showing.
Hi. Please update the plugin to the new version.