
Creating a table with Ninja Tables is simple and fast!
Install and activate Ninja Tables on your dashboard and try all the magic tricks this plugin comes with.
Let’s look at how to create a table.
Add Table #
- First, go to the WordPress Dashboard. Then navigate to the Ninja Tables Plugin from the sidebar.
- Now, Click the blue “Create New Table” button on your screen’s top right.
- After clicking the button, a popup will appear with a menu of multiple table creation options.
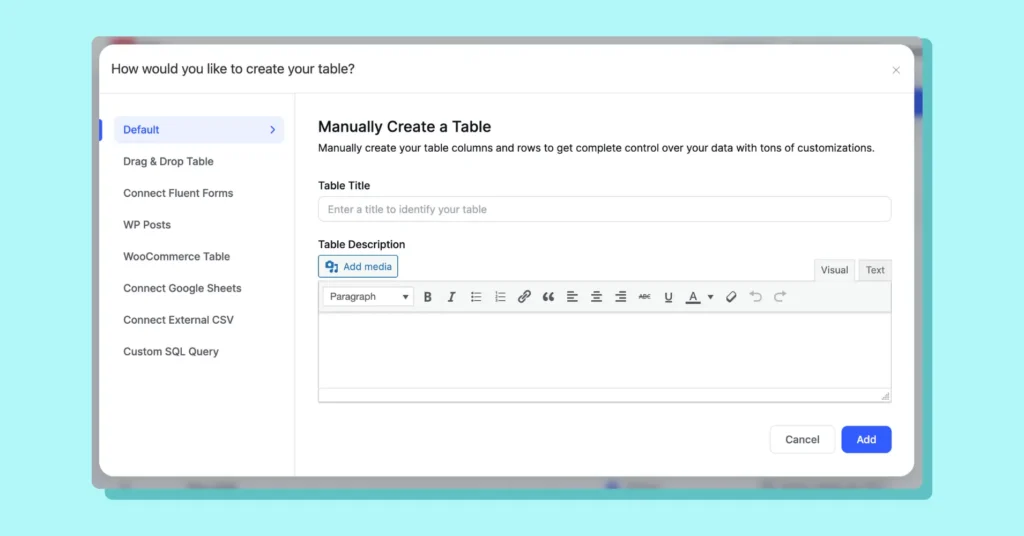
- Ninja Tables offers 8 dynamic table creation options here, including WooCommerce product tables and Google SHeet auto-sync. You can pick any option to create a new table. We’re picking the “Default” or manual table creation.
- You can see some text boxes on the right side under “Manually Create a Table”- Table Title & Description.
- Give your table a name first (it’s required), description (optional), and then, hit the Add button to add the table.
- Clicking on the Add button will send you to the Table Rows tab.
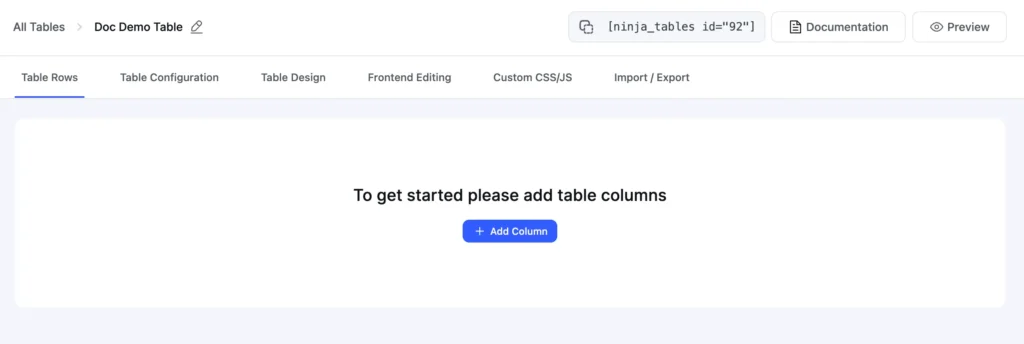
Table Rows #
- Initially, in the Table Rows tab, you will find only the “+ Add Column” button to create columns. And several other tabs to configure the table. We’ll get to that later.
- After clicking the button, a popup will appear with Column Name, Column Key (Column key will automatically generate based on your given column name), Data Type, Responsive Breakpoint for the “Basic Settings,” and some more configuration tabs above.
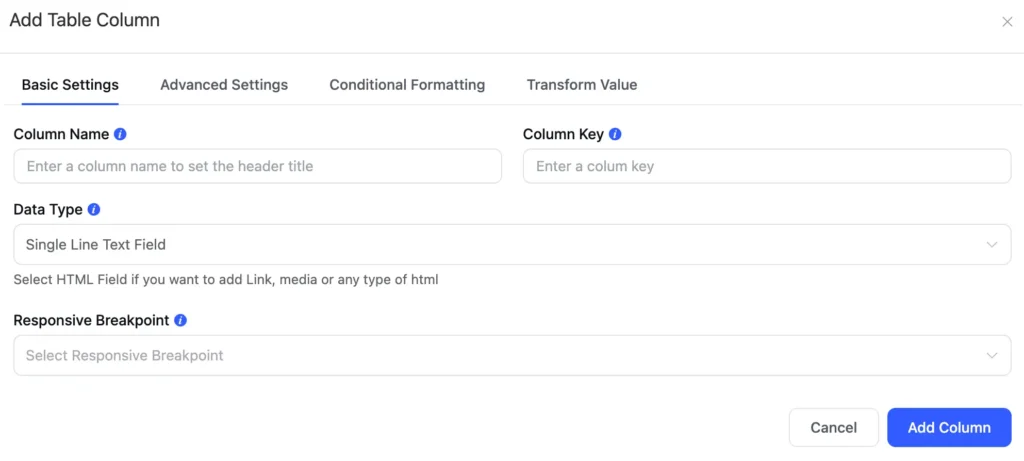
- Add the first column primary properties from here – column name and data type. Hit the blue button below to “Add Column.”
- After this, you will get two buttons in the top right corner of a new window.
“Add Data” is for data input into the column and “+ Add Column” is for creating new columns.
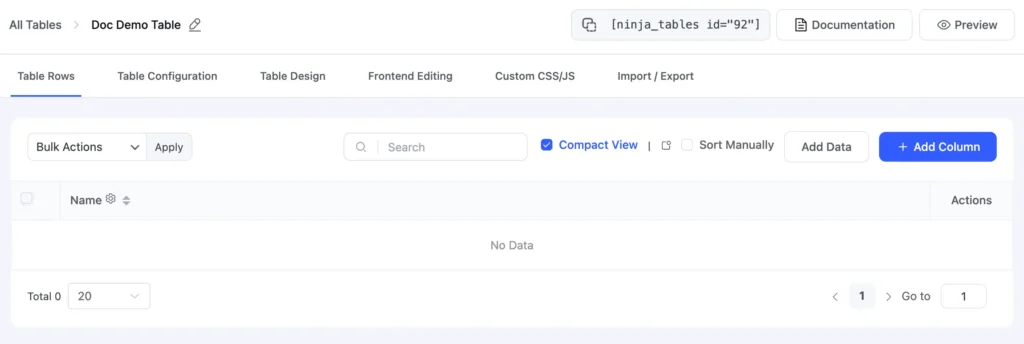
- Here you also have Bulk Actions, Compact View, and Sort Manually options. You can use the Search Field to find the rows you’re looking for (if you already have table entries).
- You may quickly drag and drop table rows and arrange them as needed by enabling the Sort Manually option.
Table Configuration Tab #
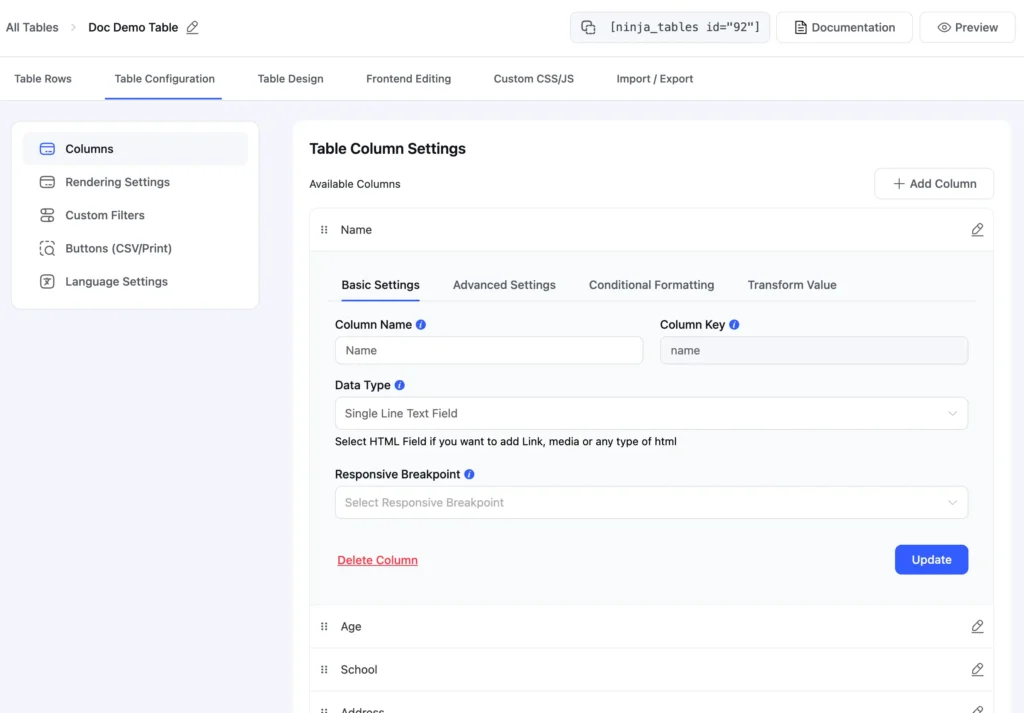
- To configure each column, you need to click on the pencil icon to get four different options- Basic Settings, Advanced Settings, Conditional Formatting, Transform Values, etc.
***After configuring each tab, you must hit “Update” or else no changes will be saved.
Basic Settings #
Using Basic Settings, you can do basic configuration, including responsive breakpoints of your table configuration. Or change the data type of the column. You can change Column Name but Column Key will only change responding to the name. It may take a refresh.
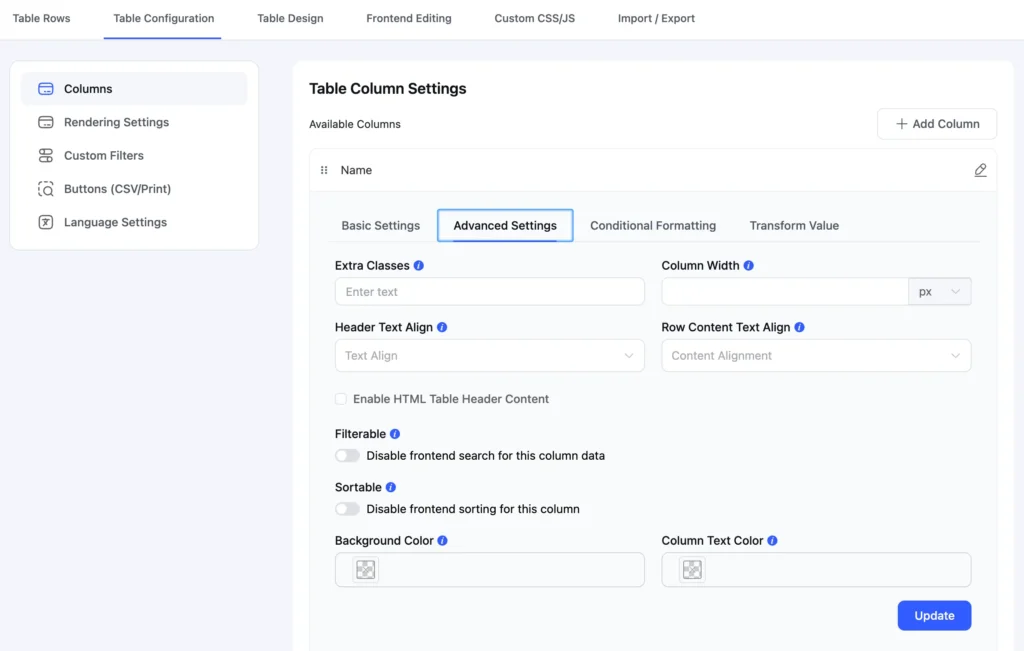
Advanced Settings #
In Advanced Settings, you can have multiple options for configuring your columns. Control column width, header and row content text alignment, enable or disable HTML header content or column filter/sort. You can also color the column background and text.
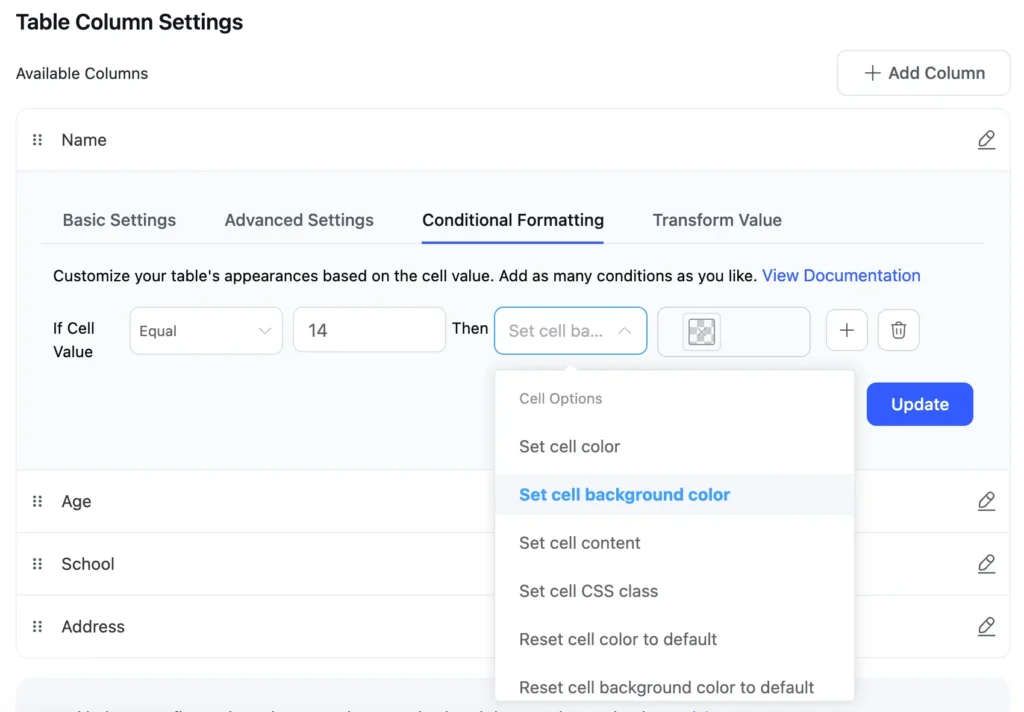
Conditional Formatting #
Conditional Formatting will allow you to add a condition for formatting your columns in very different ways.
From here, you can change cell color, cell content, set CSS class, and more. Insert as many conditions you want by clicking “+”, just remember to hit “Update.”
Transform Value #
Using Transform Value, you can change the plain text of a column to clickable hyperlinks.
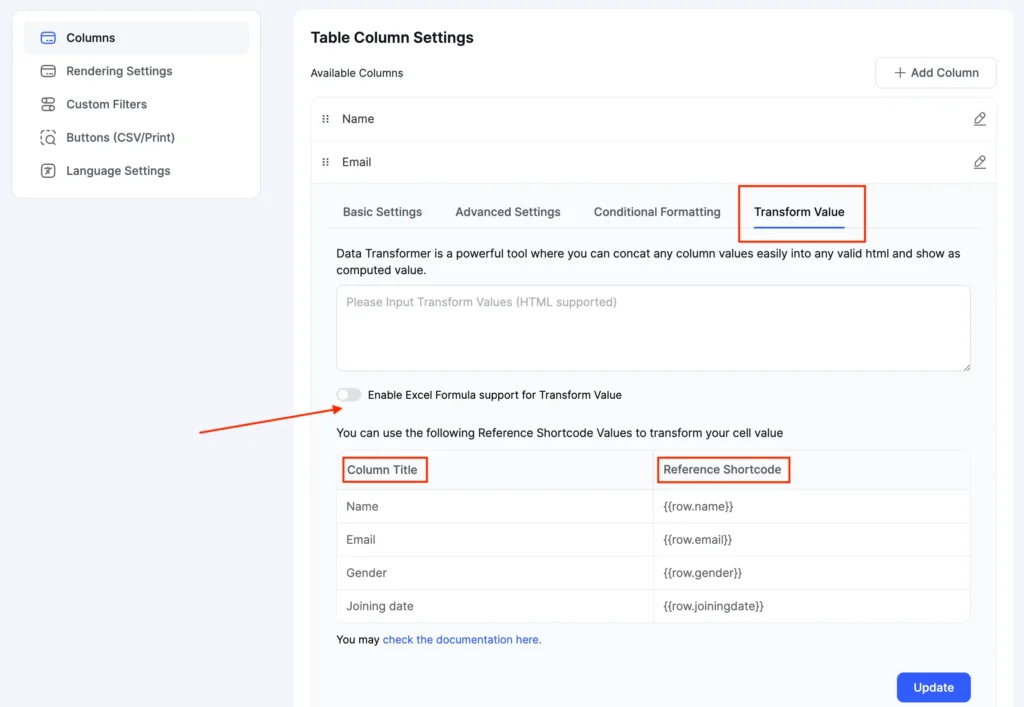
Table Design Tab #
In this section, you will find three design options for configuring your tables.
- Styling
- Table Colors
- Other
This is where you can change the whole look of your table.
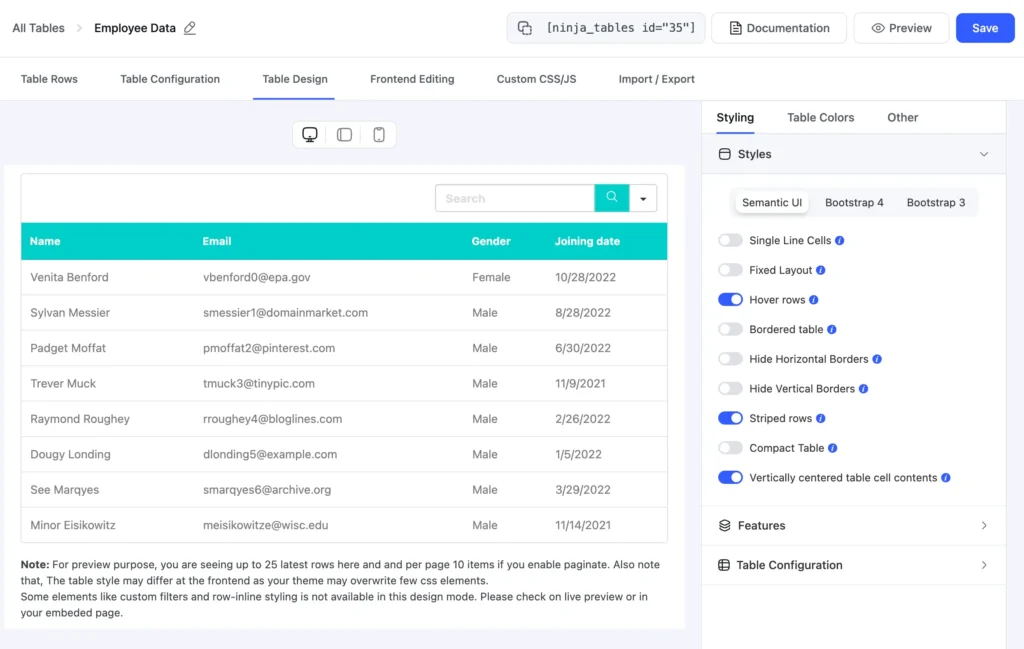
Styling #
On the right sidebar, you will notice the first tab, Styling. This tab itself has three separate styling options.
- Styles: The first one is the Styling Library, which manages the library you have to work with. Three different libraries are available in this segment: Semantic UI, Bootstrap 4 & Bootstrap 3. Each of these libraries has various components once you select one of them.
You can choose table hover, border, stripes etc.
- Features: The second one is the features option which offers several functions like table title show, make table searchable, and many more. Check these options according to your styling needs.
- Table Configuration: Last but not least, you can show your rows as a list item with a stackable table. You can target by device width and control stacked appearance.
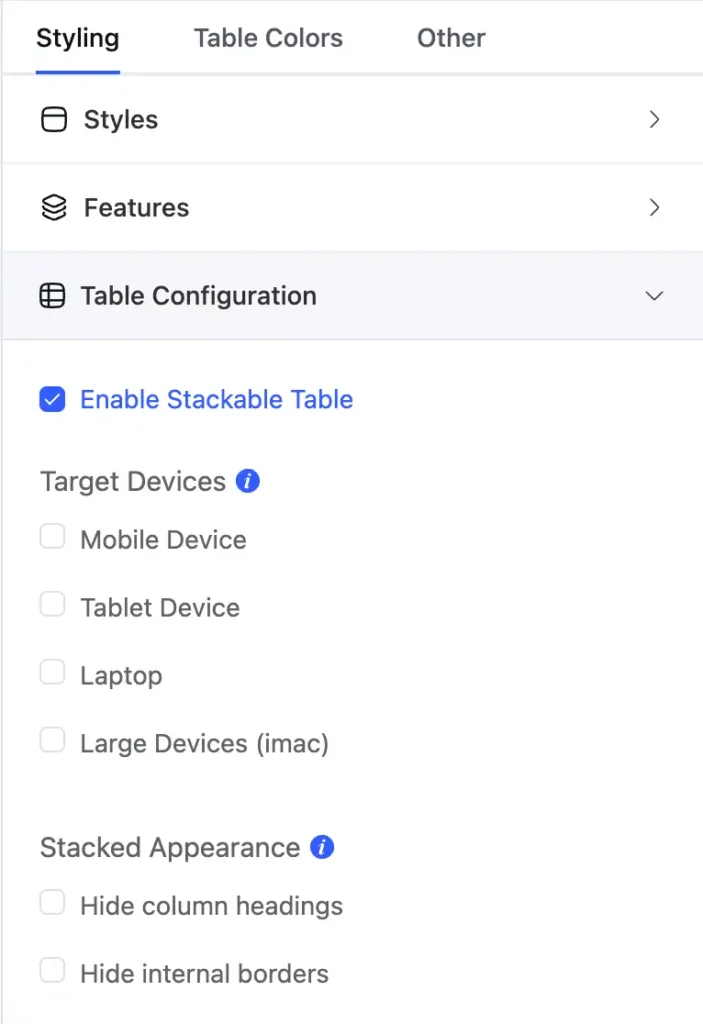
Table Colors #
You can style your table in 13 different pre-defined color schemes. Feel free to check all those color schemes.
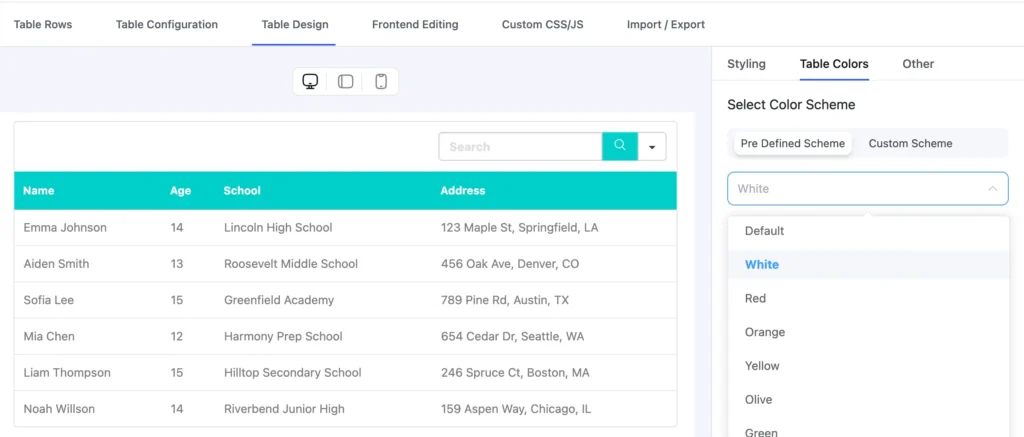
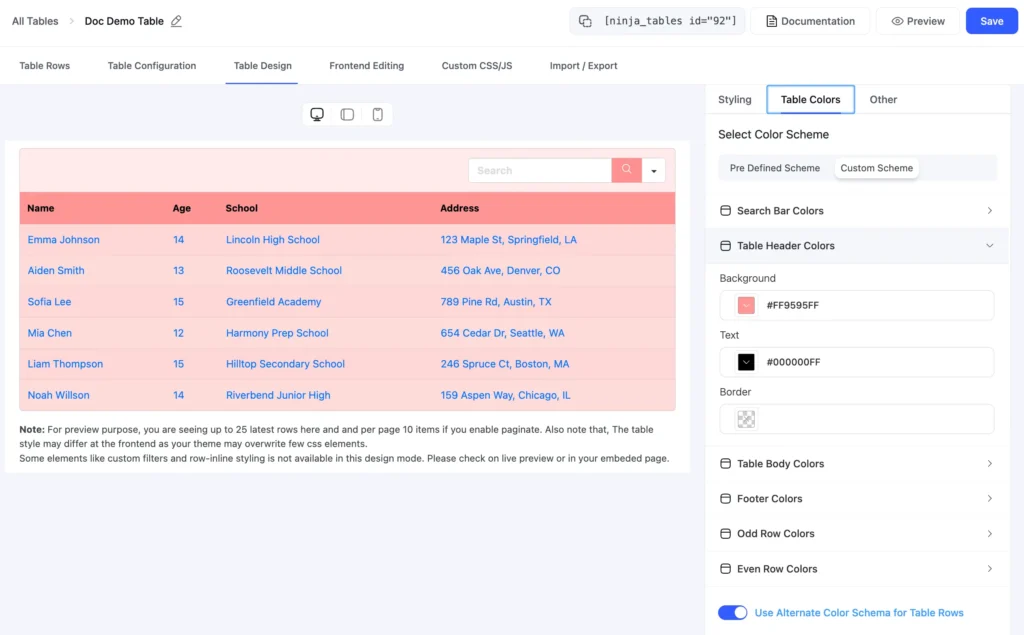
Besides these, you have a “Custom Scheme” with unlimited color choices.
***Please remember to hit the “Save” button above to keep your beautiful designs!
Other #
Pagination – Under the Other option, you will find the pagination section. In this section, you can select how many items you want to show per page. You can also disable pagination here.
Click on the Save button after finishing up your table configuration.
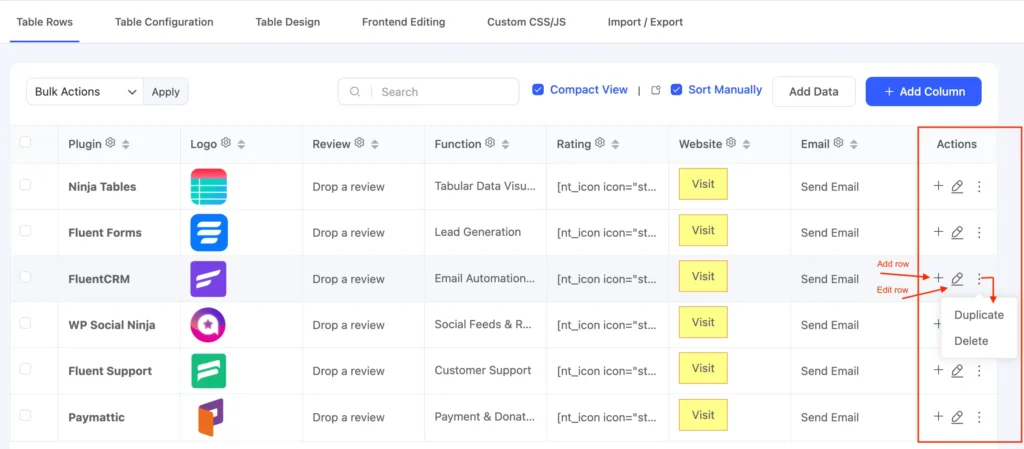
Add, Duplicate, Delete Rows #
- In the Table Rows tab, you can also manage your data by deleting or updating.
- You will find icons for editing, duplicating, add new row and row delete options in the “Actions” column of the table backend. This column will not be visible in the table frontend.
Add table to frontend #
To incorporate a table into your website, navigate to Ninja Tables where you’ll find all your tables listed. Select the specific table you want to show, then click on its shortcode to copy it.
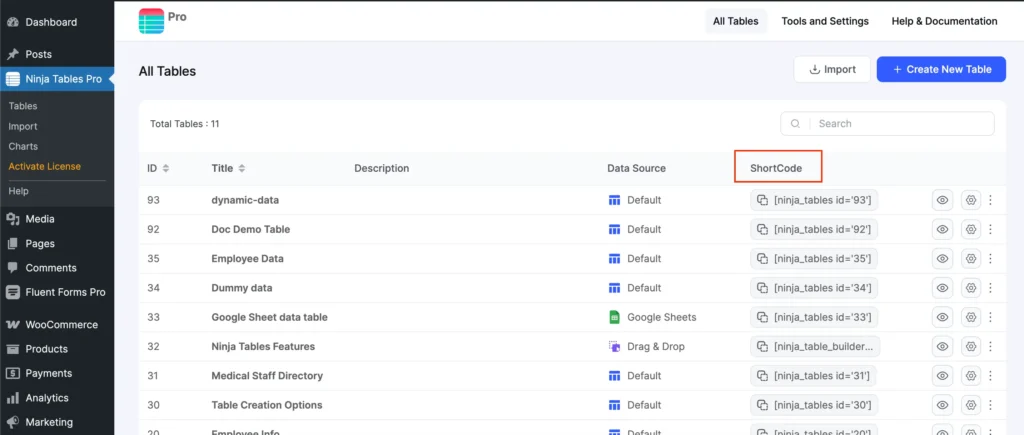
This shortcode is auto-generated. Paste the Shortcode on your desired page or post anywhere you want.
You can also easily add your table using the Ninja Tables block.
Simply go to the page or post where you’d like to embed your table. Look for the Ninja Tables Block and insert it. You’ll find a search field where you can look up the specific table you want to display on your frontend. Now click on the table name to insert it.
Change table color from post/page backend. But remember, the design changes made here will apply to this specific table in the Ninja Tables’ “All Tables” dashboard. The block won’t create a new table for you to design.
Use Bulk Action if you need to delete more than one entry. You can also duplicate each table using the icon in the table dashboard.
Let’s visually look at the video demonstration of the basic table setup using the Ninja Tables plugin.


hello Dear
I can’t display page numbers under the table? Why ?
How are the settings?
* enable paginate in ninjatables
how can I do?
thanks a lot
Hello,
Thank you for reaching out here. You can easily display page numbers under the table. Just check the below screenshot. Don’t forget to toggle off the Hide Pagination button if you have done it unintentionally. And then, if you have more that just 20 rows, you should see the numbers under your table.
https://prnt.sc/KwChD51y_BC-
If you still facing issues like you mentioned, kindly open a support ticket https://wpmanageninja.com/support-tickets/. You will surely get a solution within hours from our amazing support superheroes.
Regards,
Mohiuddin Omran
Hi, I have set up several pricing tables using the Ninja Tables Pro plugin for my website on WordPress, and I have configured breakpoints individually for each table for mobile responsiveness, etc. But still, the tables will not format properly on my Prices page (see here: https://continentalskinclinic.co.uk/prices) all of the tables stop formatting after a certain number of rows or they start overlapping the other tables. I have put all tables in separate code block elements and left space in between each code block to ensure all rows should be visible. But even on desktop they are not formatting correctly- why??
Hi Lily,
Thank you for reaching out! We noticed that you’ve already opened a support ticket, and our team is actively working on resolving the issue for you. Rest assured, they’re committed to providing all the necessary assistance to ensure your table is fully responsive and functional.
We appreciate your patience and trust in the process, and we’ll do our best to address any concerns you have as quickly as possible.
Hi – is it possible to change a default table to a drag and drop table? Or visa versa?
Thanks
Hi Peter. You can import the table CSV/JSON to the table mode you prefer anytime. Just be mindful of the import format when importing a file to the Default mode. To import a Drag and Drop file in Default mode, select “JSON/CSV – Exported from Drag and Drop Tables.”
Thanks for your comment!
Hi, Can I use the search engine (select2) within a select field? Use table default (manual)
Hi Joe,
Thanks for reaching out!
Your query isn’t fully clear to us at the moment. Could you please provide a bit more context or clarify what you’re trying to achieve with the Select2 search engine in the “select” field using the “table default (manual)” option?
For a faster and more detailed solution, we recommend reaching out to our support team directly:
👉 Submit a Support Ticket
We’ll be happy to assist you further!