
Users frequently want to import a table with an Image column from Google Sheets into Ninja Tables. When an image from that column is clicked, it opens in a lightbox with a darker background.
There’s already a “Lightbox” data type option in Ninja Tables.
So apply this to your table by following this simple guide.
Transform Image URL into Image Lightbox #
A table from Google Sheets has been uploaded into Ninja Tables for demonstration purposes.
This table offers data about numerous car models. It is divided into two columns: Name and Image.
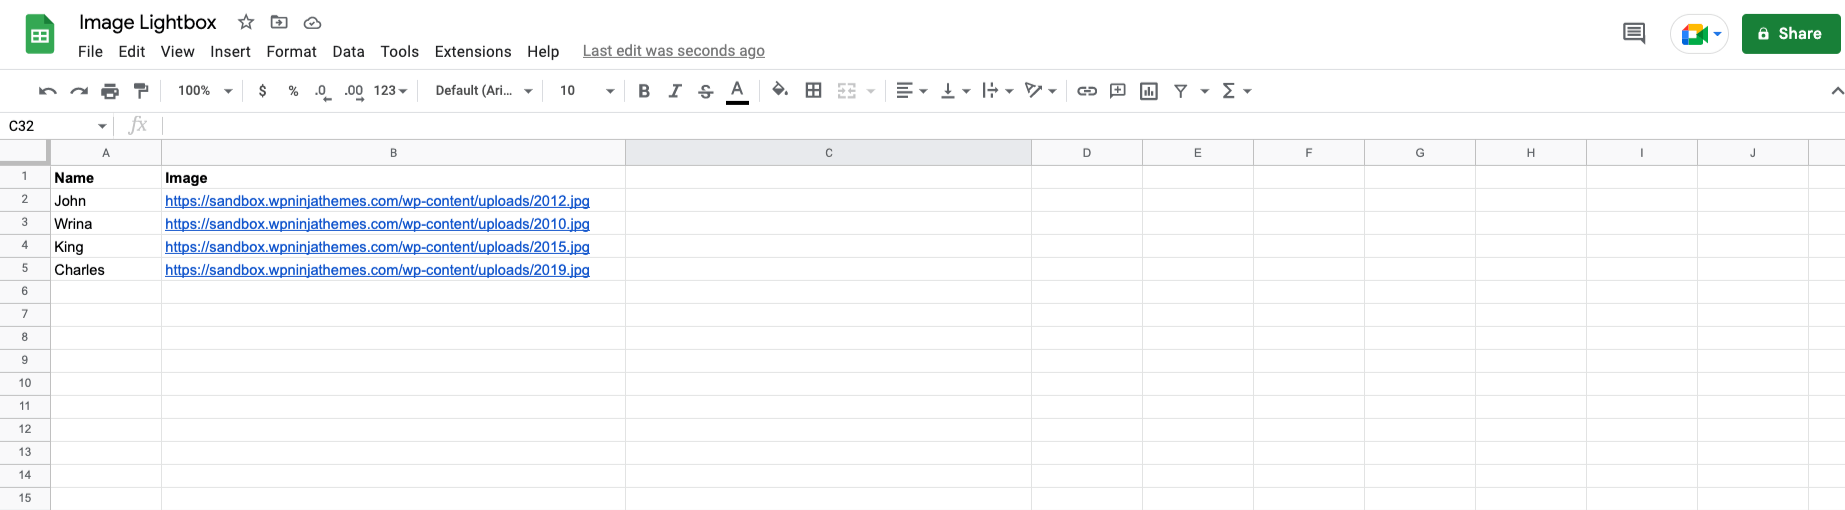
- In the image column, various image links/URL has been added.
- Connect this Google Sheet to Ninja Tables and the columns will be imported automatically. But the image links won’t transform into images and neither open in a lightbox.
- Now to convert this image link into an Image, first navigate to the Table Configuration tab. Then click on the Edit icon located on the right side of the Image column bar. There you will find an option called Transform Value, click on that.
- In the transform value field, add this code; this is quite a simple HTML code –
<img src="Image column Reference Shortcode">
- Now turn this image link into an Image. Replace the text inside the quotations with the Column Shortcode of the Image column given in the Transform Value option.
- So the code will ultimately look like this –
<img src="{{row.image}}">
- Then click on the Update button to save the code. All the image URLs are shown as an image in the table.
Image with Lightbox #
- To convert this image link into an Image Lightbox, add an HTML code in the Transform Value box.
- In the transform value field, add this code; this is quite a simple HTML code –
< a href="Image Shortcode" class="nt_lightbox"><img src="Image Shortcode"></a>
- Now turn this image link into an Image Lightbox. Replace the Image Shortcode with the Column Shortcode of the Image column given in the Transform Value option.
- A class named nt_lightbox also needs to be added inside the anchor tag. This class is used to transform the image URL into an Image Lightbox.
So the code will ultimately look like this –
<a href="{{row.image}}" class="nt_lightbox"><img src="{{row.image}}"></a>
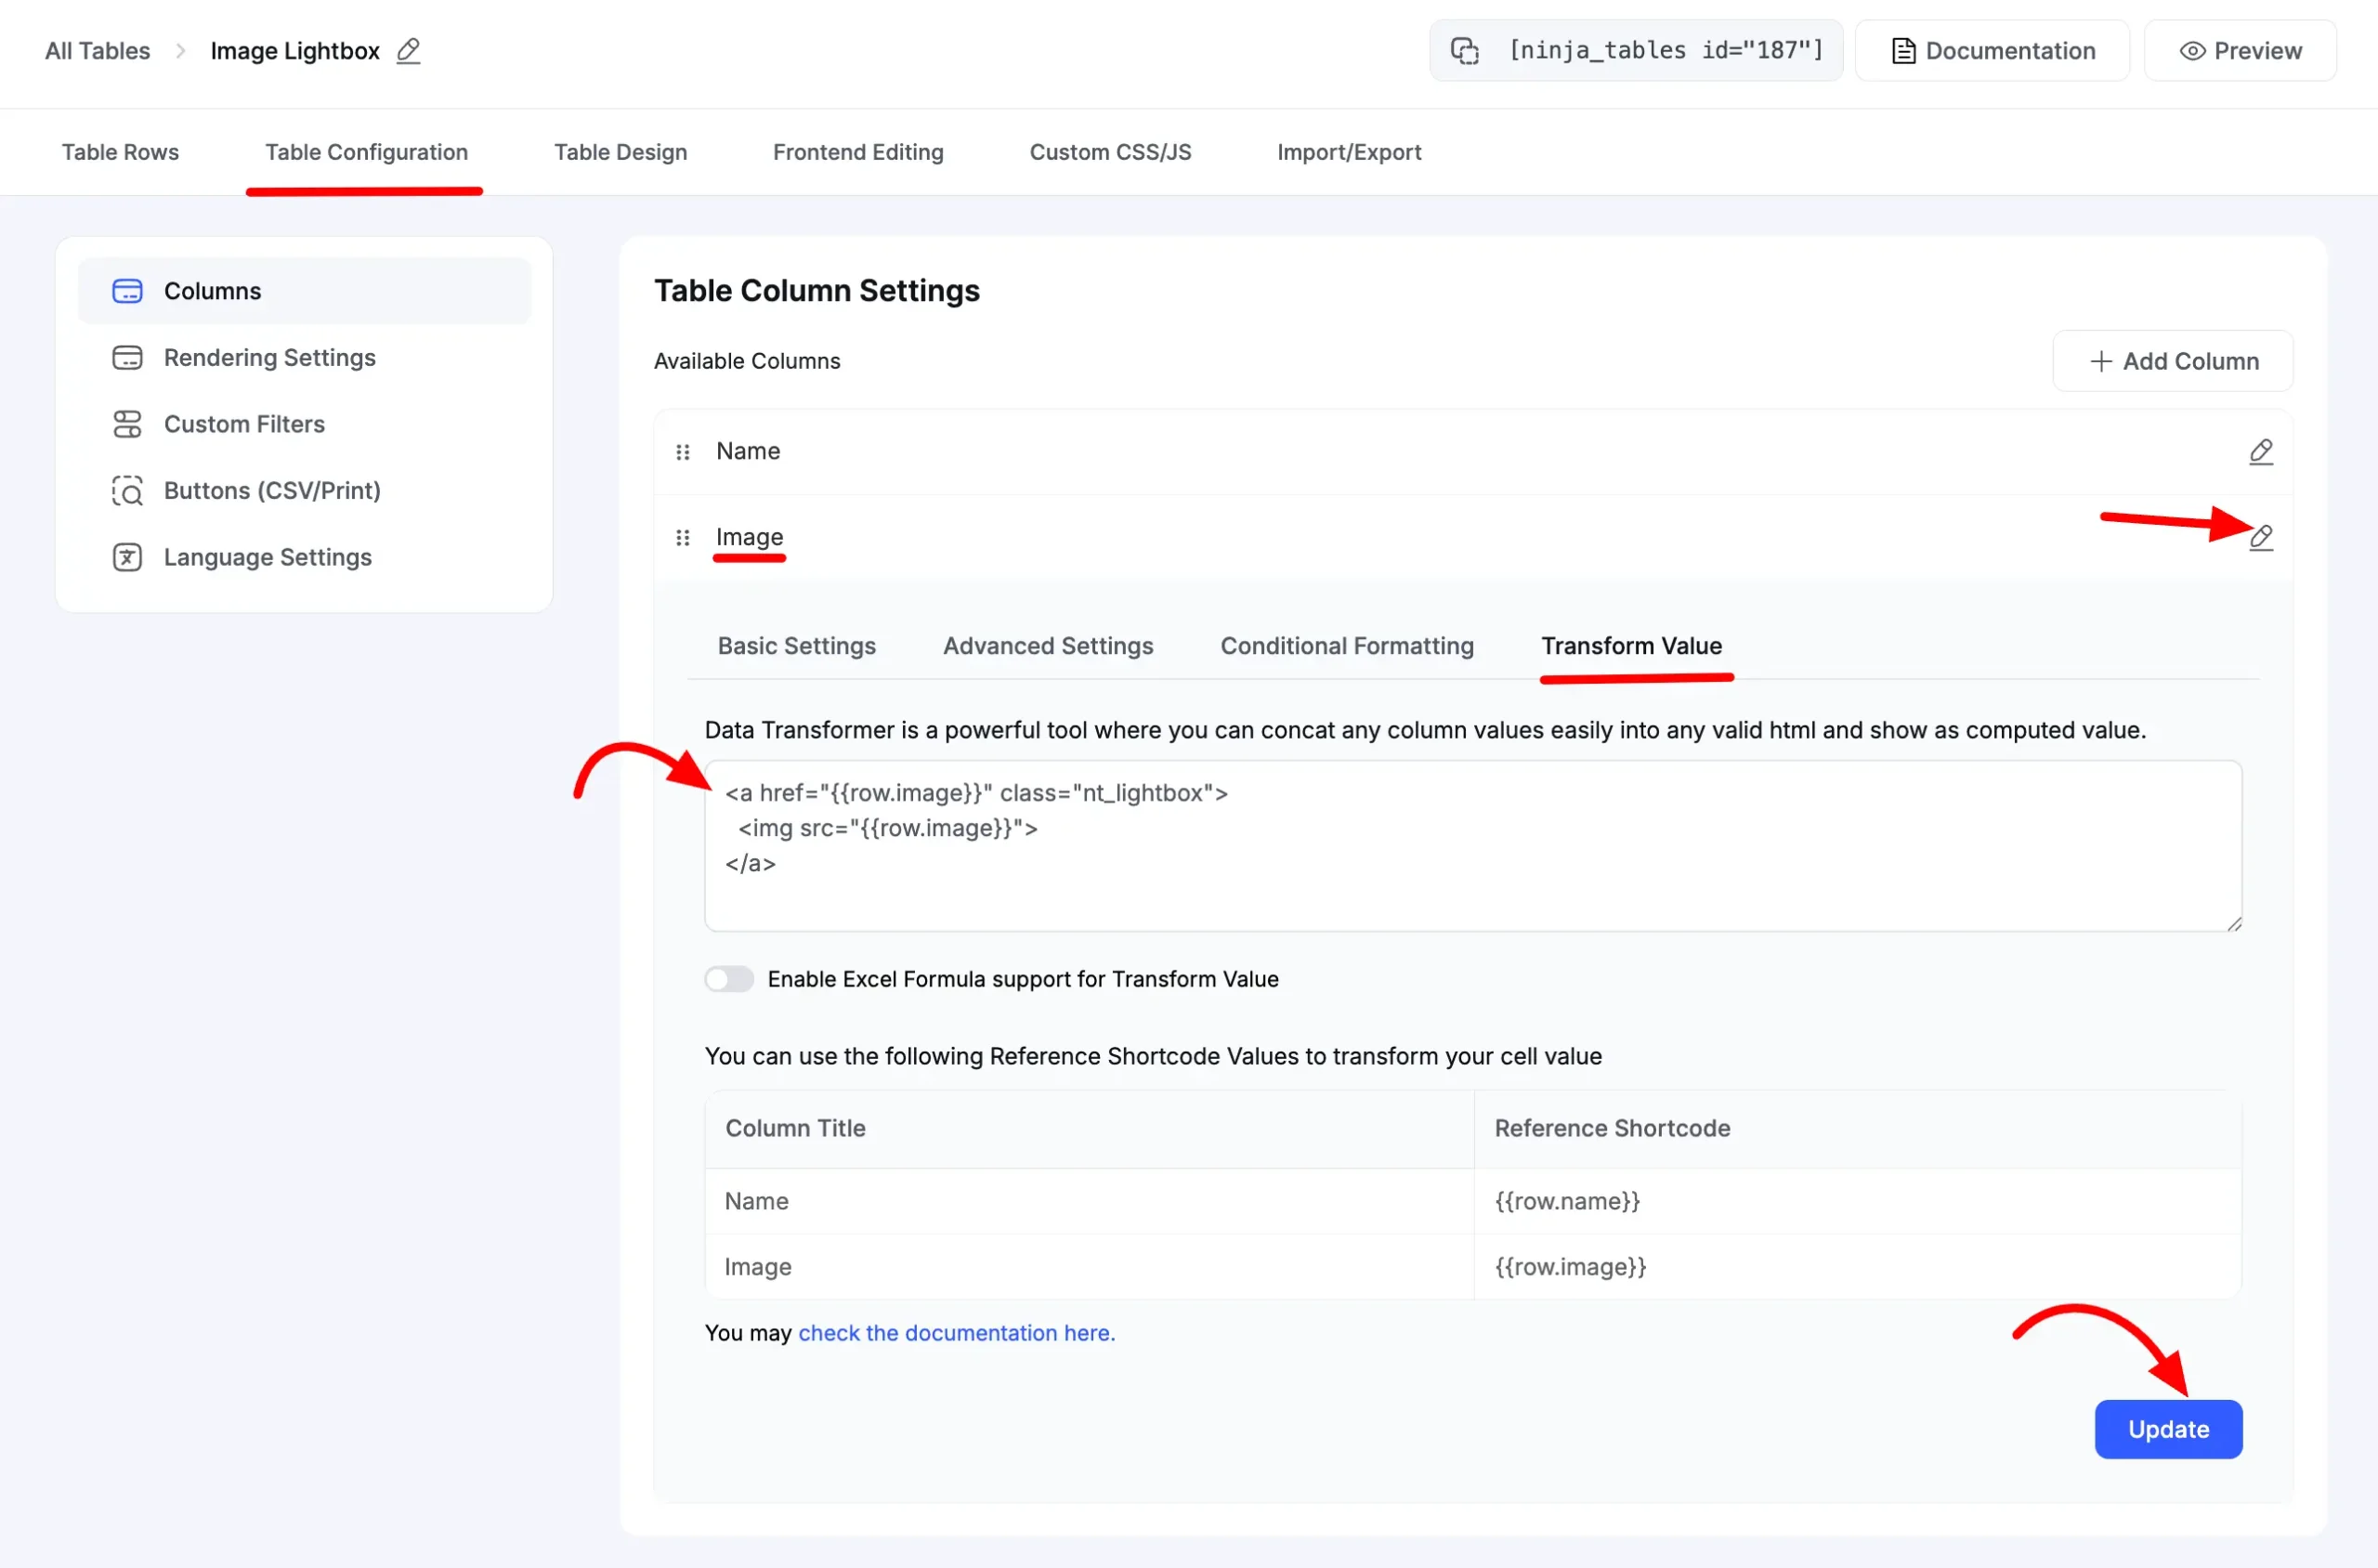
- Then click on the Update button to save the code.
- Next, go to the Table Design tab → click on the Other option. Then you will find an input field called Extra CSS Class for the table, add this class nt_has_lightbox here.
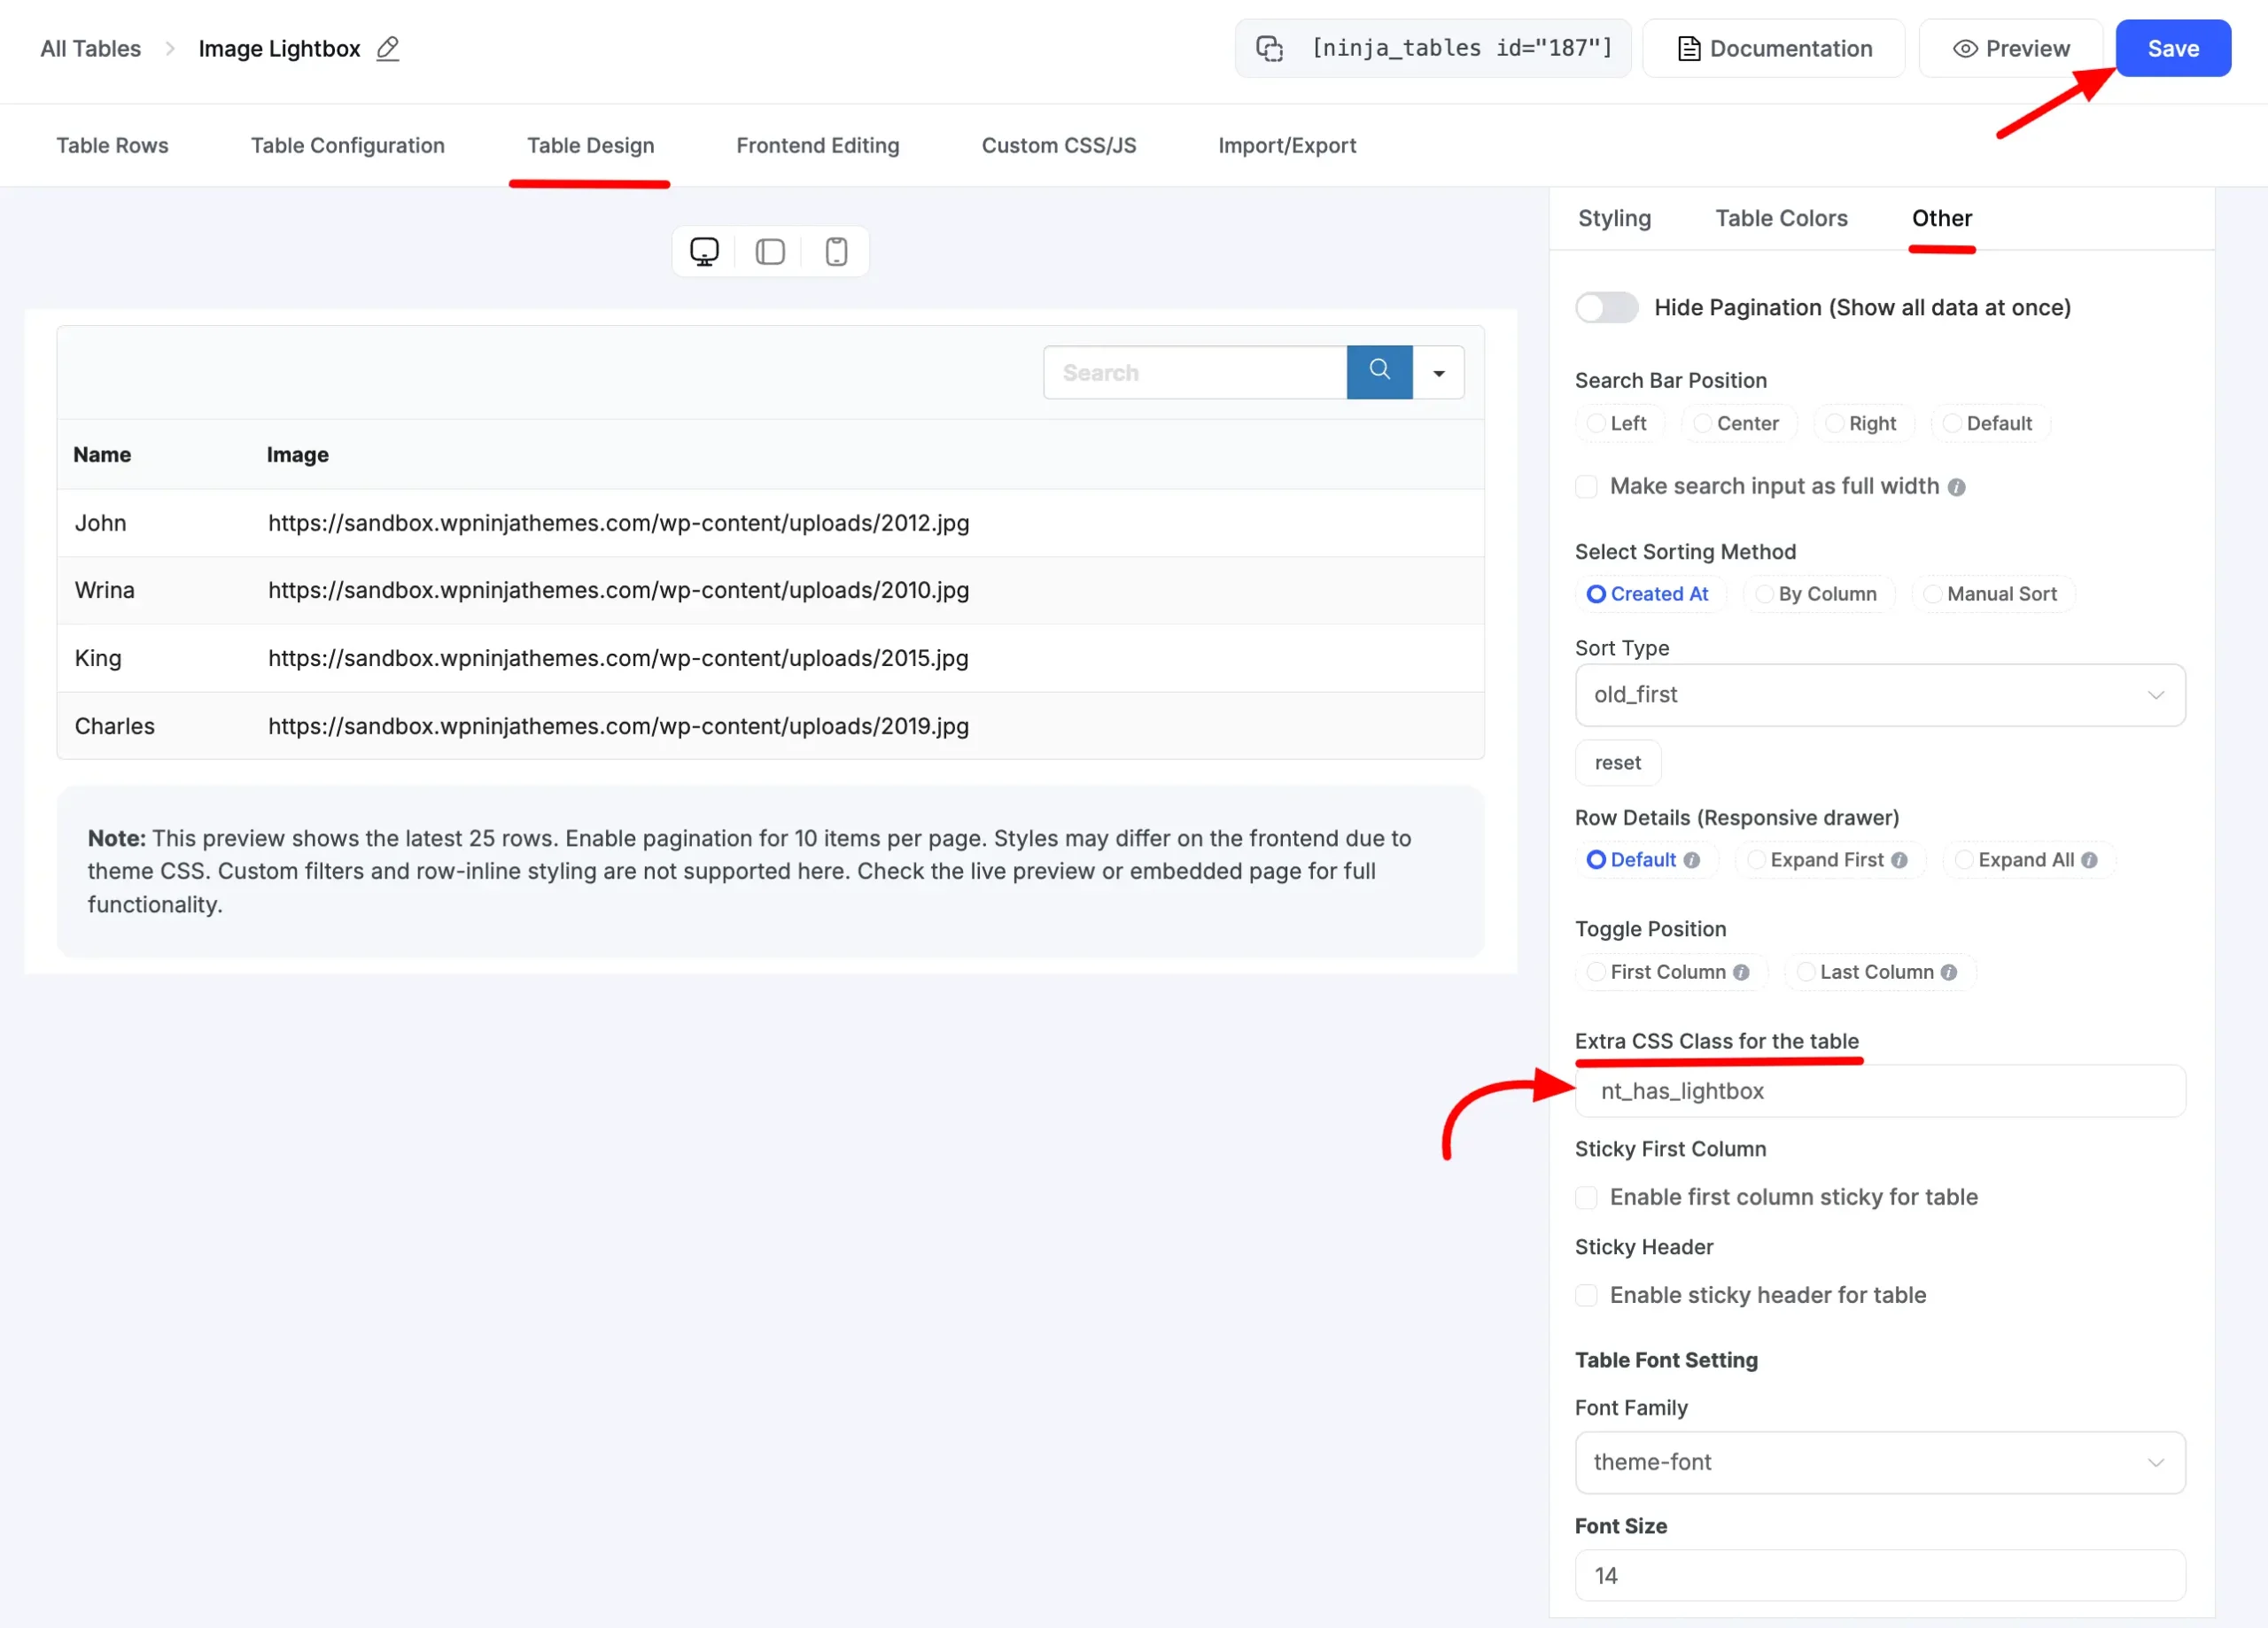
- Lastly, click on the Save button to save the settings.
Now if you preview the table, the links from Google Sheets will have transformed into image and will open in a lightbox.
Easily transform image link from Google Sheets into image lightbox in Ninja Tables this way.


