
Conditions in table cells can change the column’s data or highlight the specific cells you want your audience to focus on. Conditional formatting in Ninja Tables lets you add multiple conditions to table cells and the column/row the cell is in.
Conditional Formatting is a Pro Feature!
The cell value of the table changes in response to the conditions.
Applying Conditional Formatting in Ninja Tables #
Read this simple guide to learn how to apply this feature.
- Firstly, you need to have a table designed beforehand.
- There are two methods to configure Conditional Formatting.
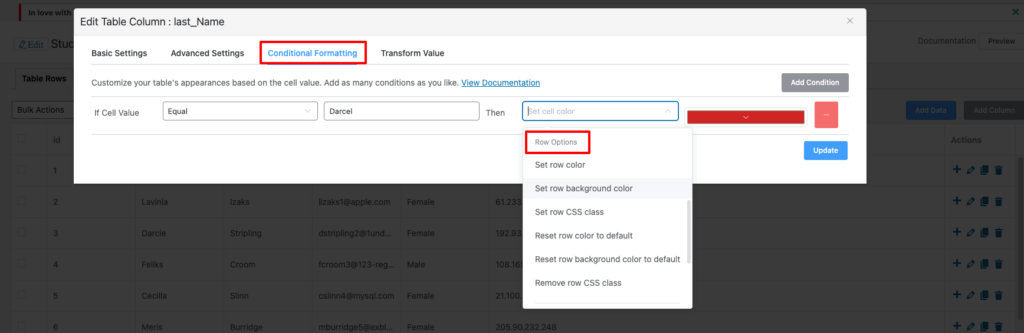
Go to the Table Configuration tab → Click on the Edit icon (Pencil Icon) on the right side of the tables columns and you will notice a drop-down.
- Or you can do it by going over any column name and pressing the Edit icon from the Table Rows tab.
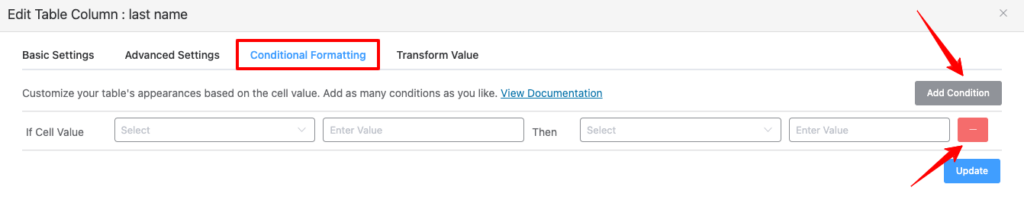
- After that, a pop-up window will appear with various interactive options. Go to the top bar for Conditional Formatting.
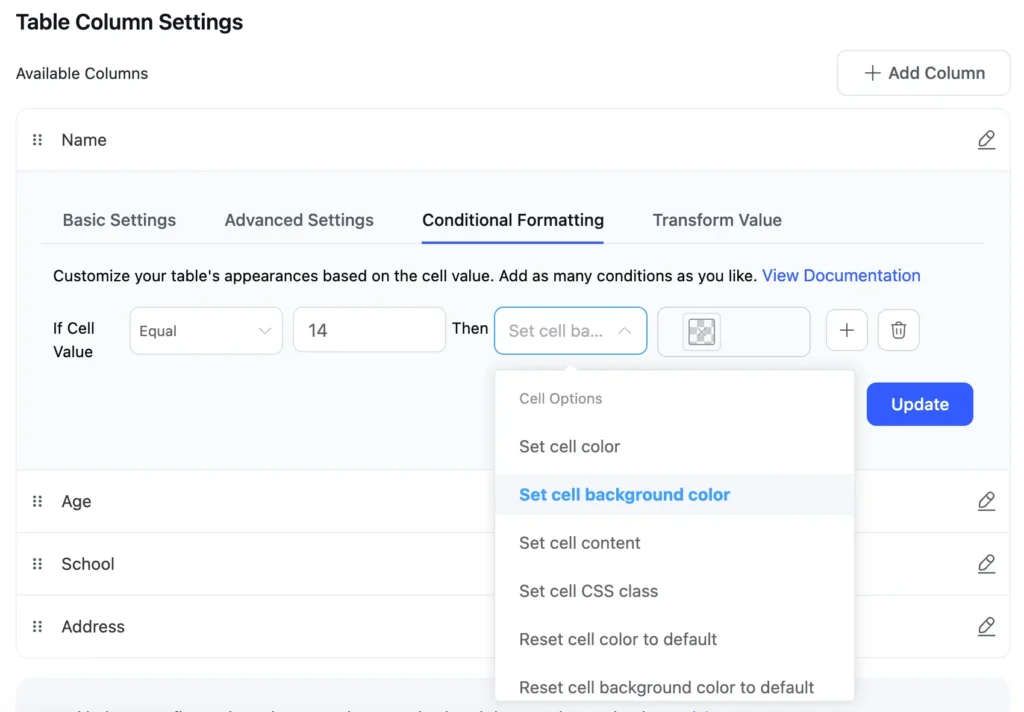
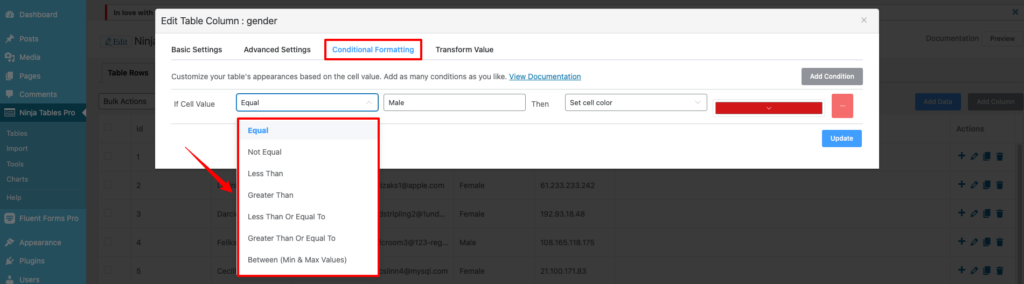
- Click on the Conditional Formatting tab. When you click the Add Condition button, multiple options to set conditions will appear with-
If Cell Value [Select] [Enter Value] Then [Select] [Enter Value].
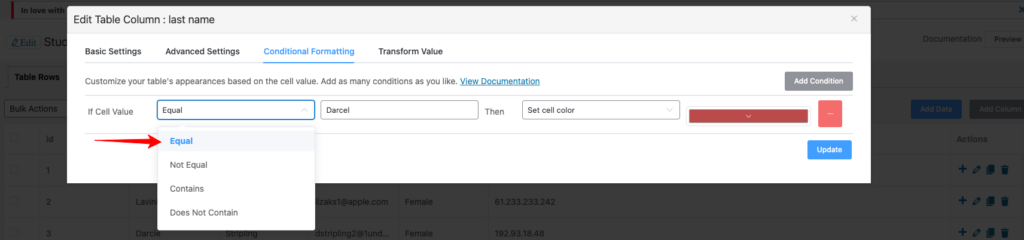
- Let’s set the conditions differently as Equal, Not Equal, Contains, and Does not Contain. Then, you need to set some trigger values and then set options for which conditions will be applied.
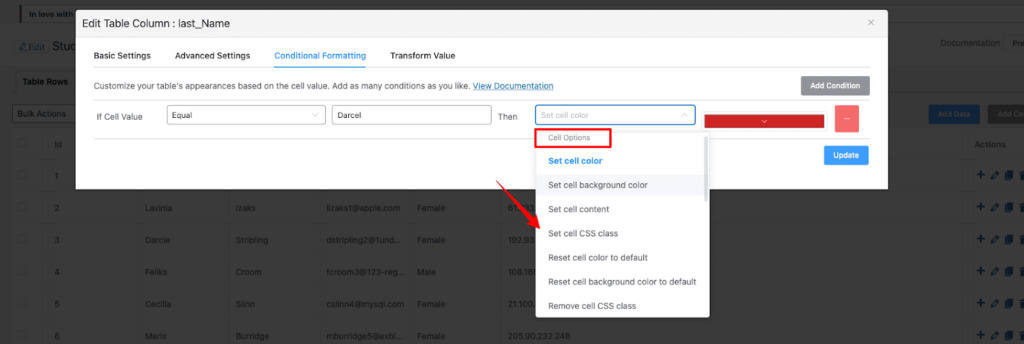
- From the 3rd box, you can set Cell Options, Row Options, and Column Options and apply the desired condition.
-If you select Cell Options, the condition will only apply to cells
-If you select Row Options, the condition will apply to the corresponding row
-And if you select Column Options, the conditions will change the corresponding column.

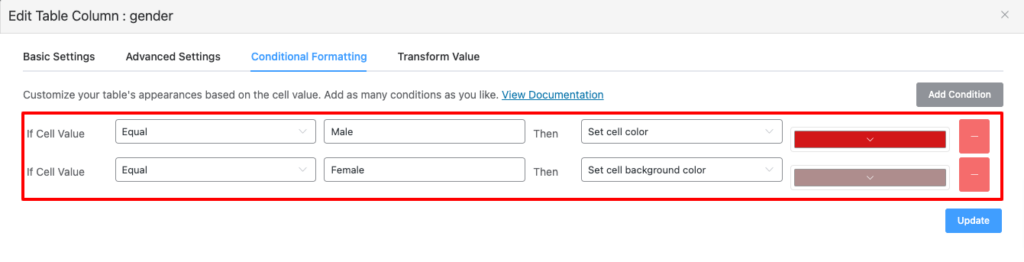
Let’s see how the conditions work.
- In this case, If Cell Value is Equal to Male, Then the Set cell color to red.
- Also, If Cell Value is Equal to Female, Then the Set cell background color to brown.
- Lastly, click on the Update button when the configuration is done.
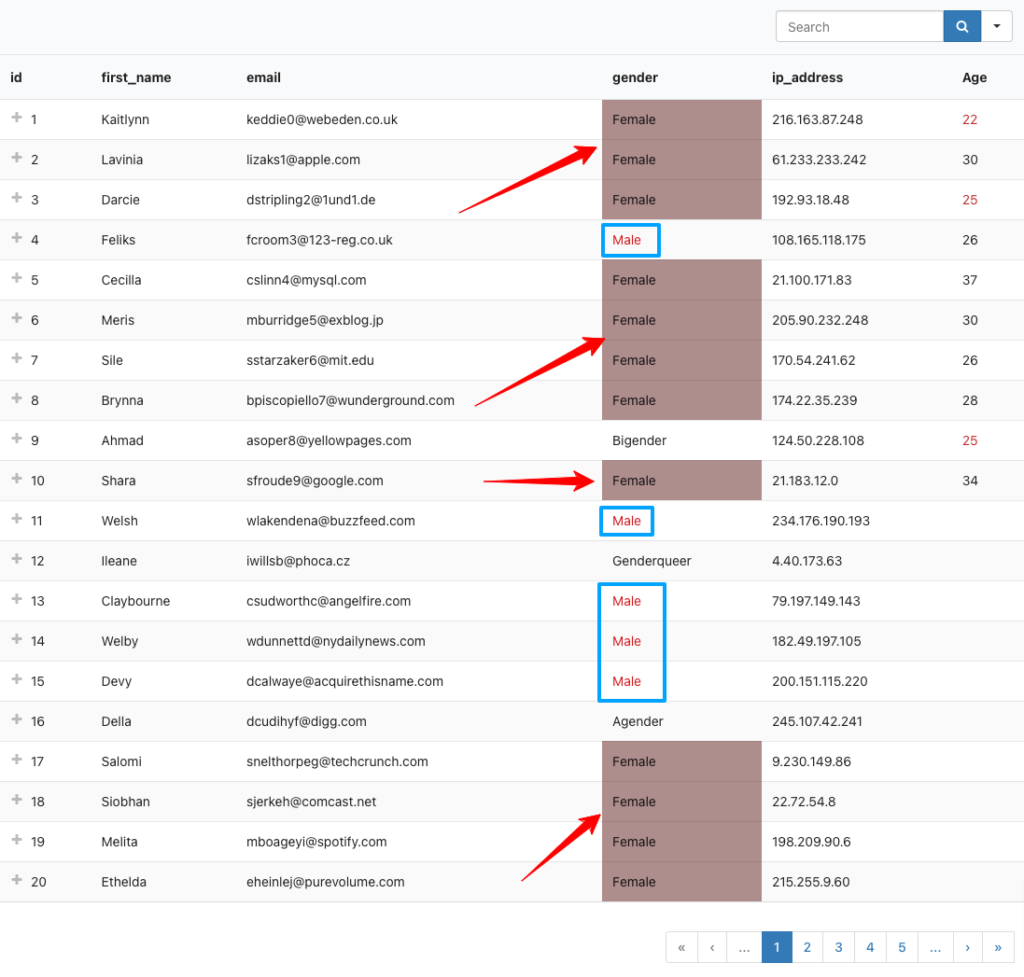
- After applying Conditional Formatting, the table will look like the below screenshot –
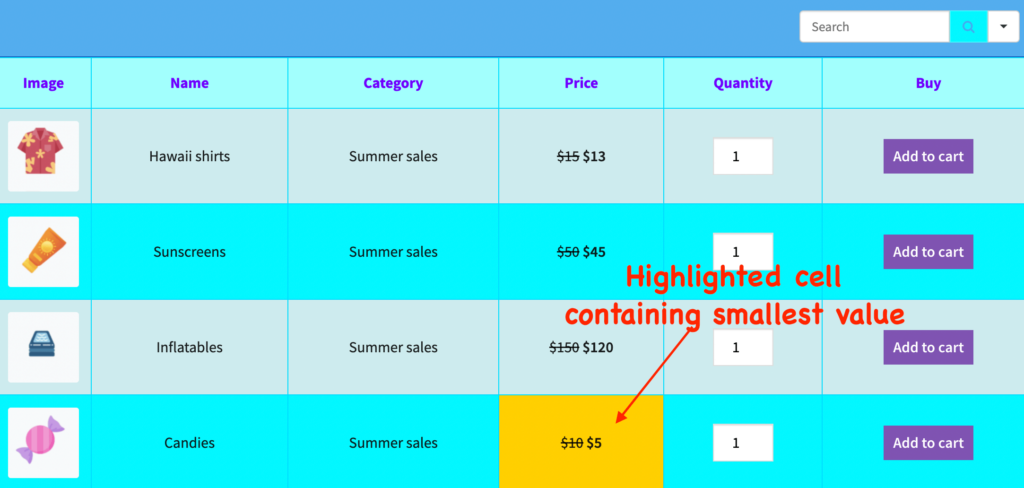
Highlight Table Cells With Conditions #
Say you want your customers to pay attention to a specific product price.
You can highlight the cell where the price is mentioned.
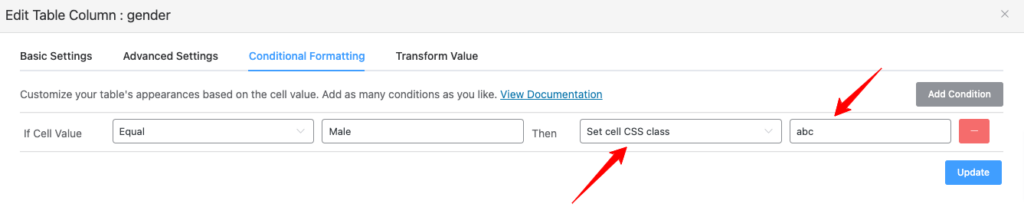
Set Cell CSS class #
Let’s discuss another cell option, the Set Cell CSS class.
- First, set the Cell option as Set cell CSS class and enter a value name as abc (it will be a CSS class name).
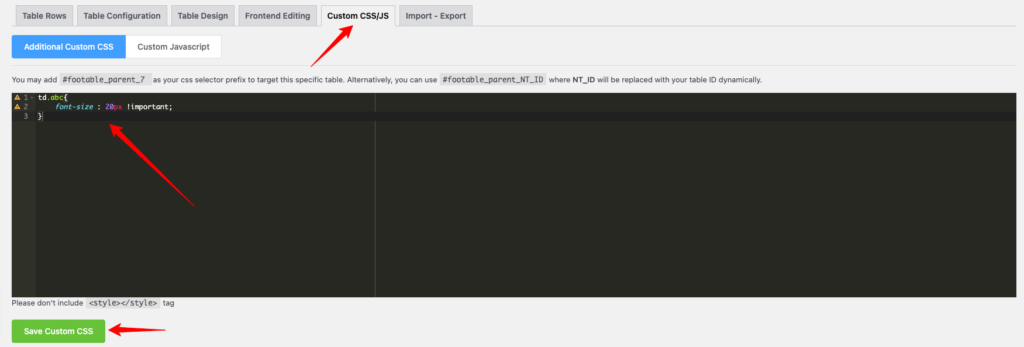
- Then, navigate to the table’s Custom CSS/JS tab and write your CSS style. (It will apply to all of the Male values since it’s the gender column)
- Click on the Save Custom CSS button after you are done.
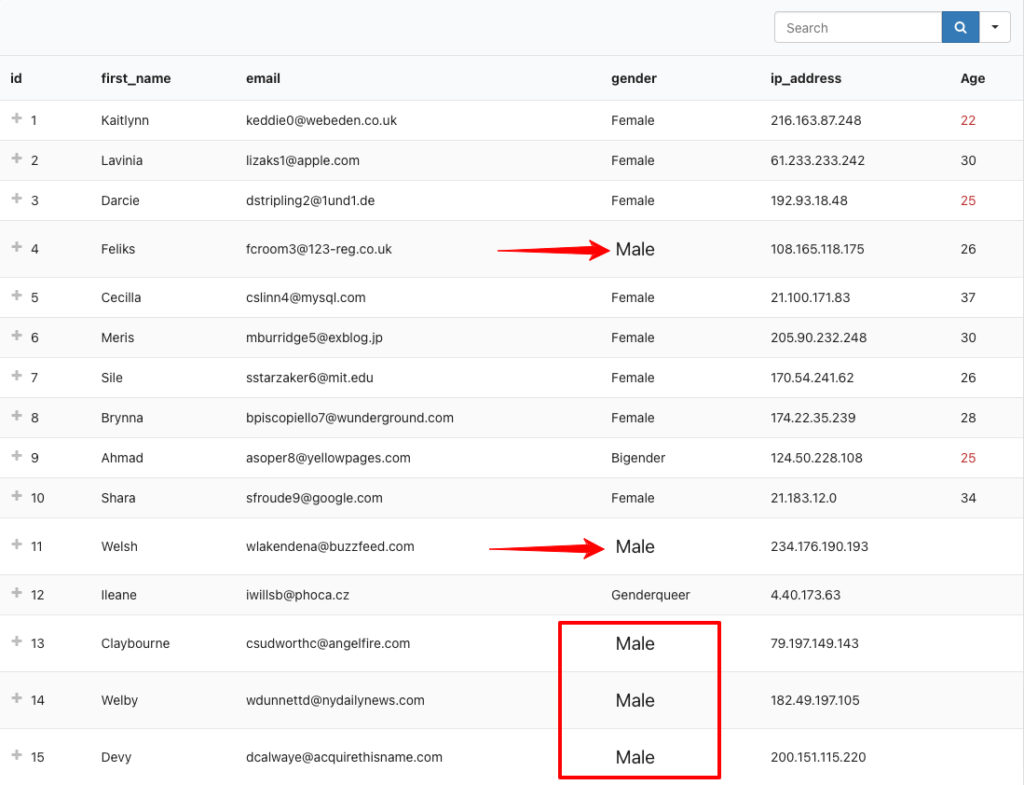
- See the preview of the table after adding the CSS.
Conditional Formatting for Numeric Value Data #
When you select Numeric Value as a Data Type in column settings, there will be more options in Cell Value.
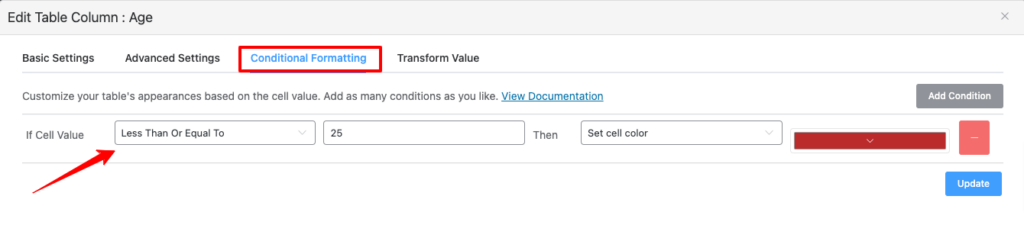
- In the Age Column, if the Cell Value is Less Than Or Equal To 25, Then the Set cell color (cell options) to maroon.
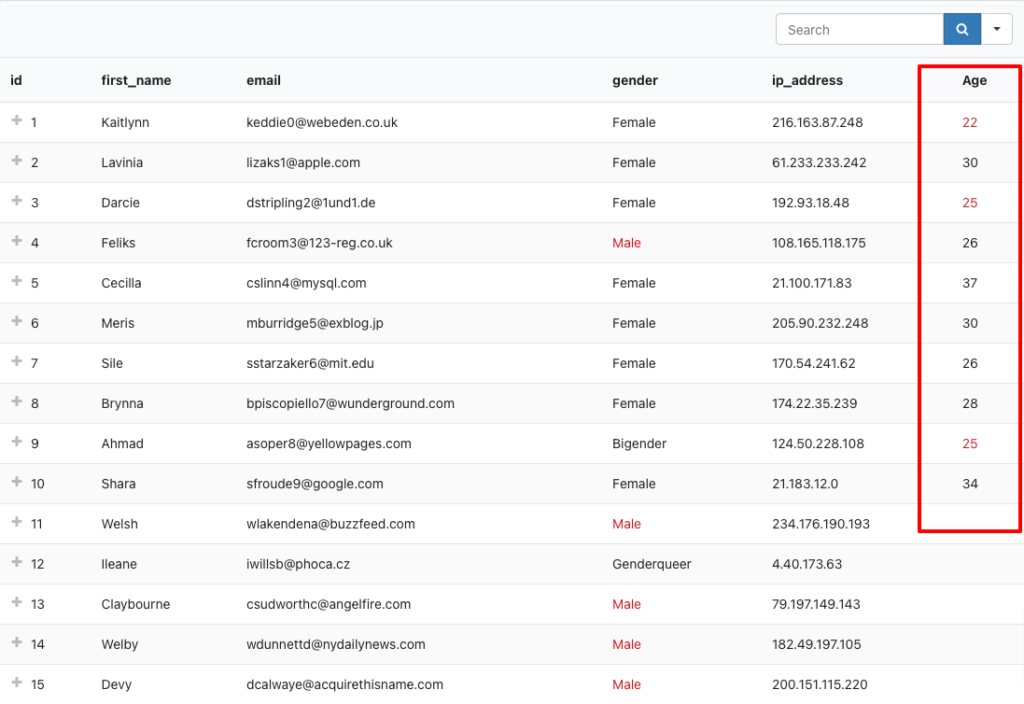
- See how the conditions work in a column with numeric data. All cell data with a value less than or equal to 25 are colored in maroon.
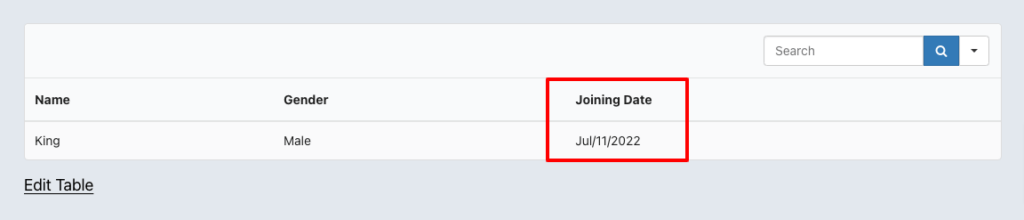
Conditional Formatting in Date Field #
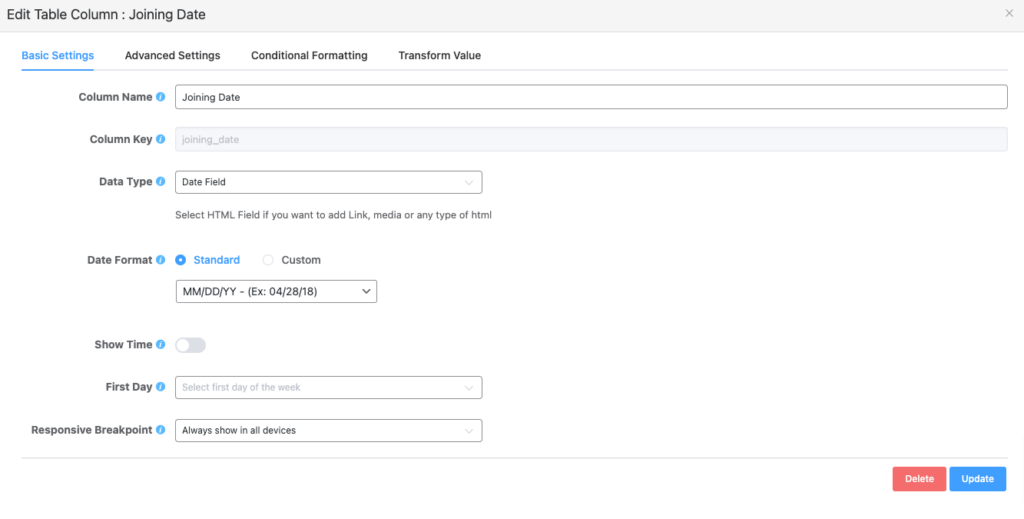
When you select Date Field as a Data Type in column settings, there will be more options in Cell Value.
Also, you need to take care of your Date Format in column settings because you will get the list of Example Usage in Conditional Formatting according to your chosen Date Format.
- Here is the list of Example Usage according to the chosen Date Format.
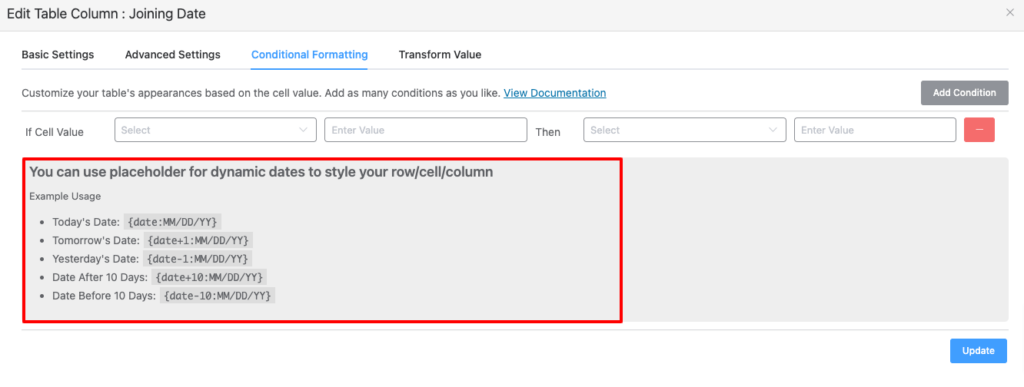
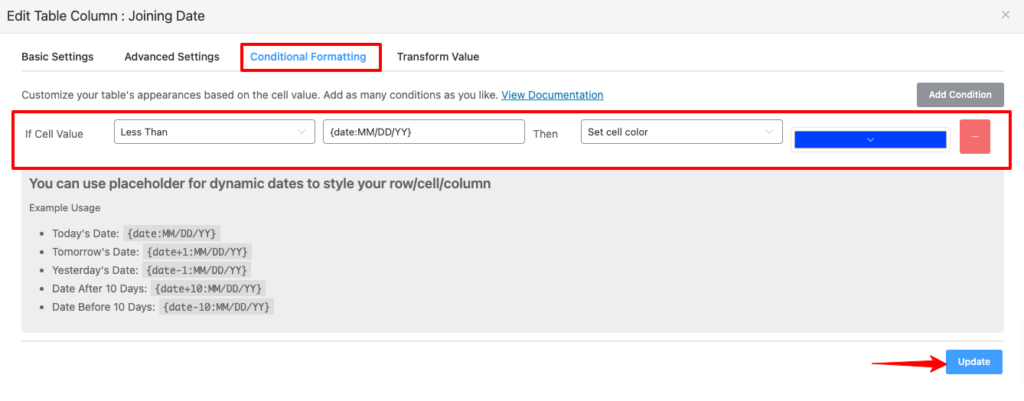
- Here, if the Cell Value is Less Than Today’s Date {date: MM/DD/YY} (this date format is taken from the below Example usage list), Then the Set cell color will be changed to Blue.
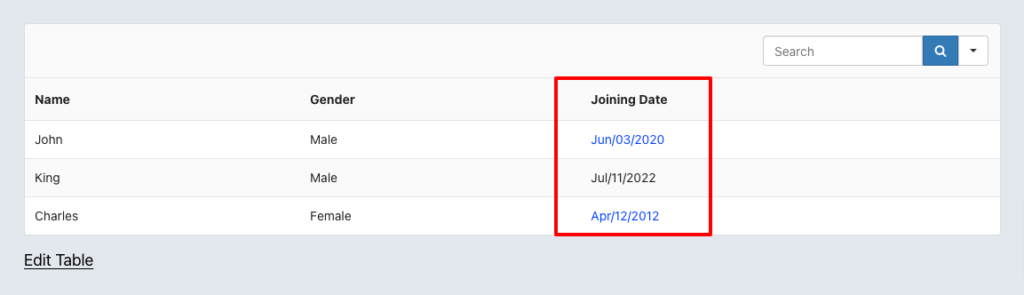
- See the preview. The data with less than today’s date are blue.
Set Row CSS class #
Let’s talk about another row option, the Set row CSS class, and how it works.
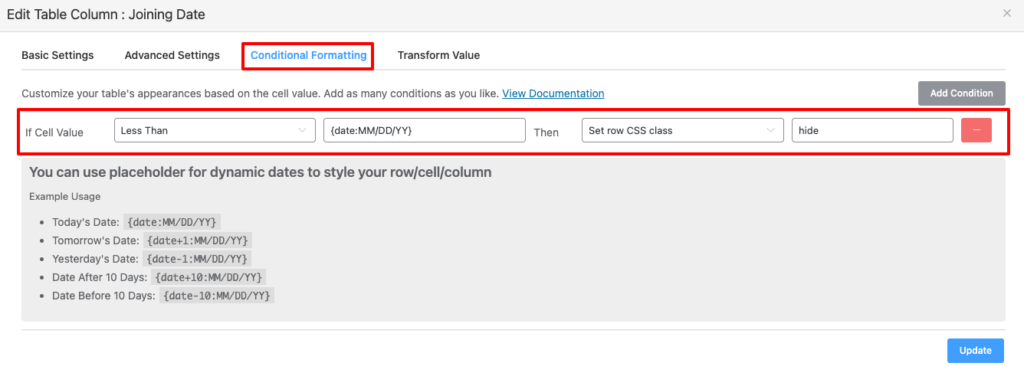
- First, set the Row option as Set row CSS class and enter a value name as hide (it will be a CSS class name).
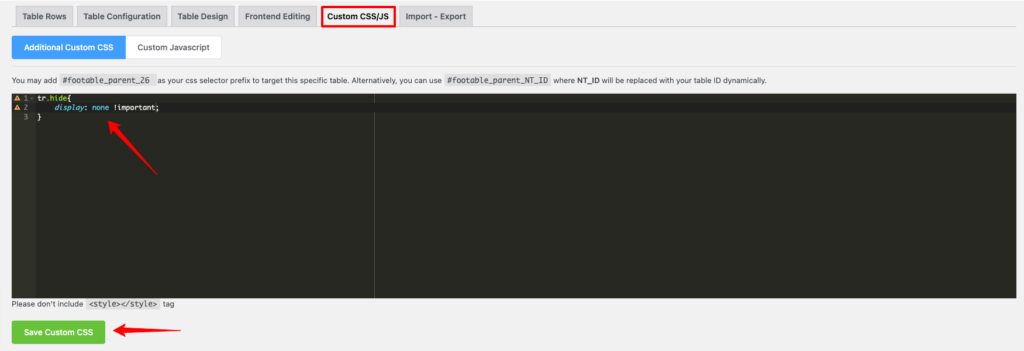
- Then, navigate to the table’s Custom CSS/JS tab and write your CSS style; it will apply to all of the dates which are less than Today’s Date values.
- At last, click on the Save Custom CSS button after you are done.
- Here in the preview, you can see the rest of the dates that are less than today’s date have been hidden here.
That’s how to set up Conditional Column Formatting in Tables!


This is awesome, but can you please ADD an example that shows how to display a Font-Awesome ICON instead of a color or instead of Text size changes?
Hello Dan. This is Nusrat from Ninja Tables.
Glad you liked this doc. I’m afraid Ninja Tables does not support Font-Awesome yet.
But you can pick CDN from here- https://icons8.com/icons/set/foo and use it in Ninja Tables.
We’ll keep your requirement in mind. Thank you!
Hi, when I use HTML, my external links cannot be set to open in new tabs.
how to set up?thanks
Hi Li,
Thanks for reaching out. When you use HTML you can easily add ‘no-opener’ tag to open in new tabs. Use this below HTML tag,
You can open a support ticket from here https://wpmanageninja.com/support-tickets/ for any kind of other assistance. Our support heroes are eagerly waiting 24/7 to help you create any kind of modification on your tables.
Thanks.
Hello,
I saw your tutorial about hiding a raw.
What if we want to remove entirely the raw how to do it?
Thank you in advance
Hi. You can delete/duplicate/edit a row from the backend in both Ninja Tables modules (Basic & Advanced).
For advanced mode, find the “Action” column in the backend- https://ninjatables.com/docs/create-your-first-table/#add-duplicate-delete-rows
For the basic drag & drop, click “Manage Cells”- https://ninjatables.com/docs/manage-cells-in-ninja-tables-drag-and-drop/#row-customization
Hi!,
I am trying to wrap this text “Round Trip price” which is Sticky Header but it only shows me on mobile “Trip Price”. Can you tell me how can i solve this?
Thanks,
George
Hi George. I’m afraid I can’t quite understand your query. Please open a support ticket and send us the details of your problem. We’ll see to it ASAP.
Is it possible to copy these conditional formatting rules from table to table or column to column?
HI Nick,
Yes, it it possible to copy these conditional formatting rules from table to table. Export the JSON file and import. Check this blog for better understanding: https://ninjatables.com/how-to-export-import-data-table-in-wordpress/
Thanks.
Is it possible to set a condition based on another column’s value?
Hi Ivan. Conditions can work for other column, yes. Please let us know in your comment or contact Support if you’re facing any issue.
It would be great to add a hide cell or row option. Thanks
Hi Ron, Thank you for reaching out. Thats a good suggestion. I will forward it to our R&D team. For instance you can hide columns of your tables. See this: https://ninjatables.com/docs/basic-settings/
And our support team will be helpful for your query now. Contact: https://wpmanageninja.com/support-tickets/.
Thanks.