
From the admin dashboard (left sidebar), go to the Tools option from the Ninja Tables plugin. You’ll see the “Tools and Settings” tab where you can customize the table’s global appearance, permissions, etc.
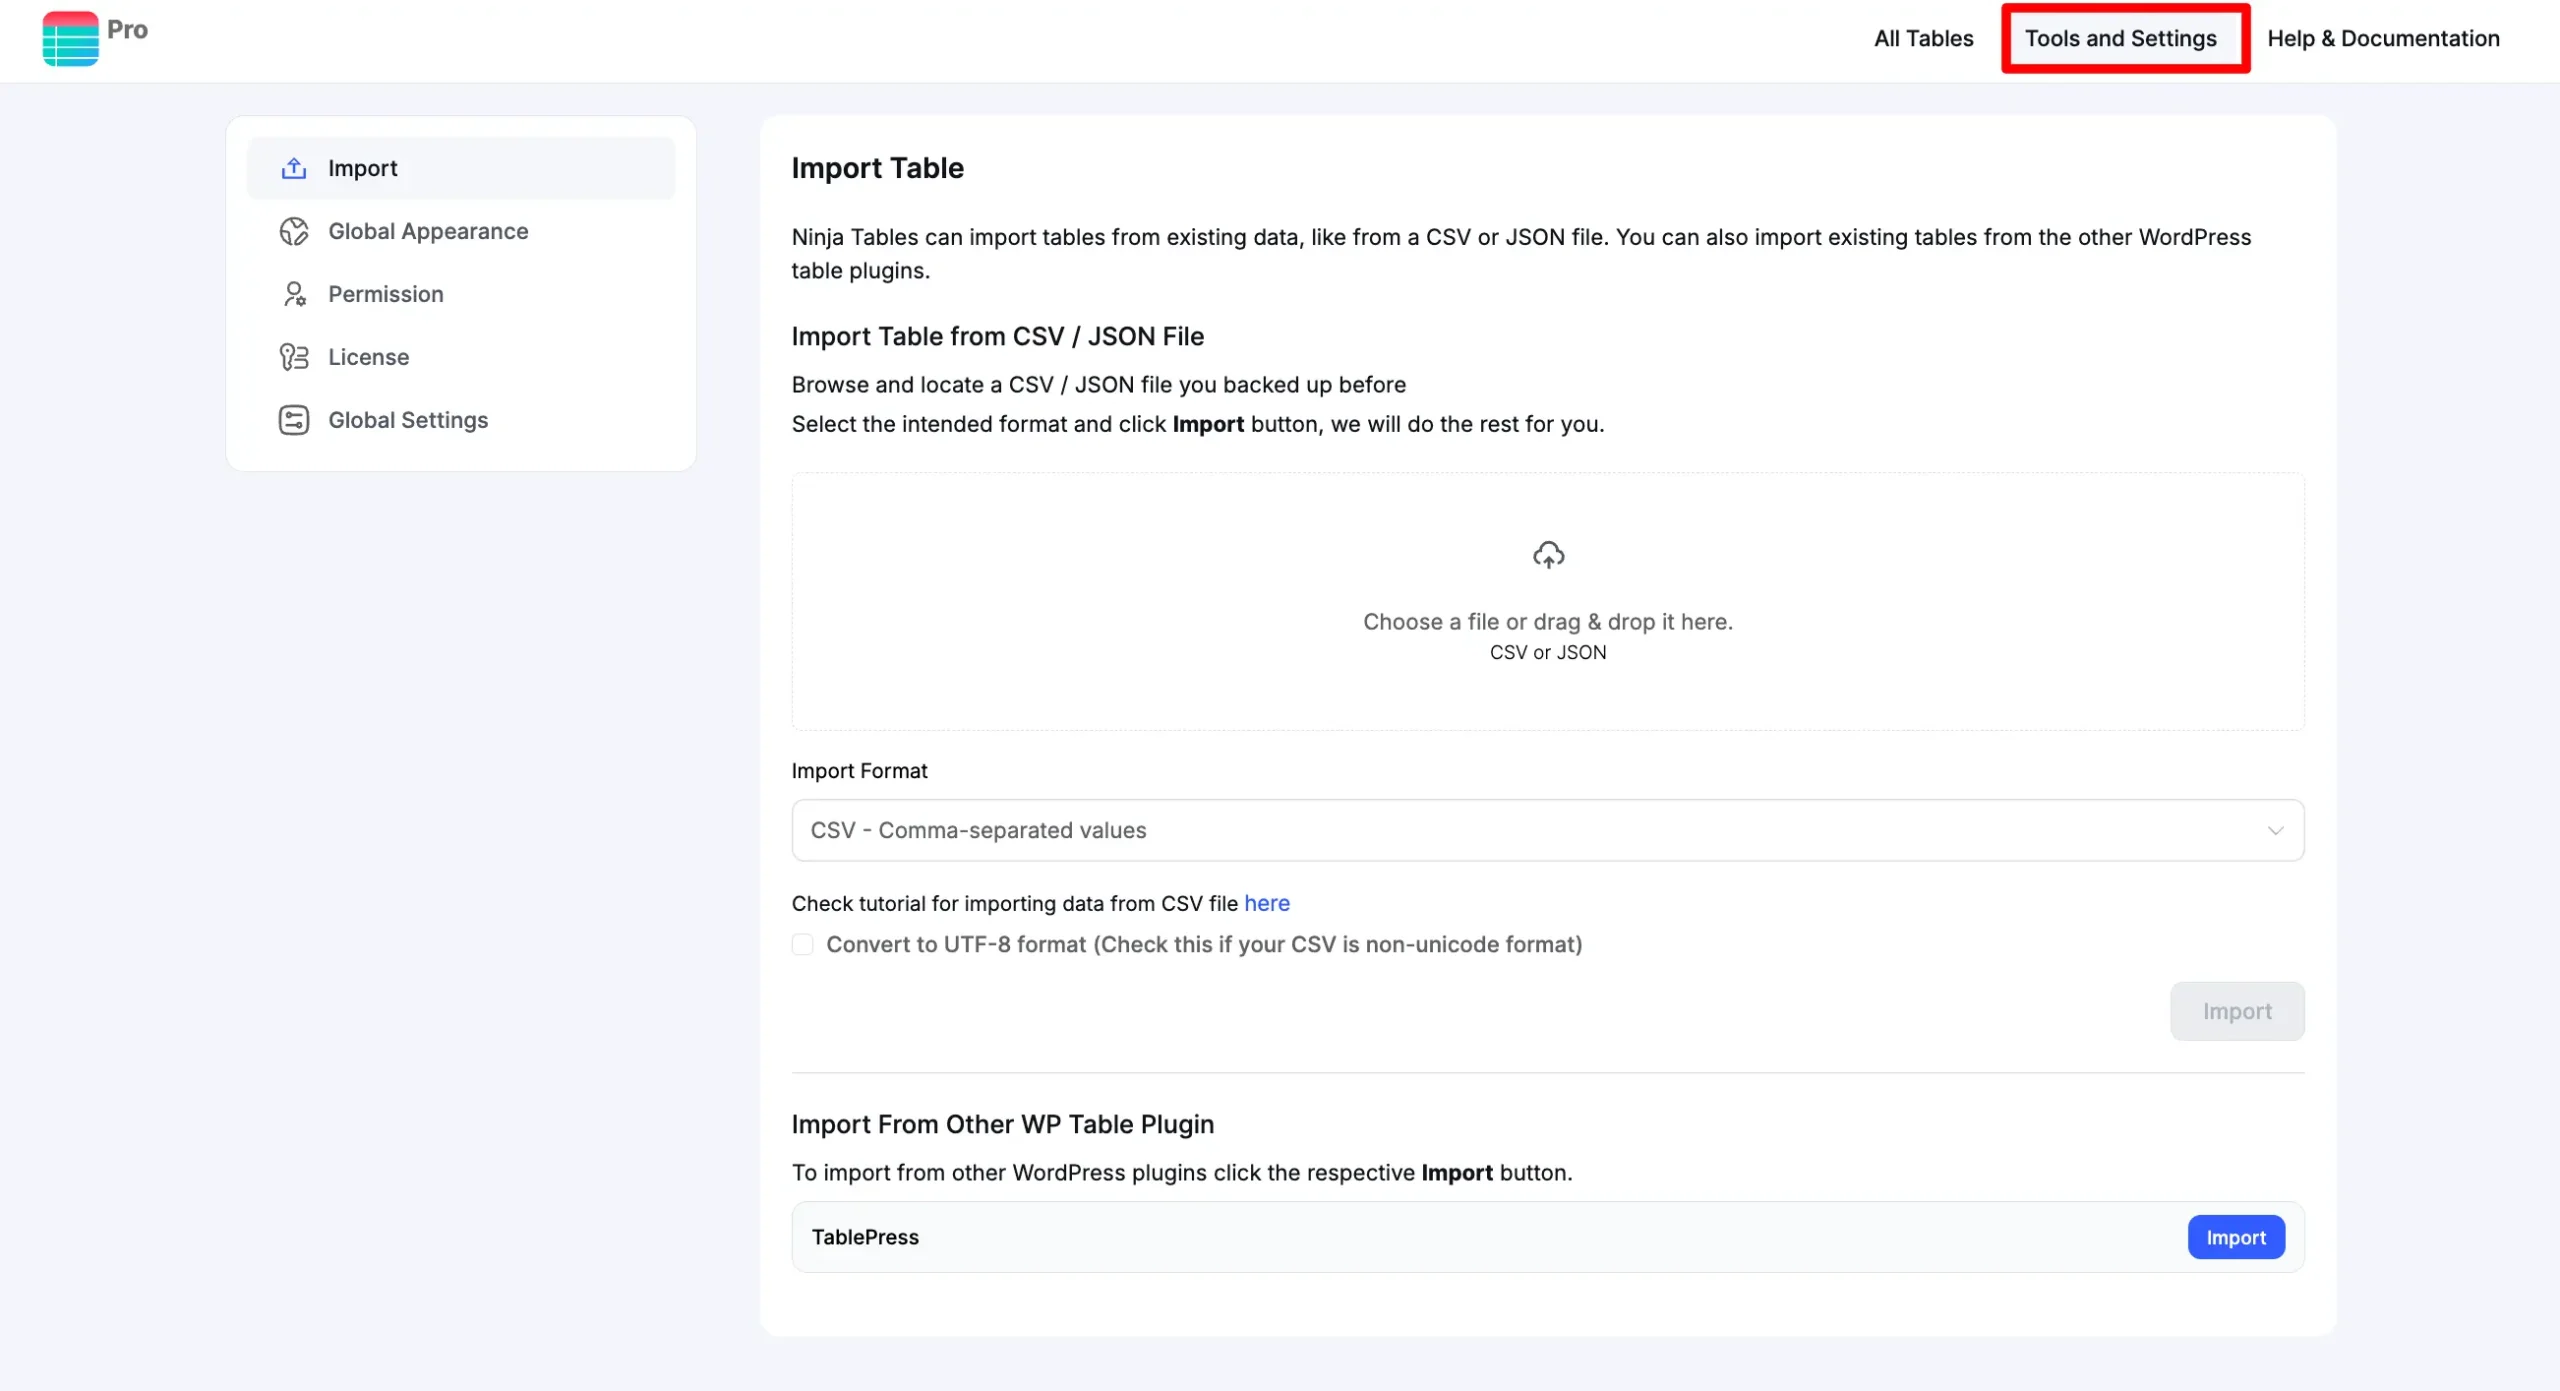
Import #
Ninja Tables can import tables from existing data, like from a CSV or JSON file. You can also import existing tables from the other WordPress table plugins. Check the link to learn more about how to Import.
Global Appearance #
The newly generated tables will use the following settings. You may, of course, adjust the appearance settings for each level of the table.
- The first feature is the Default Styling Library, which manages the library you must work with. Three different libraries are available in this segment, such as Semantic UI, Bootstrap 4 & Bootstrap 3. Each of these libraries has various components once you select one of them.
- The second feature is the Default Table Styles option which offers several functions like Single Line Cells, Fixed Layout, Hover Rows, Bordered Table, and many more. Check these options according to your styling needs. Hover rows, Striped rows, and Vertically centered table cell contents are all checked at the beginning of the newly constructed table.
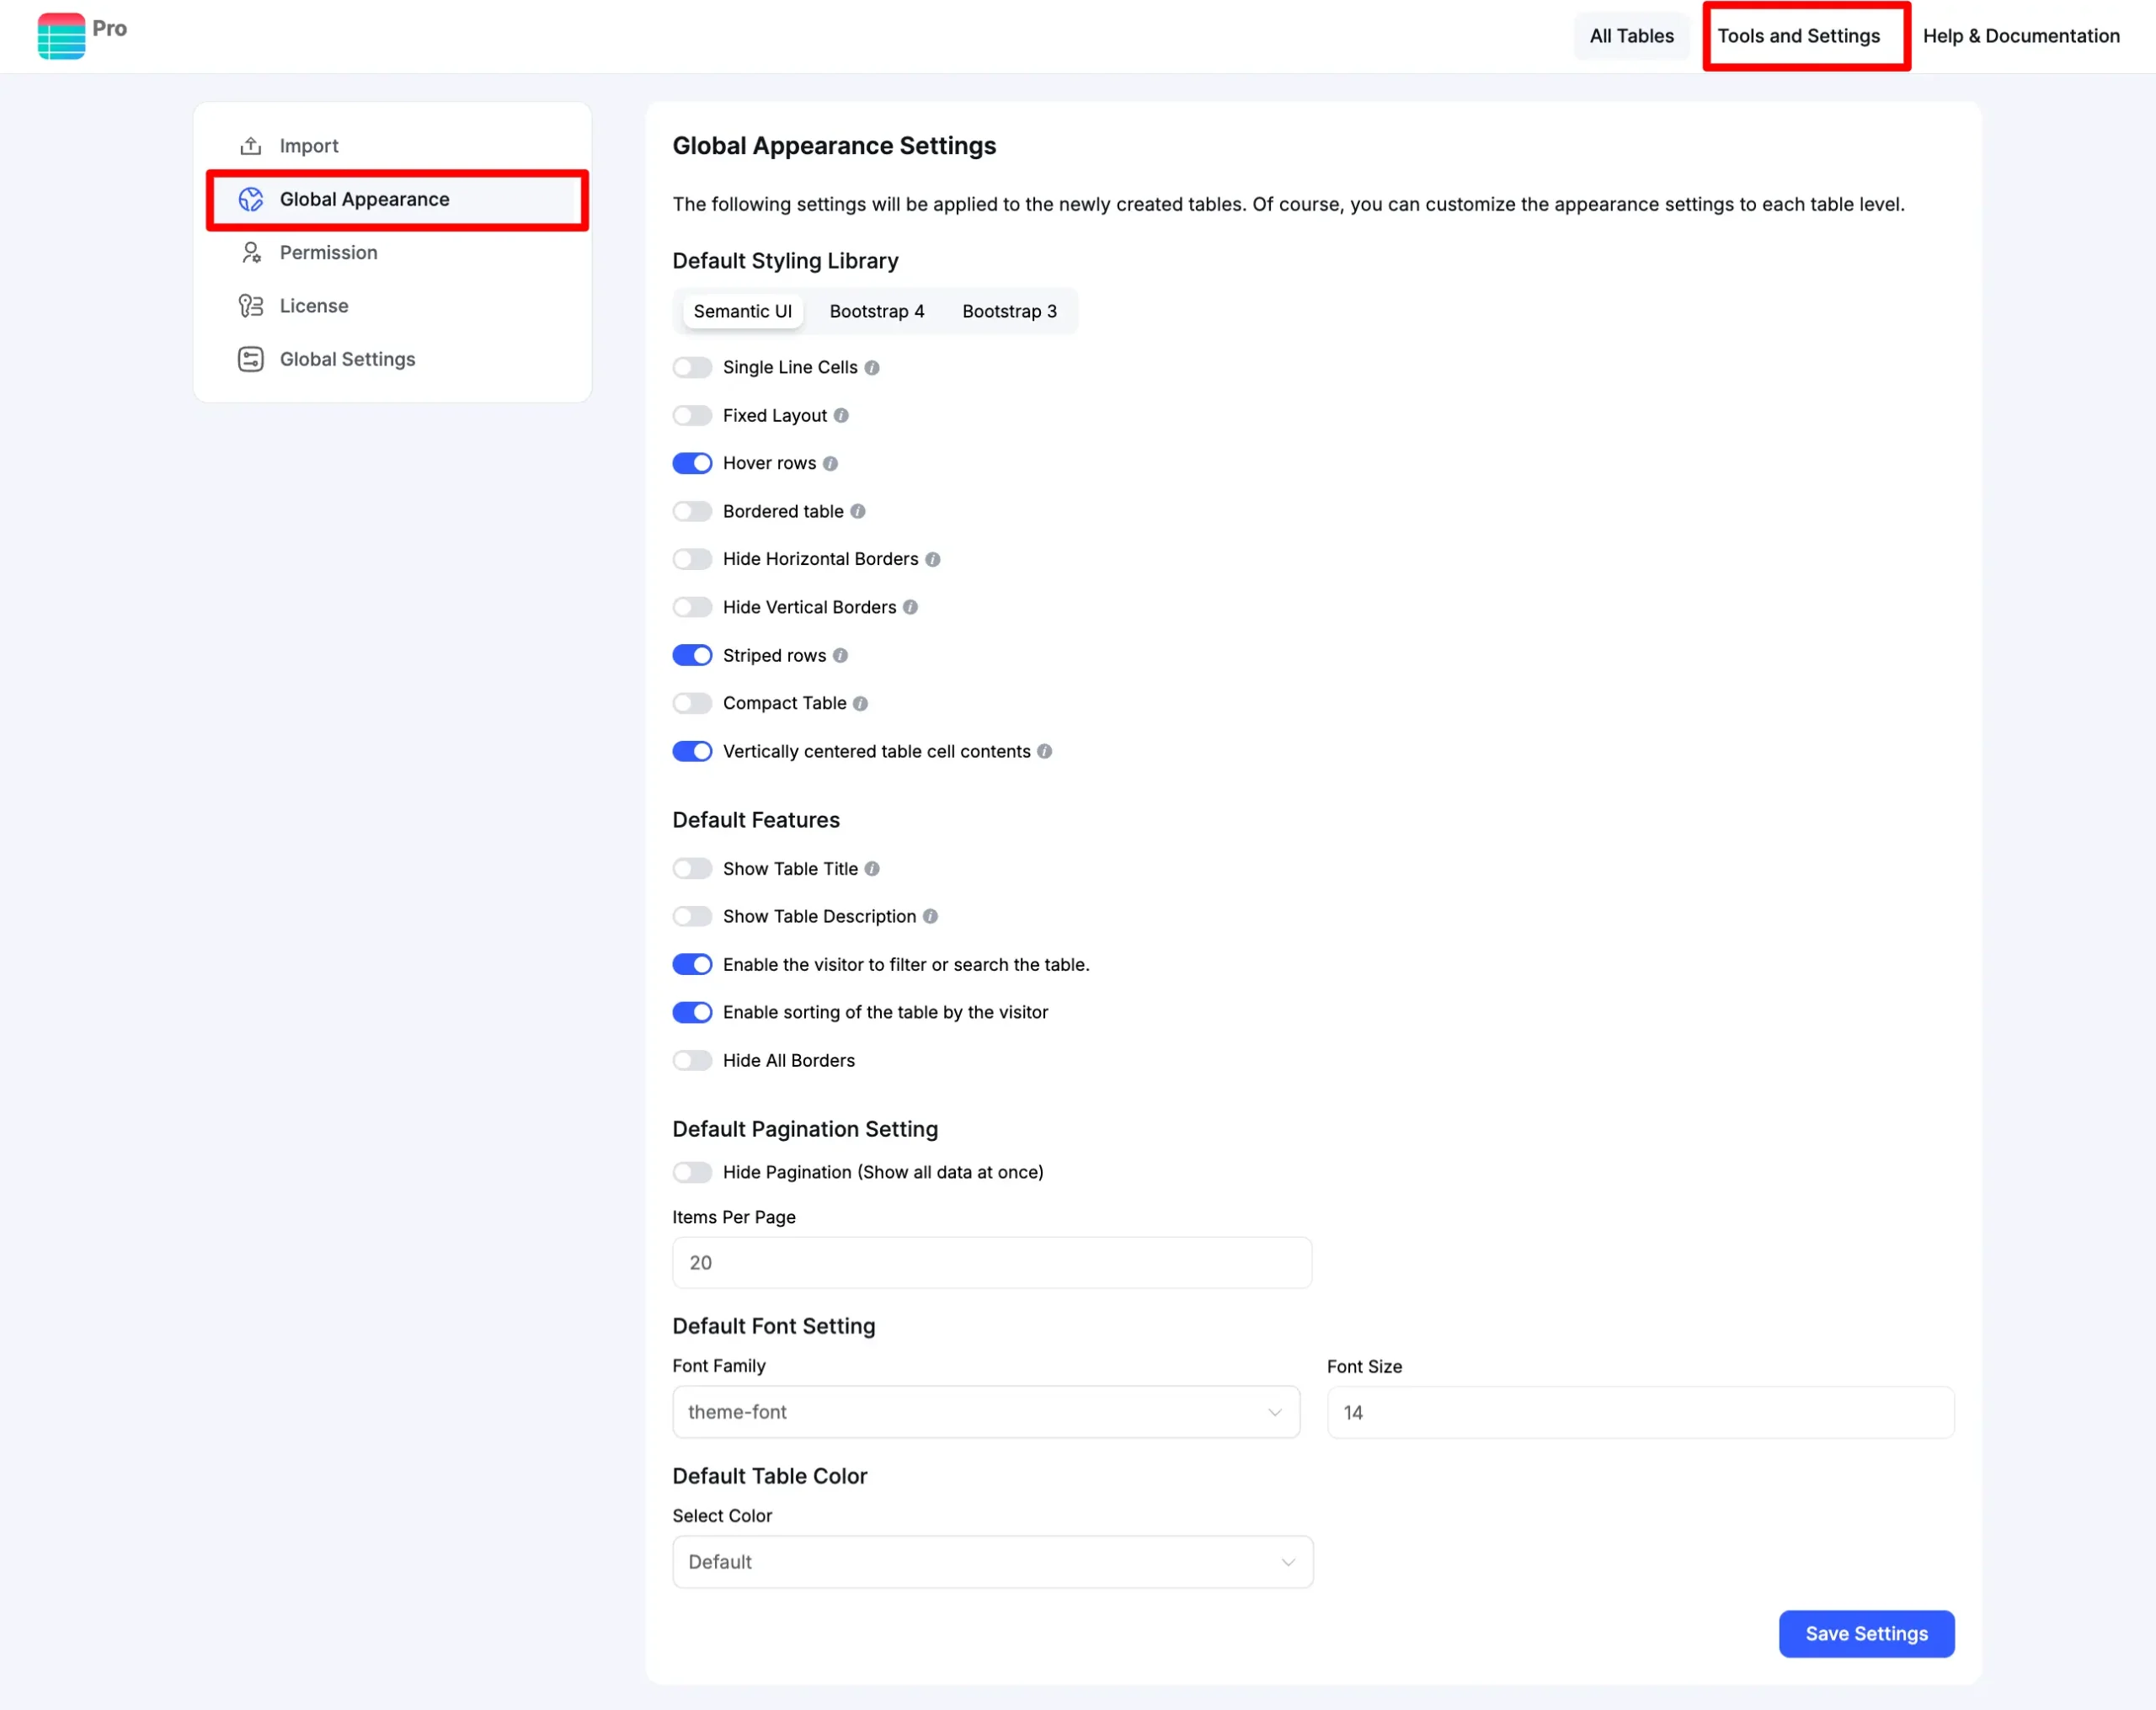
- The other function is the Default Features which defines many components, all you have to do is check the one you need for setting your table. Enable the visitor to filter or search the table and enable sorting of the table by the visitor; these two default features are checked at the beginning.
- You can style your table in 13 different pre-defined color schemes. By default, there will be a default table color at the beginning.
Other than predefined colors, Ninja Tables has custom table color options in the “Table Design” tab.
- In Default Pagination Setting, you can select how many items you want to show per page. You can also disable pagination here.
- Default Font Setting feature allows users to change the Table’s Font Family & Font Size according to their requirements.
- Click on the Update button when you are done!
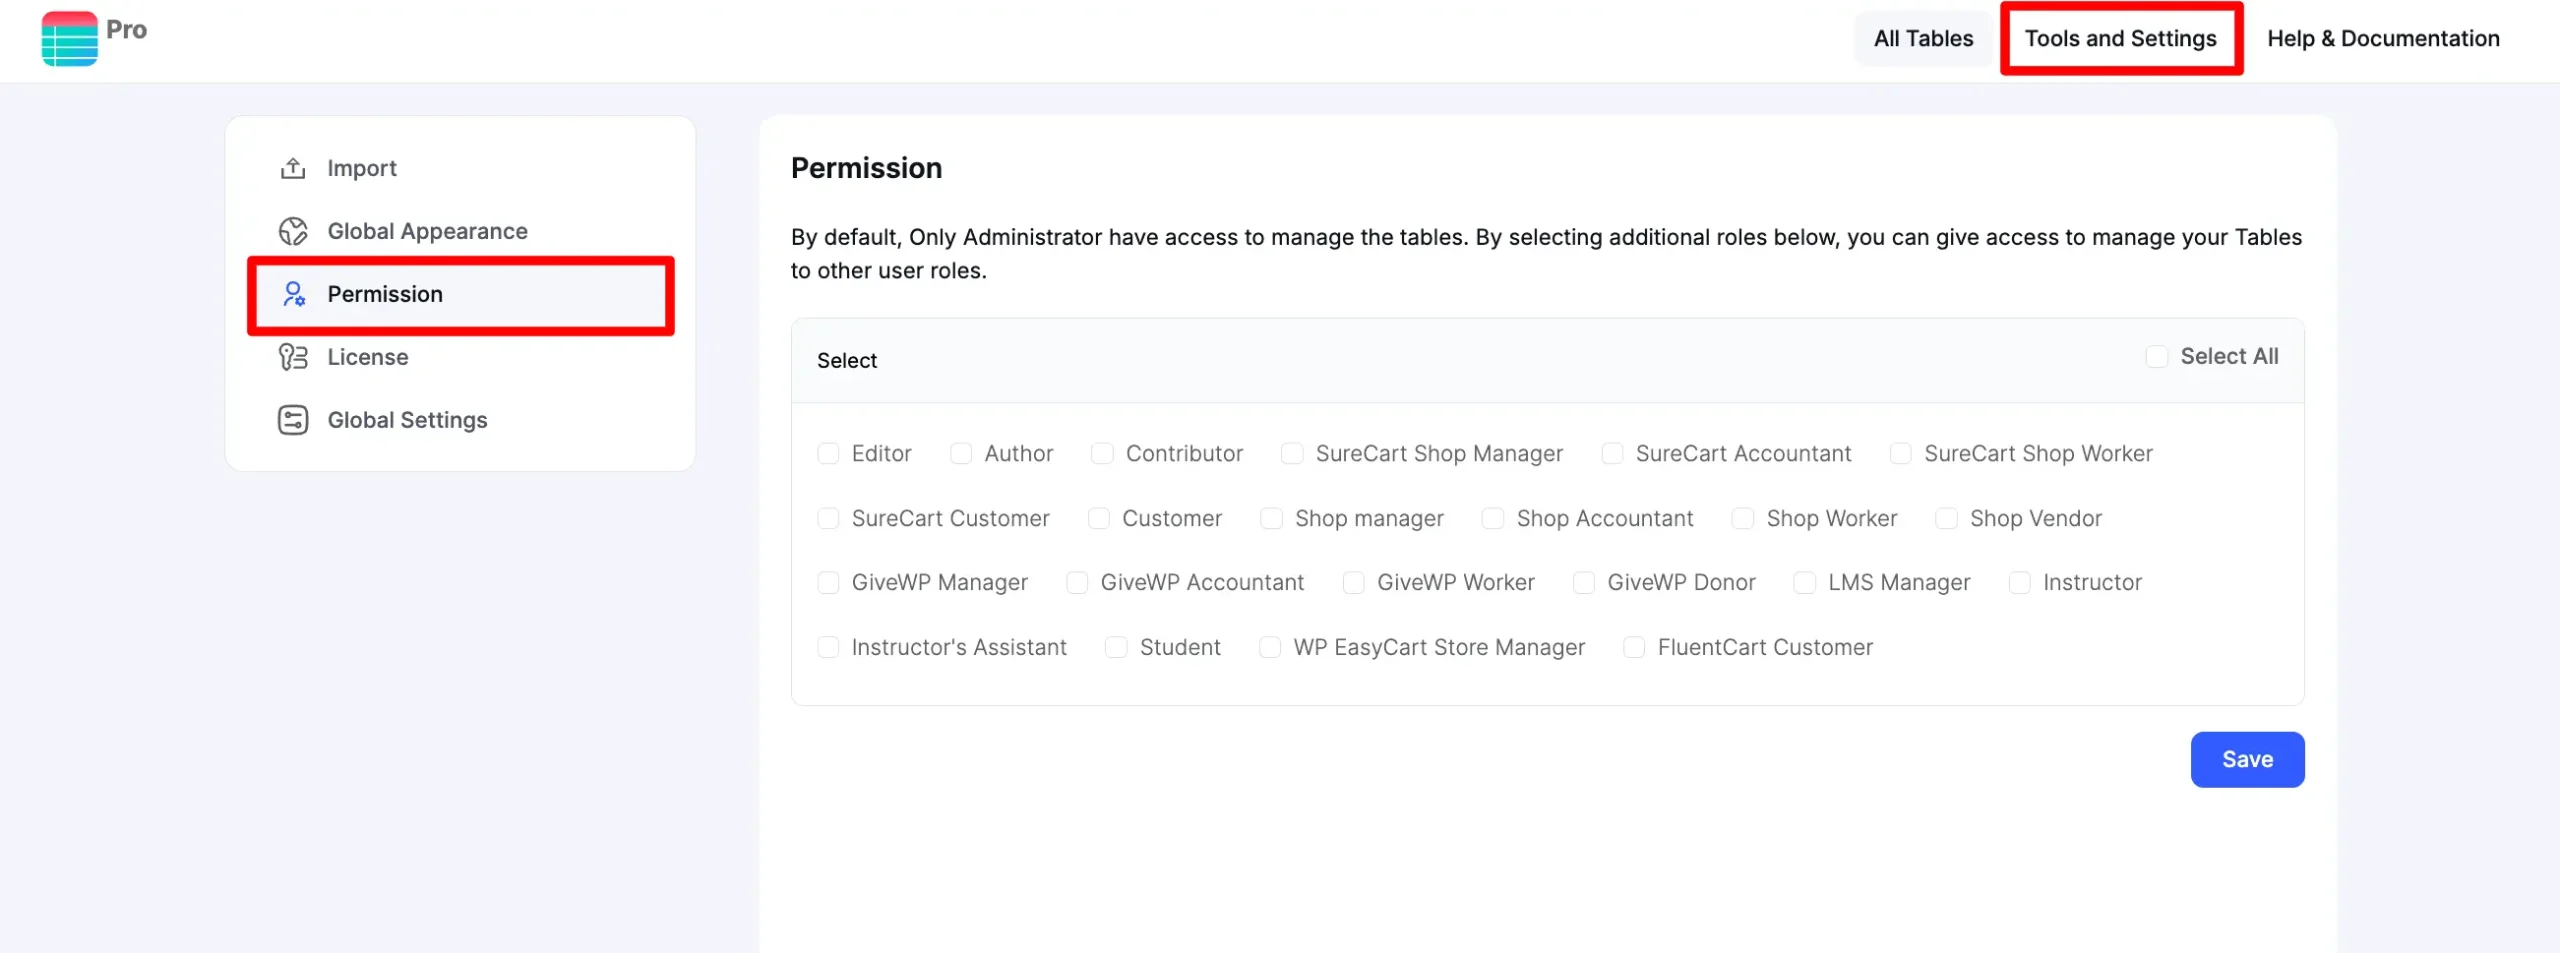
Permission #
By default, Only the Administrator has access to manage the tables. By selecting additional roles below, You can give access to manage your Tables to other user roles.
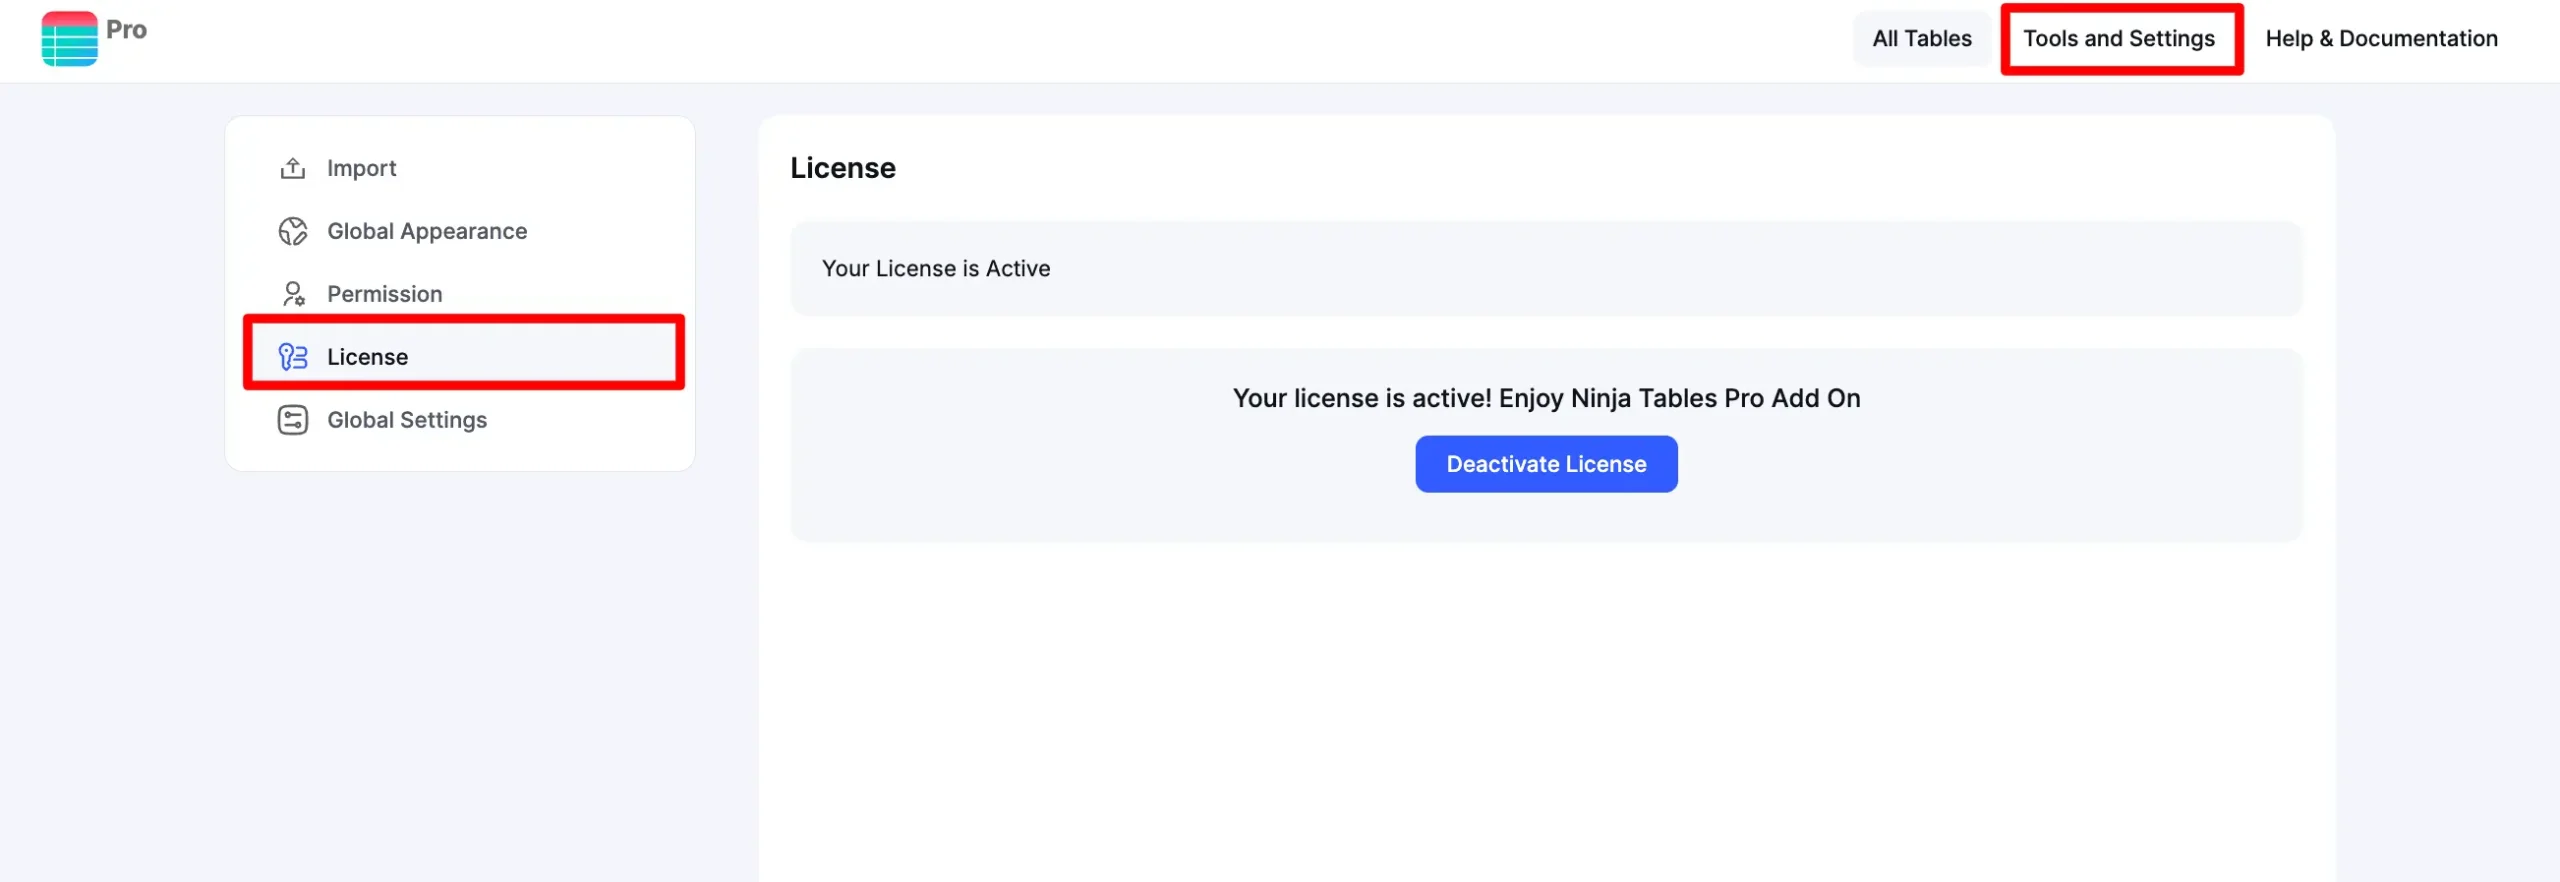
License #
For the licensing option to appear in your tools and settings, you must install Ninja Table Pro.
From the left sidebar, click on the License option & activate your Ninja Table Pro by providing the license key below.
📌 See How to install and activate Ninja Tables from here.
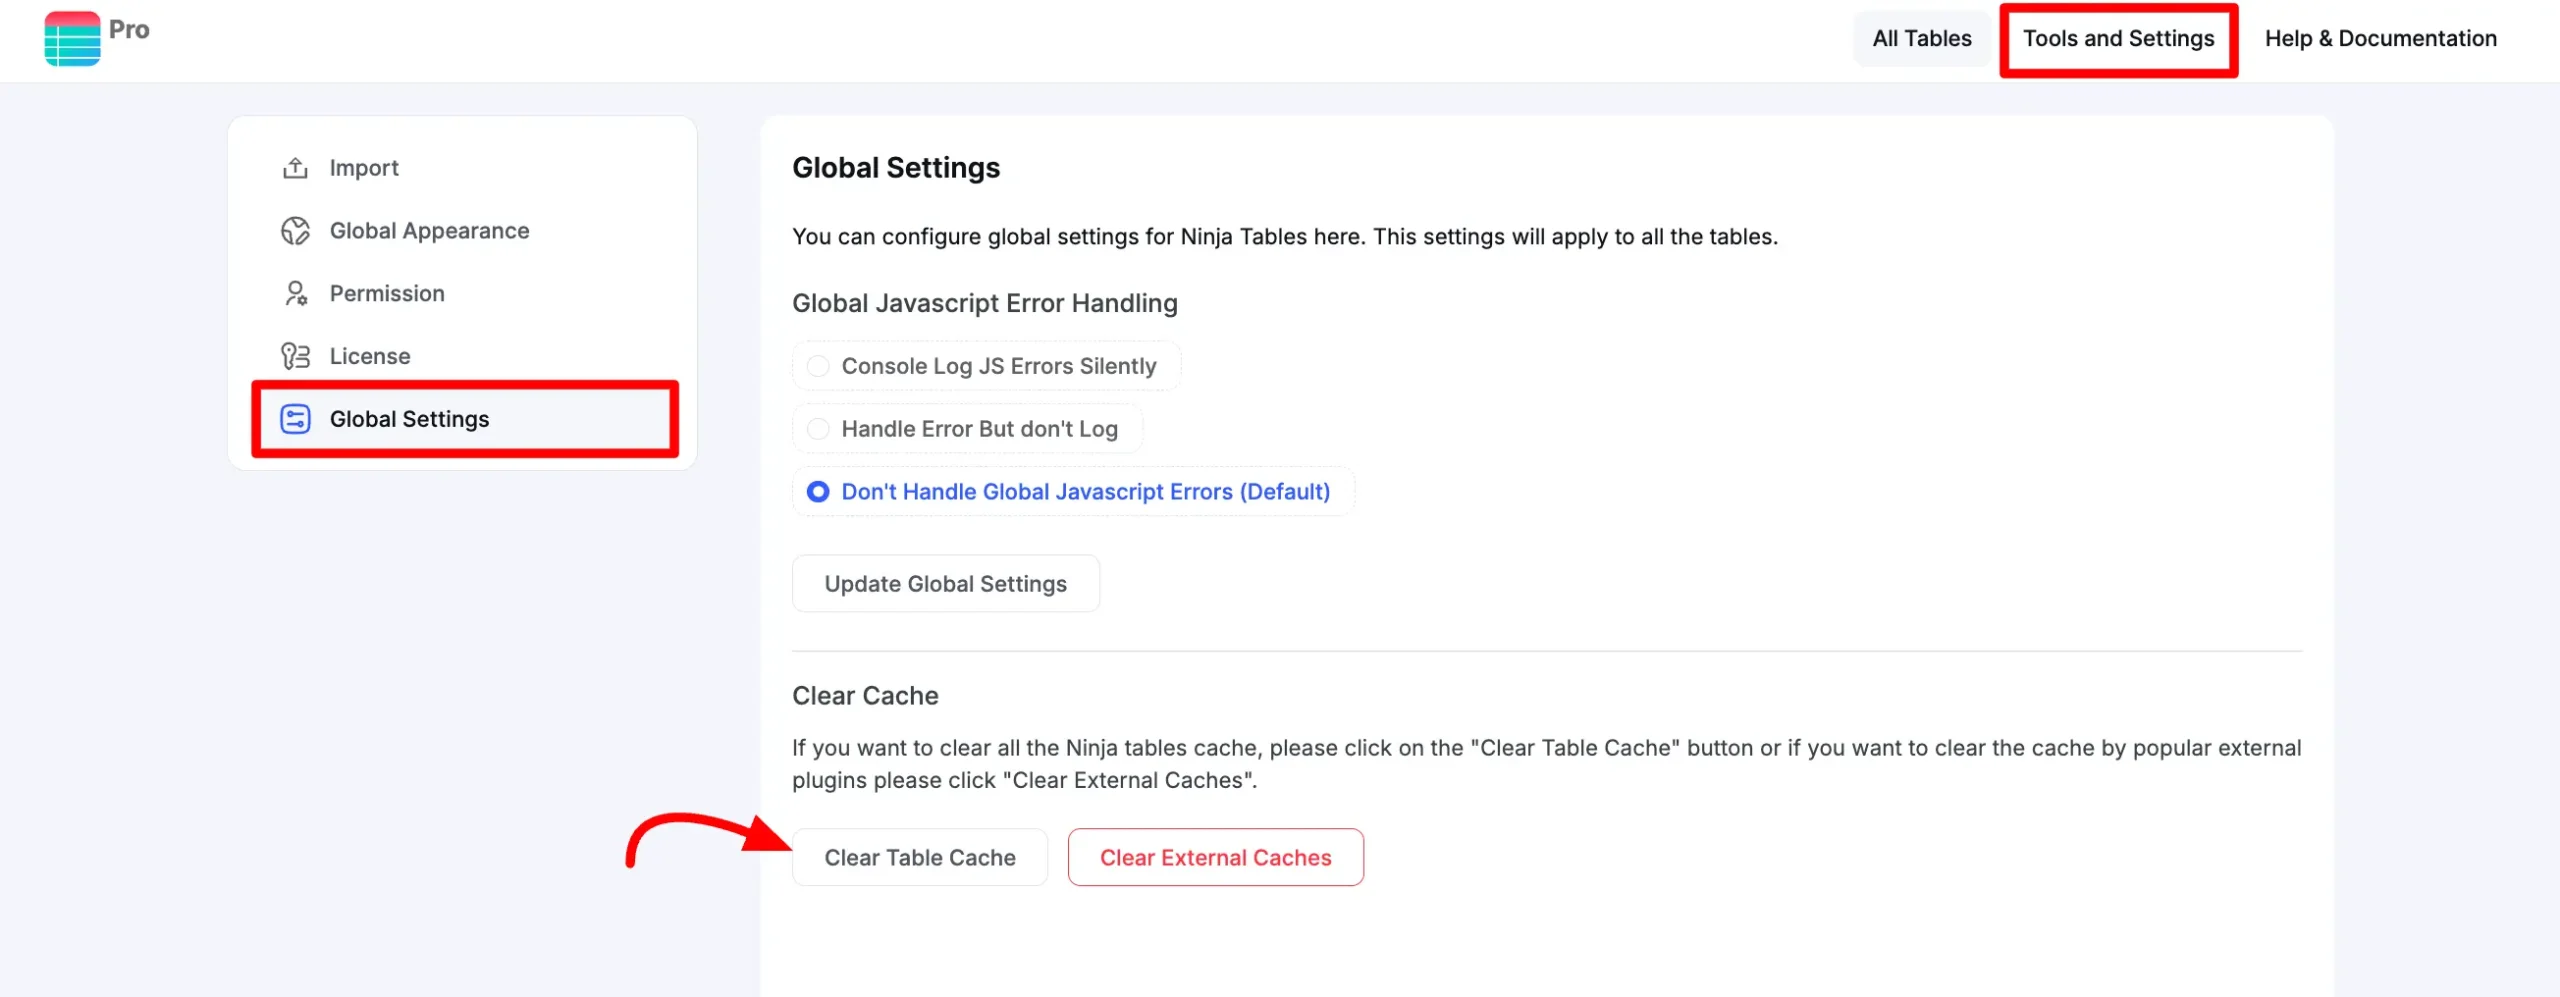
Global Settings #
From here, you can clear the table cache or handle Javascript errors.
Clear Table Cache #
If you want to clear all the Ninja Tables cache, click on the Clear Table Cache button.
This is all about the Tools and settings of Ninja Tables.


Hi, this is a great plugin, we have been using it for years.
However one of the committee is having trouble printing the Ninja Tables from her iPad. Is this just a problem on her device or are you able to provide a solution?
thanks
Hello. Thank you very much for loving Ninja Tables!
We didn’t encounter any problem using iPad. It could be a caching issue. Kindly clear the cache and try again. If the problem persists, you can always contact our support team- https://wpmanageninja.com/support-tickets/#/
Uso o plugin Ninja Tables, mas hoje fui incluir umas informações na tabela e não abre, fica girando e não carrega a tabela.
Olá!
Sentimos muito pelo problema que você está enfrentando. Por favor, entre em contato com a nossa equipe de suporte através do link: https://wpmanageninja.com/support-tickets/#/ — eles poderão te ajudar diretamente com isso. 😊