
This function joins multiple neighboring cells into a single larger cell. To merge multiple cells in a row, you must give your cells a value as “#colspan#,” and then see the selected cell merge with the subsequent cells.
***Please note that this function will operate with Advanced Table (Legacy) only.
How to Merge Table Cells #
- To apply this Cell Merge feature, you have to create a table. Or you can edit any of the existing tables.
- First, select a table and find the cells you want to merge.
- Remember that when you merge columns, the cell merge option always takes the corresponding cell value into one single row.
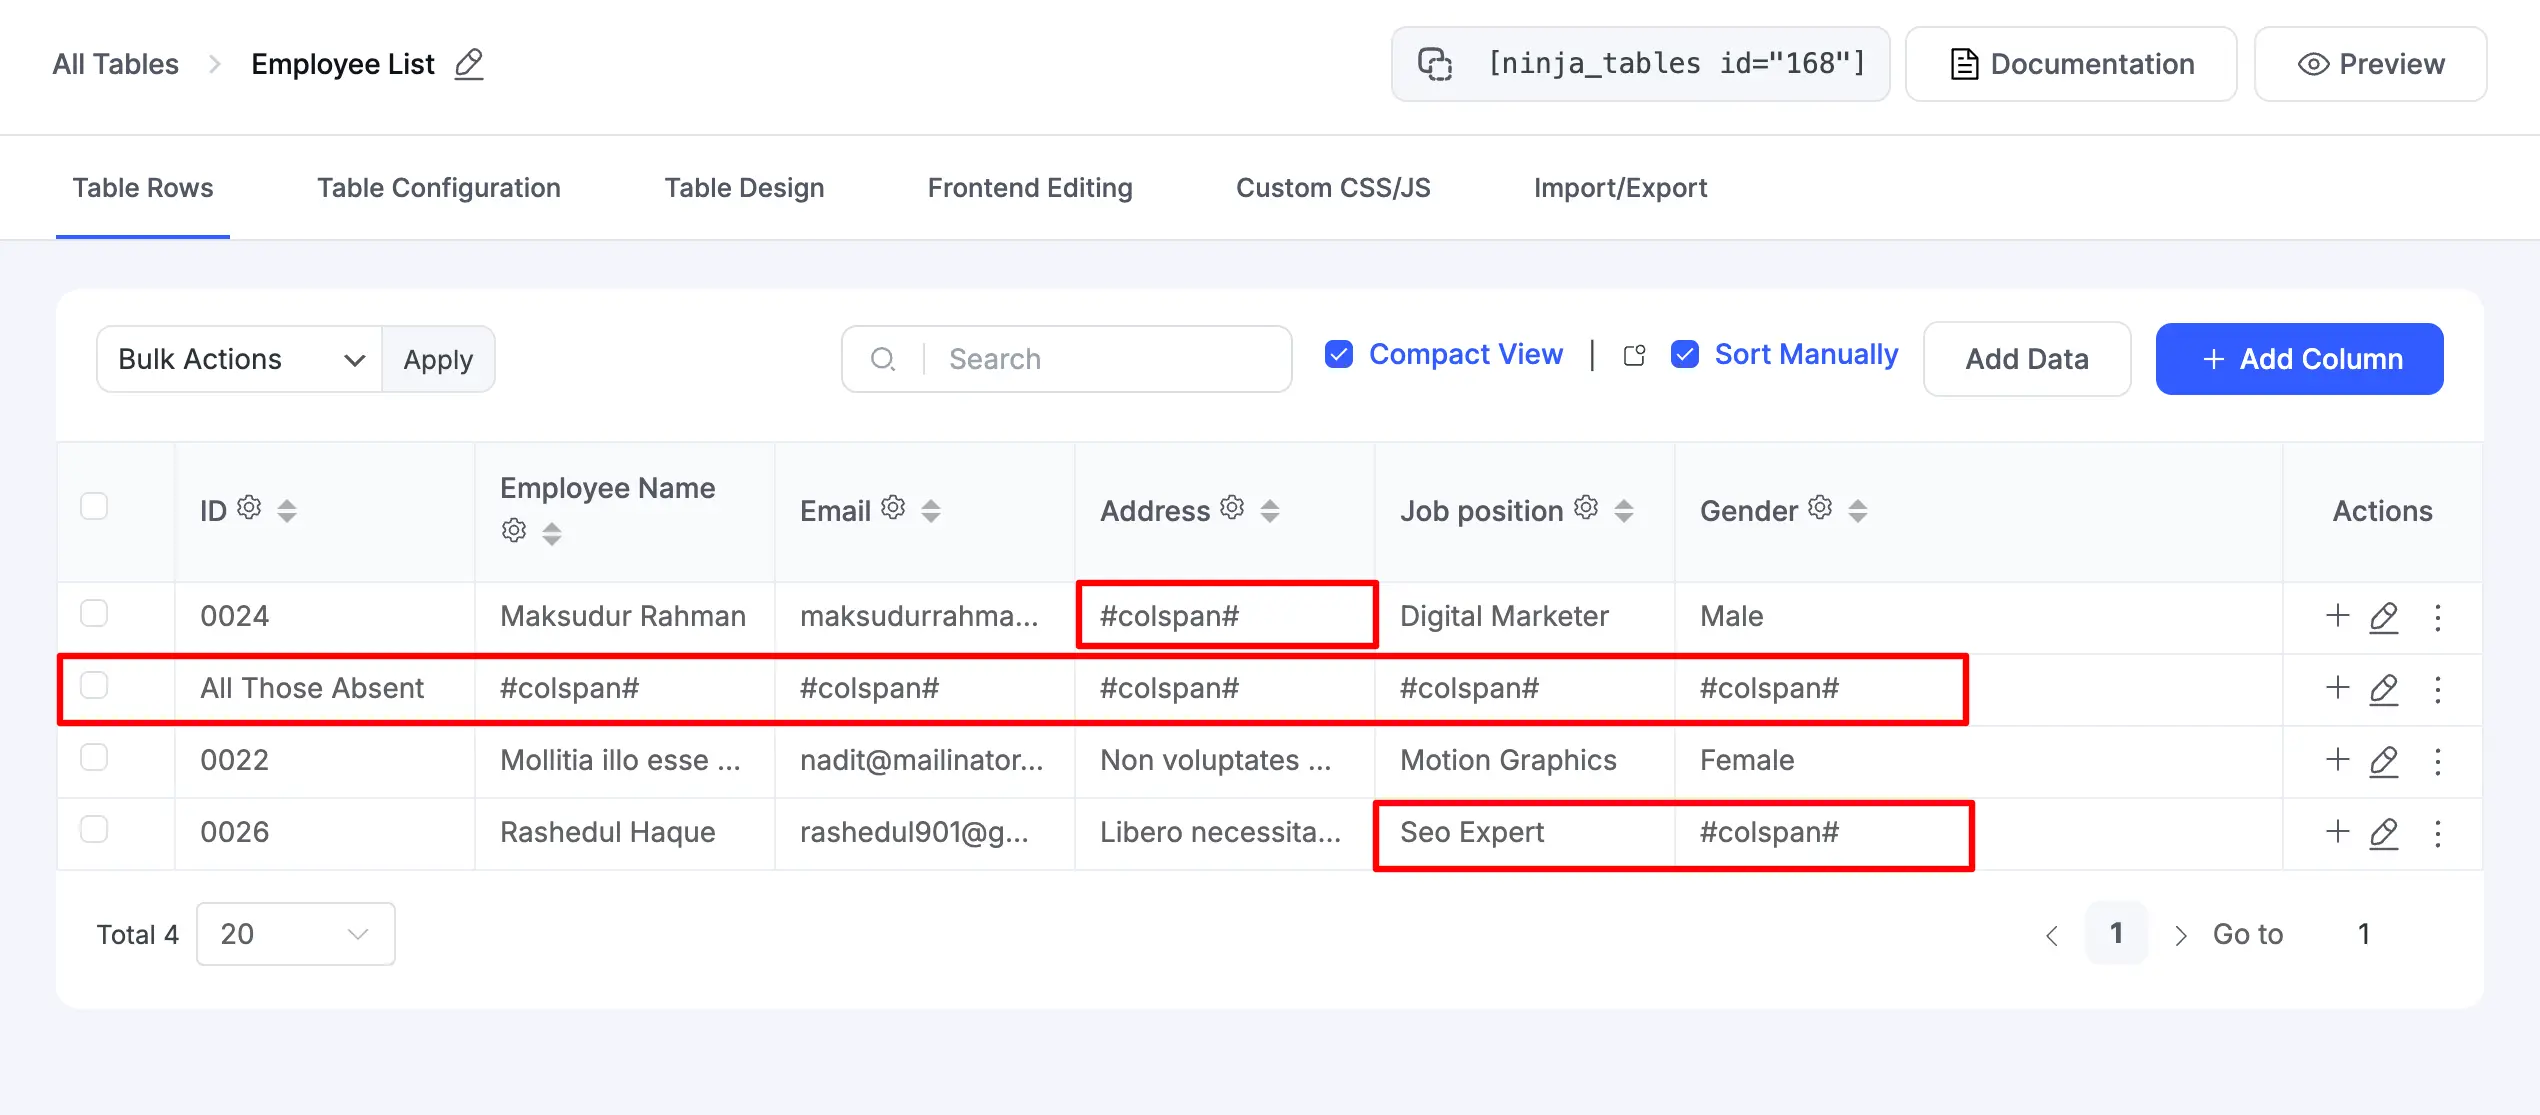
- As you can see in the image above, we here want to merge some cells right below the header to create a separate header and another one in the middle of the table. Also, 2 cells at the end of the table will be merged into one using the same #colspan#.
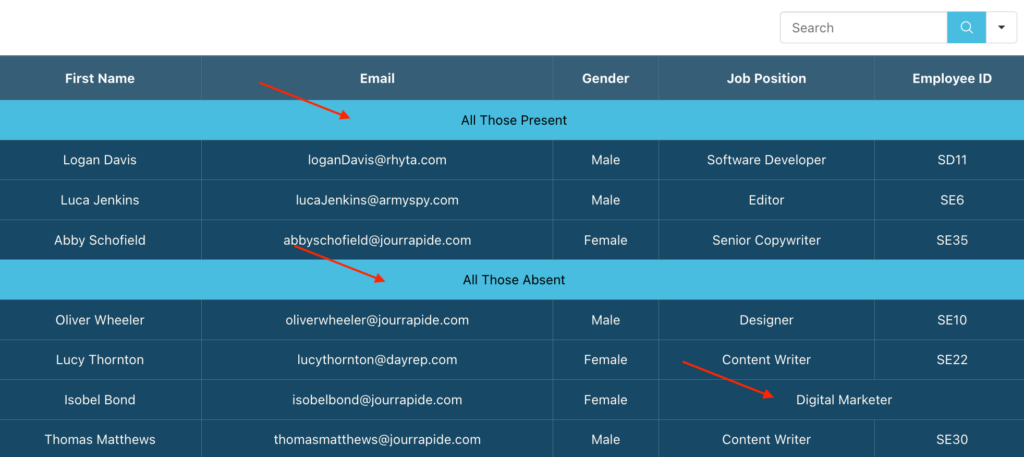
You will see the trick after you complete this step. The columns will merge automatically only in that particular row.
Here’s how the table looks.
Also, You can apply the #colspan# instead of the column title (Job Position), and the column header will be merged with its previous one.
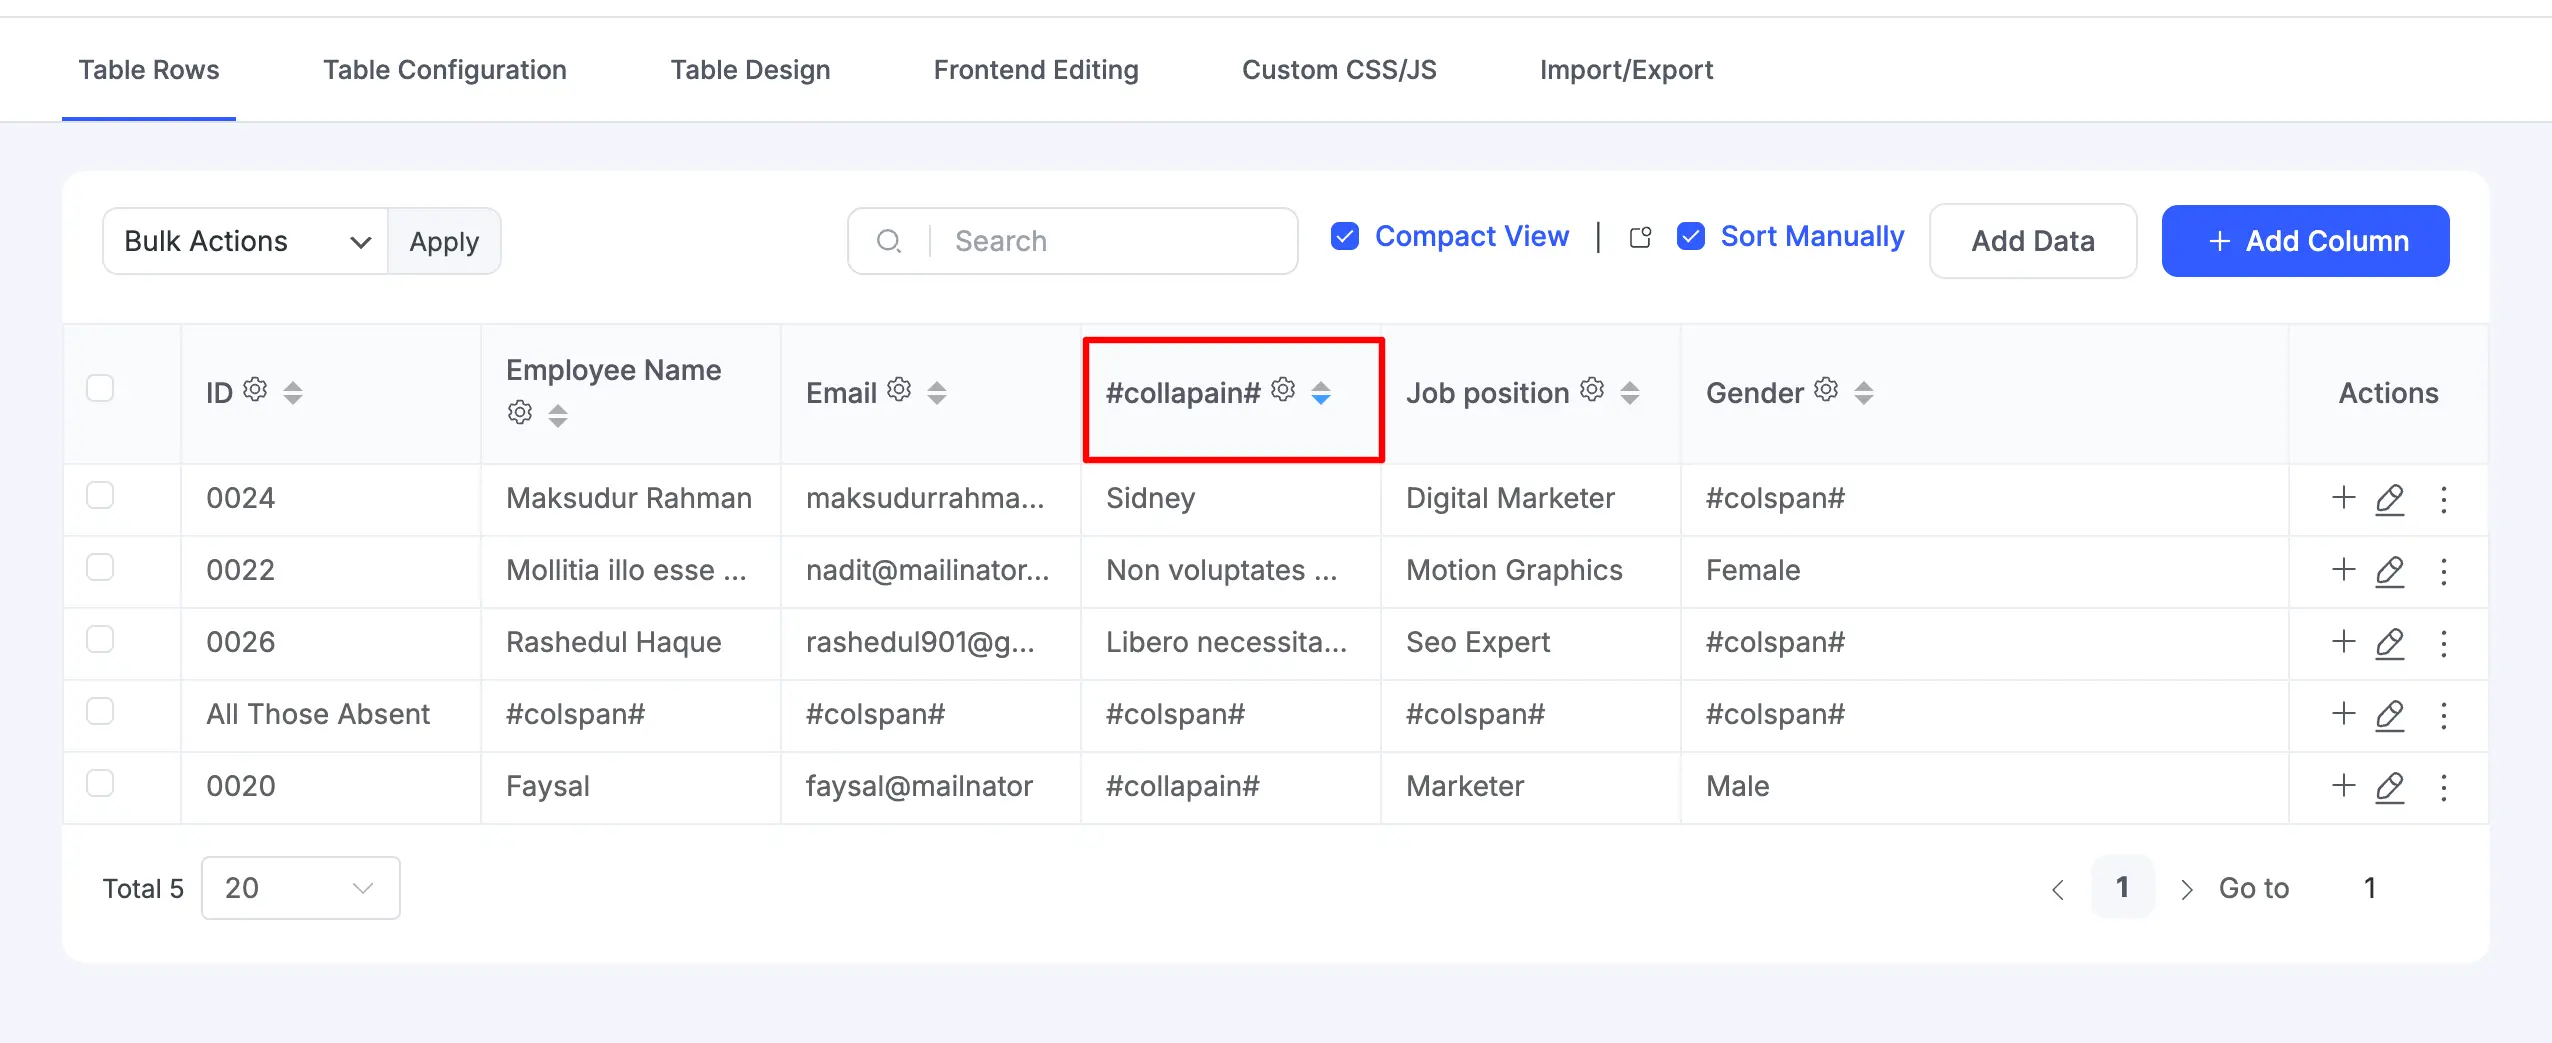
Here’s an example of how merged table cells using “colspan” on the header looks like.
Go to Table Configuration → Rendering Settings and set your table to Advanced Table (Legacy). This will enable you to apply the Cell Merge feature in your Ninja Table. See Rendering Settings.


