
You can create a WP Posts table with Ninja Tables easily. This feature basically shows the WordPress posts on your website in a table format.
Bloggers or business owners can use this feature to display the details of their posts/pages in data tables. The table can include a featured image, title, description, link, and even any custom button.
Create WP Posts Table #
Let’s dive into this simple guide to demonstrate how to implement this function in detail.
- With the built-in WP Posts feature of Ninja Tables, you can convert your WordPress Pages, Posts/CPT, and WooCommerce items into a table format without installing any additional add-ons like other plugins.
- For instance, there are some pages, blog posts, or customized posts in the WordPress dashboard. Then these items will be displayed in the form of a table. To do this, go to the Ninja Tables dashboard → Add Table in the top right corner.
- Then a pop-up box will appear. Click on the WP Posts and add a title to your table.
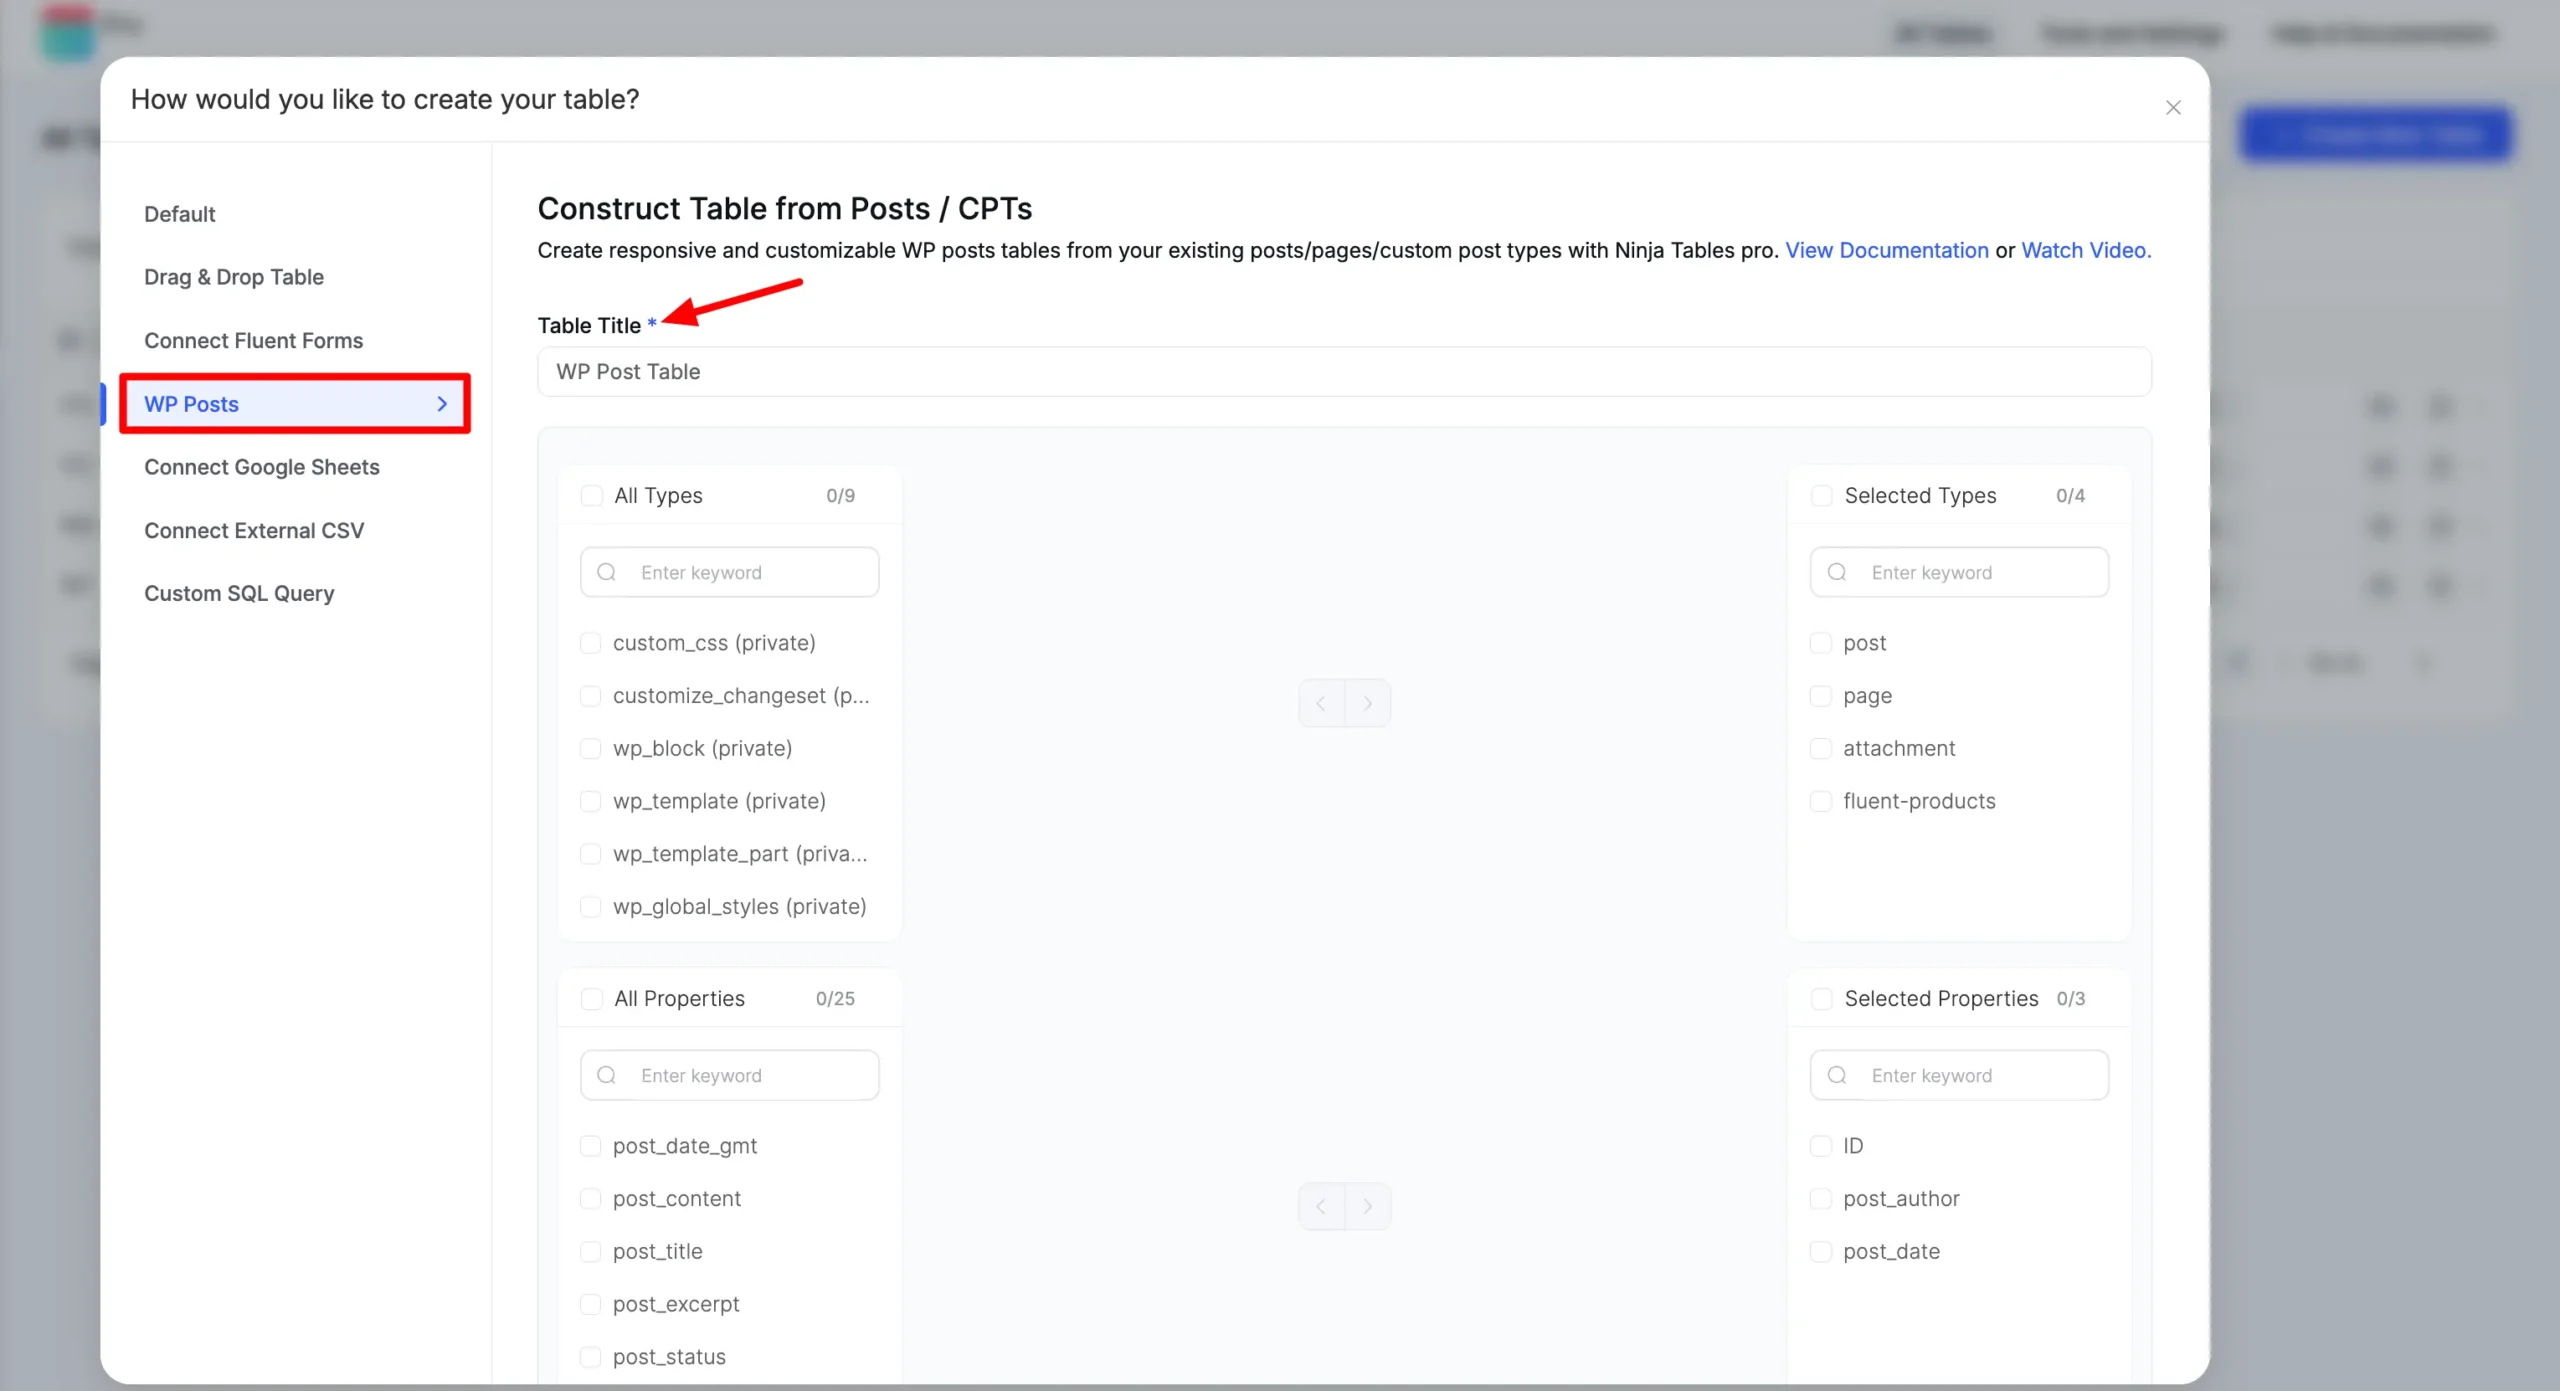
- All Post Types, pages, and products will be in the checkbox fields; you can choose as per your requirements.
- A single Post Type is chosen in this example –
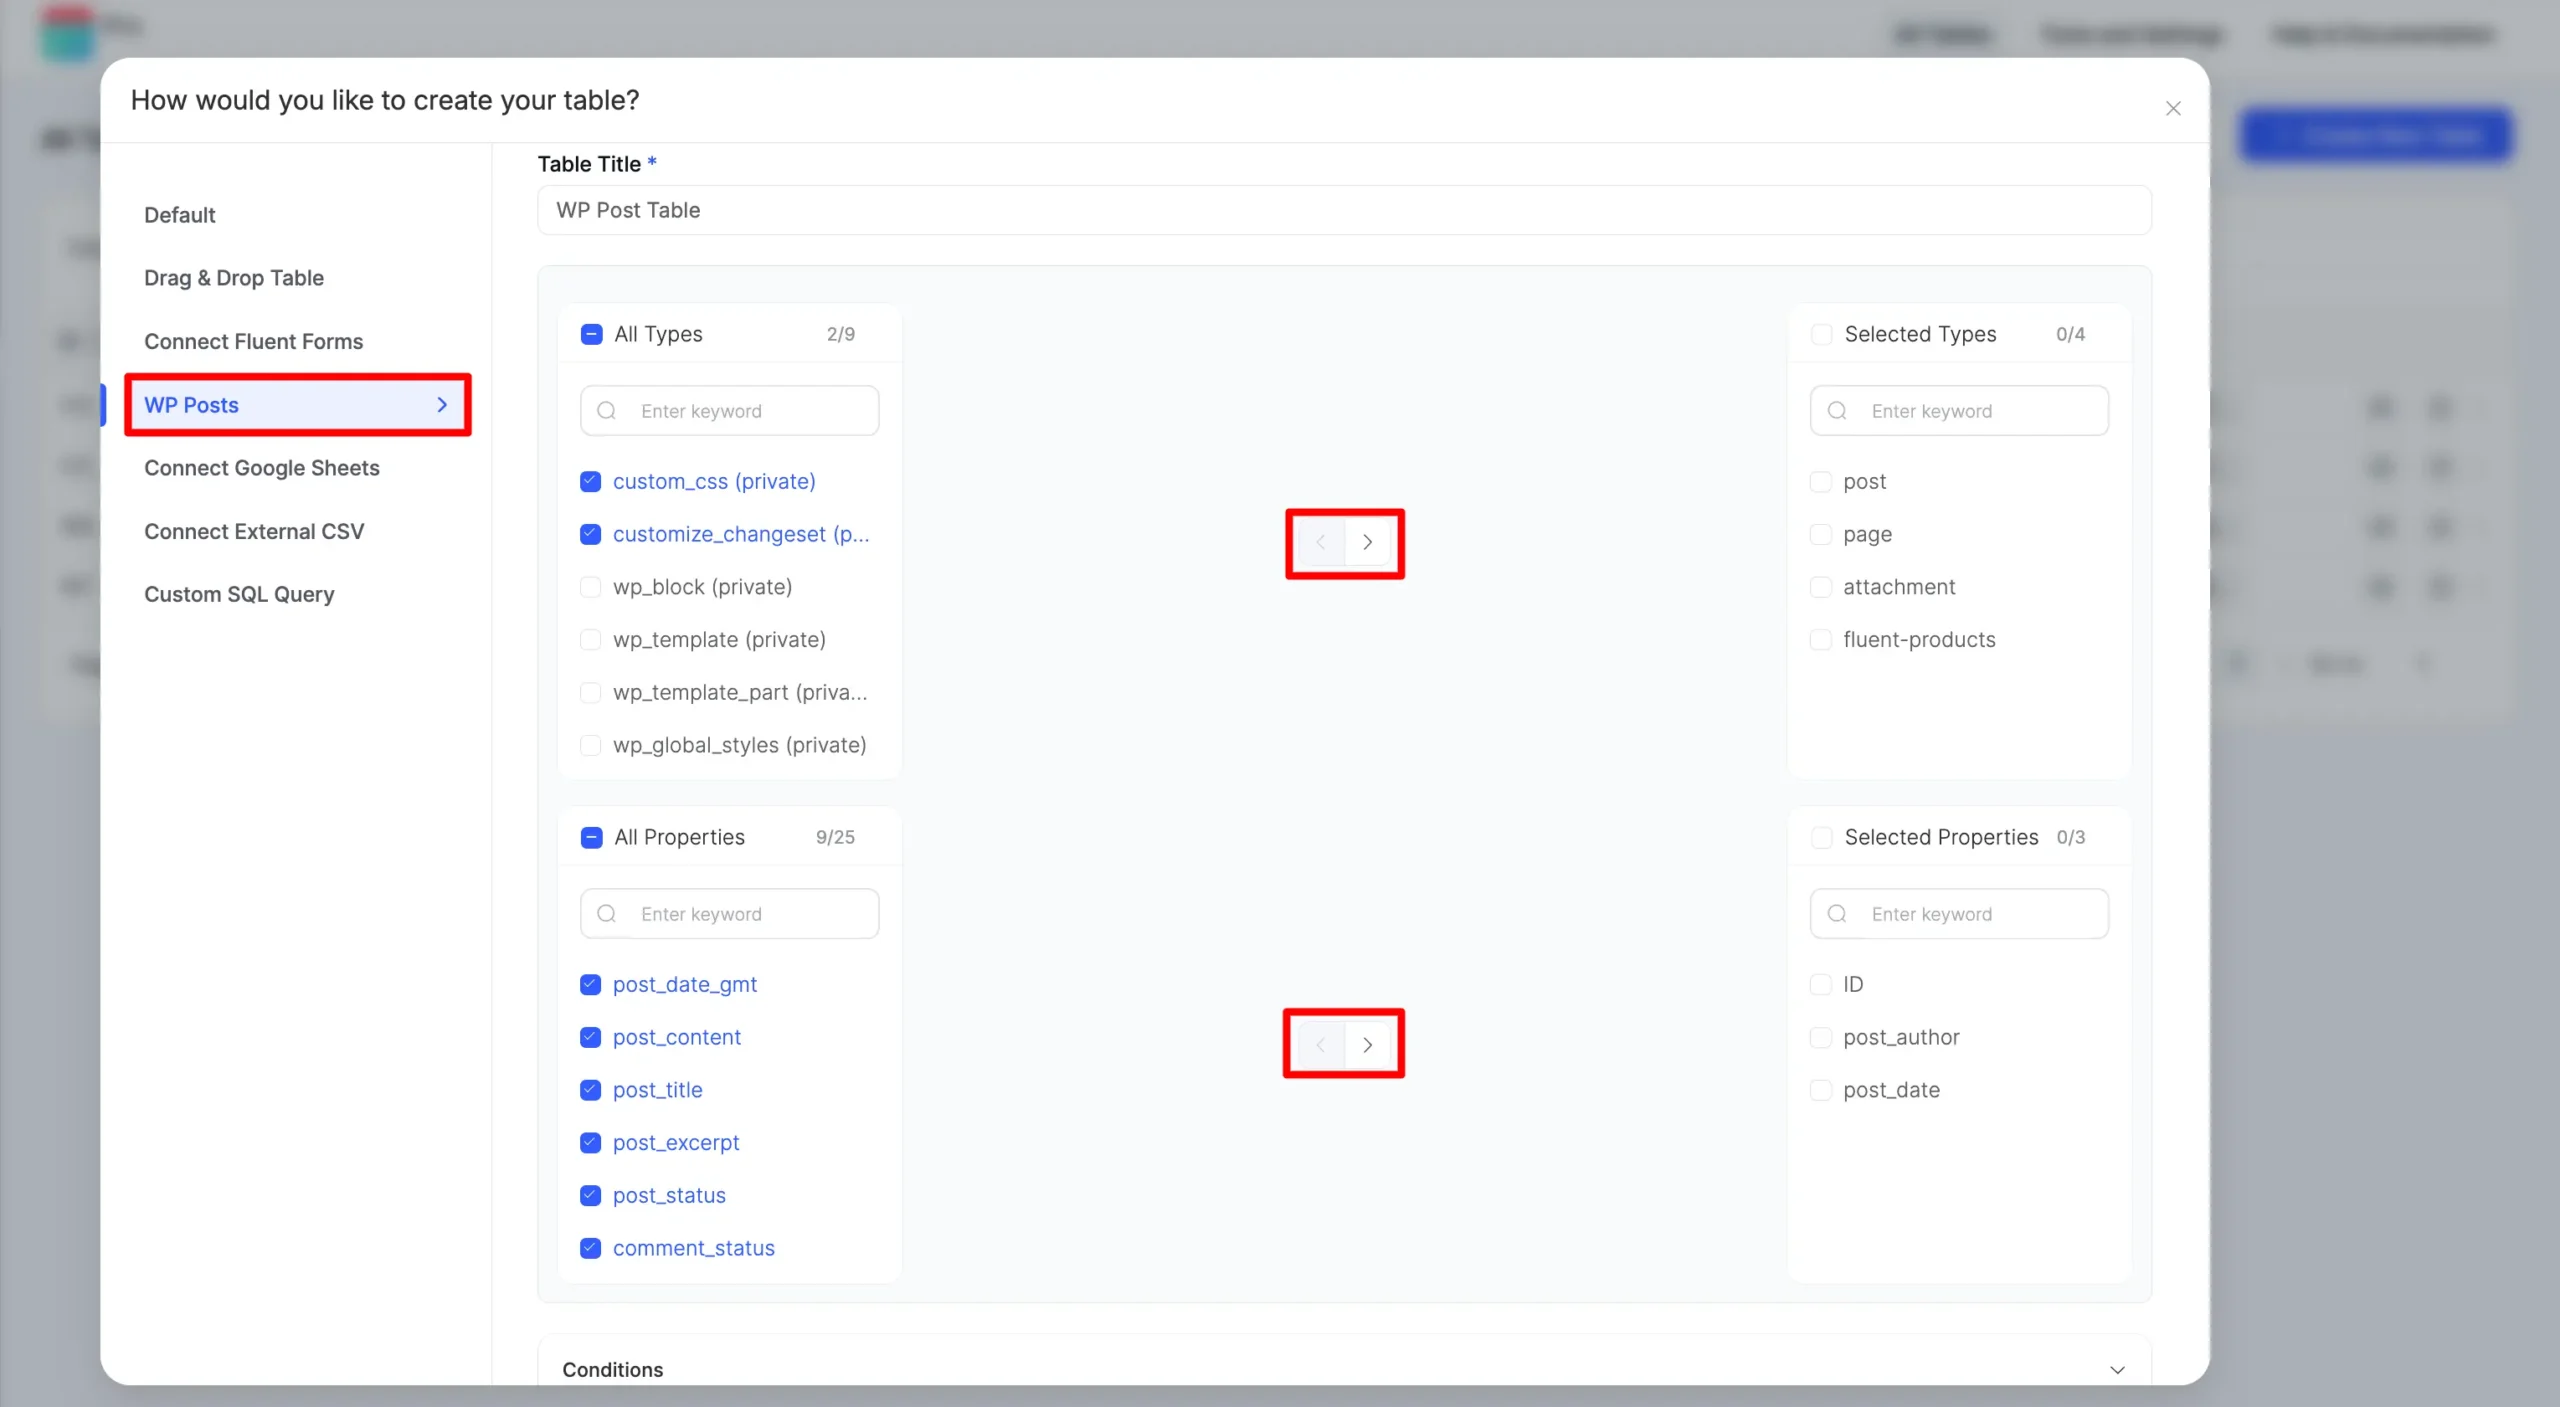
- Switch your selected post types from left to right, and move on to the next.
- The properties you pick from the left will be the column of your post-data table. These properties are the columns in your table. Select the properties you want and transfer them from left to right. Then you can set multiple conditions for the properties of your post if you wish.
- Save the settings after all the configuration is set up. Then you can view the output of this setup.
- Now, all the post items have been added here. The post table also has paginations & you can search for any posts from this table.
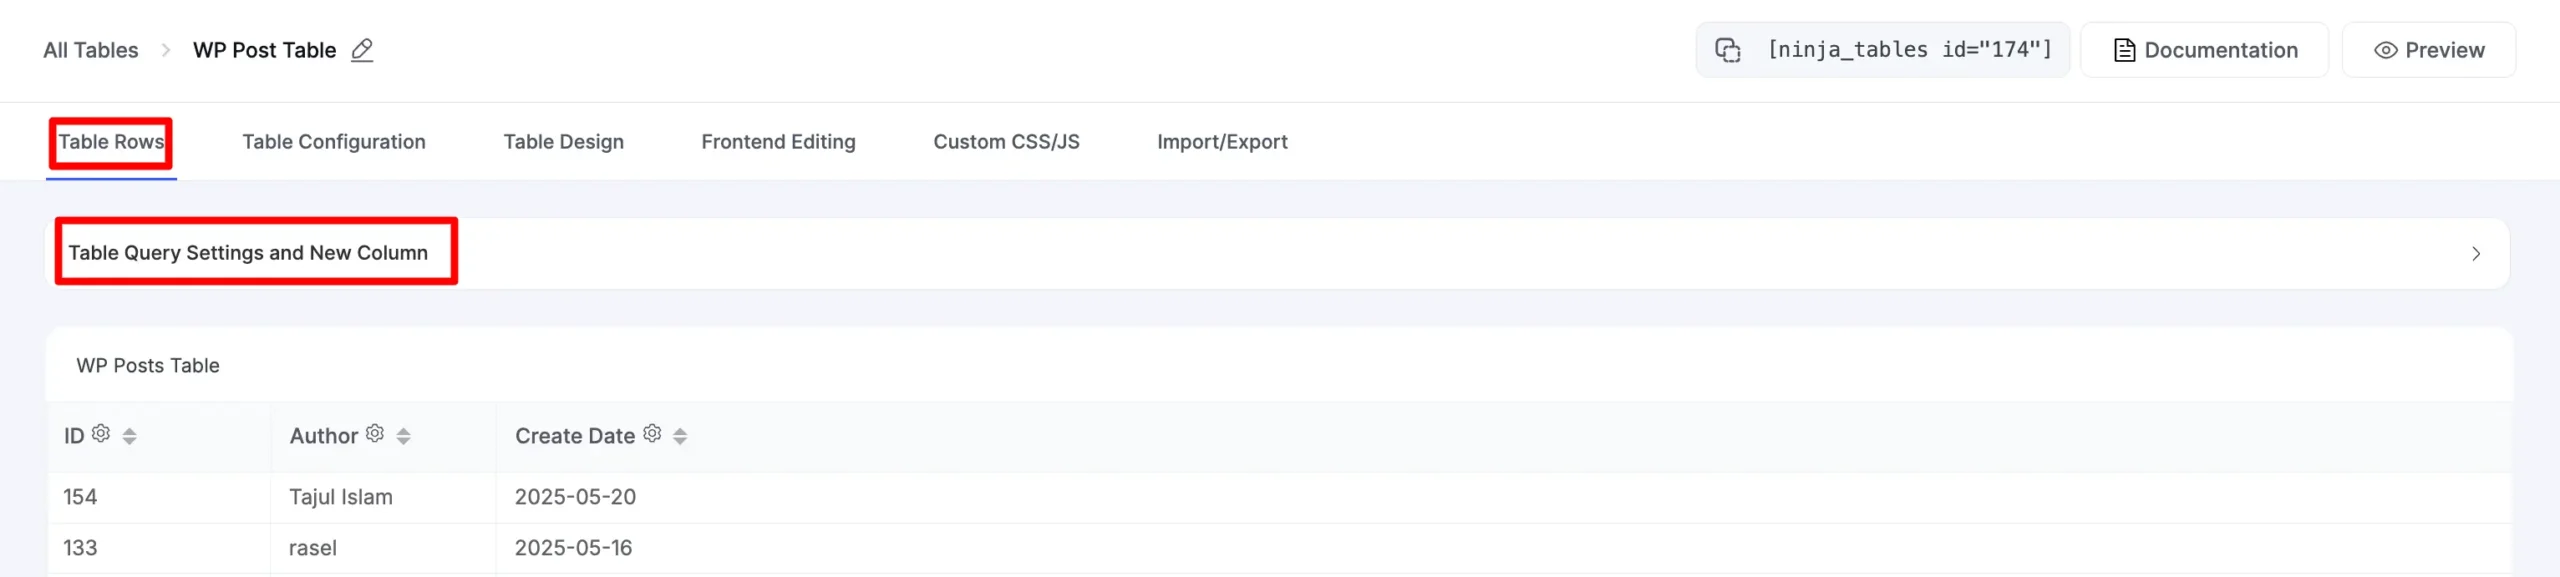
Go to the Query Settings tab of that post table. Scroll down, and here you will get two options, one is Conditions & the other one is Meta Query.
Conditions in Custom Post Type #
Table Query can be performed using Conditions based on the available fields.
- Query Limit for Frontend: This enables you to specify how many posts/CPTs you want to show in total in the Frontend & if you want to show all, you can leave them blank.
- Order by Column: You can select your preferred column by which the table will be sorted.
- Order by Type: There are only two options to sort the table rows. Ascending or Descending.
- By clicking on the + icon, you can add as many conditions as you want.
Let’s look at an example where we can add a condition to find out the column, which is the ID equal to 129.
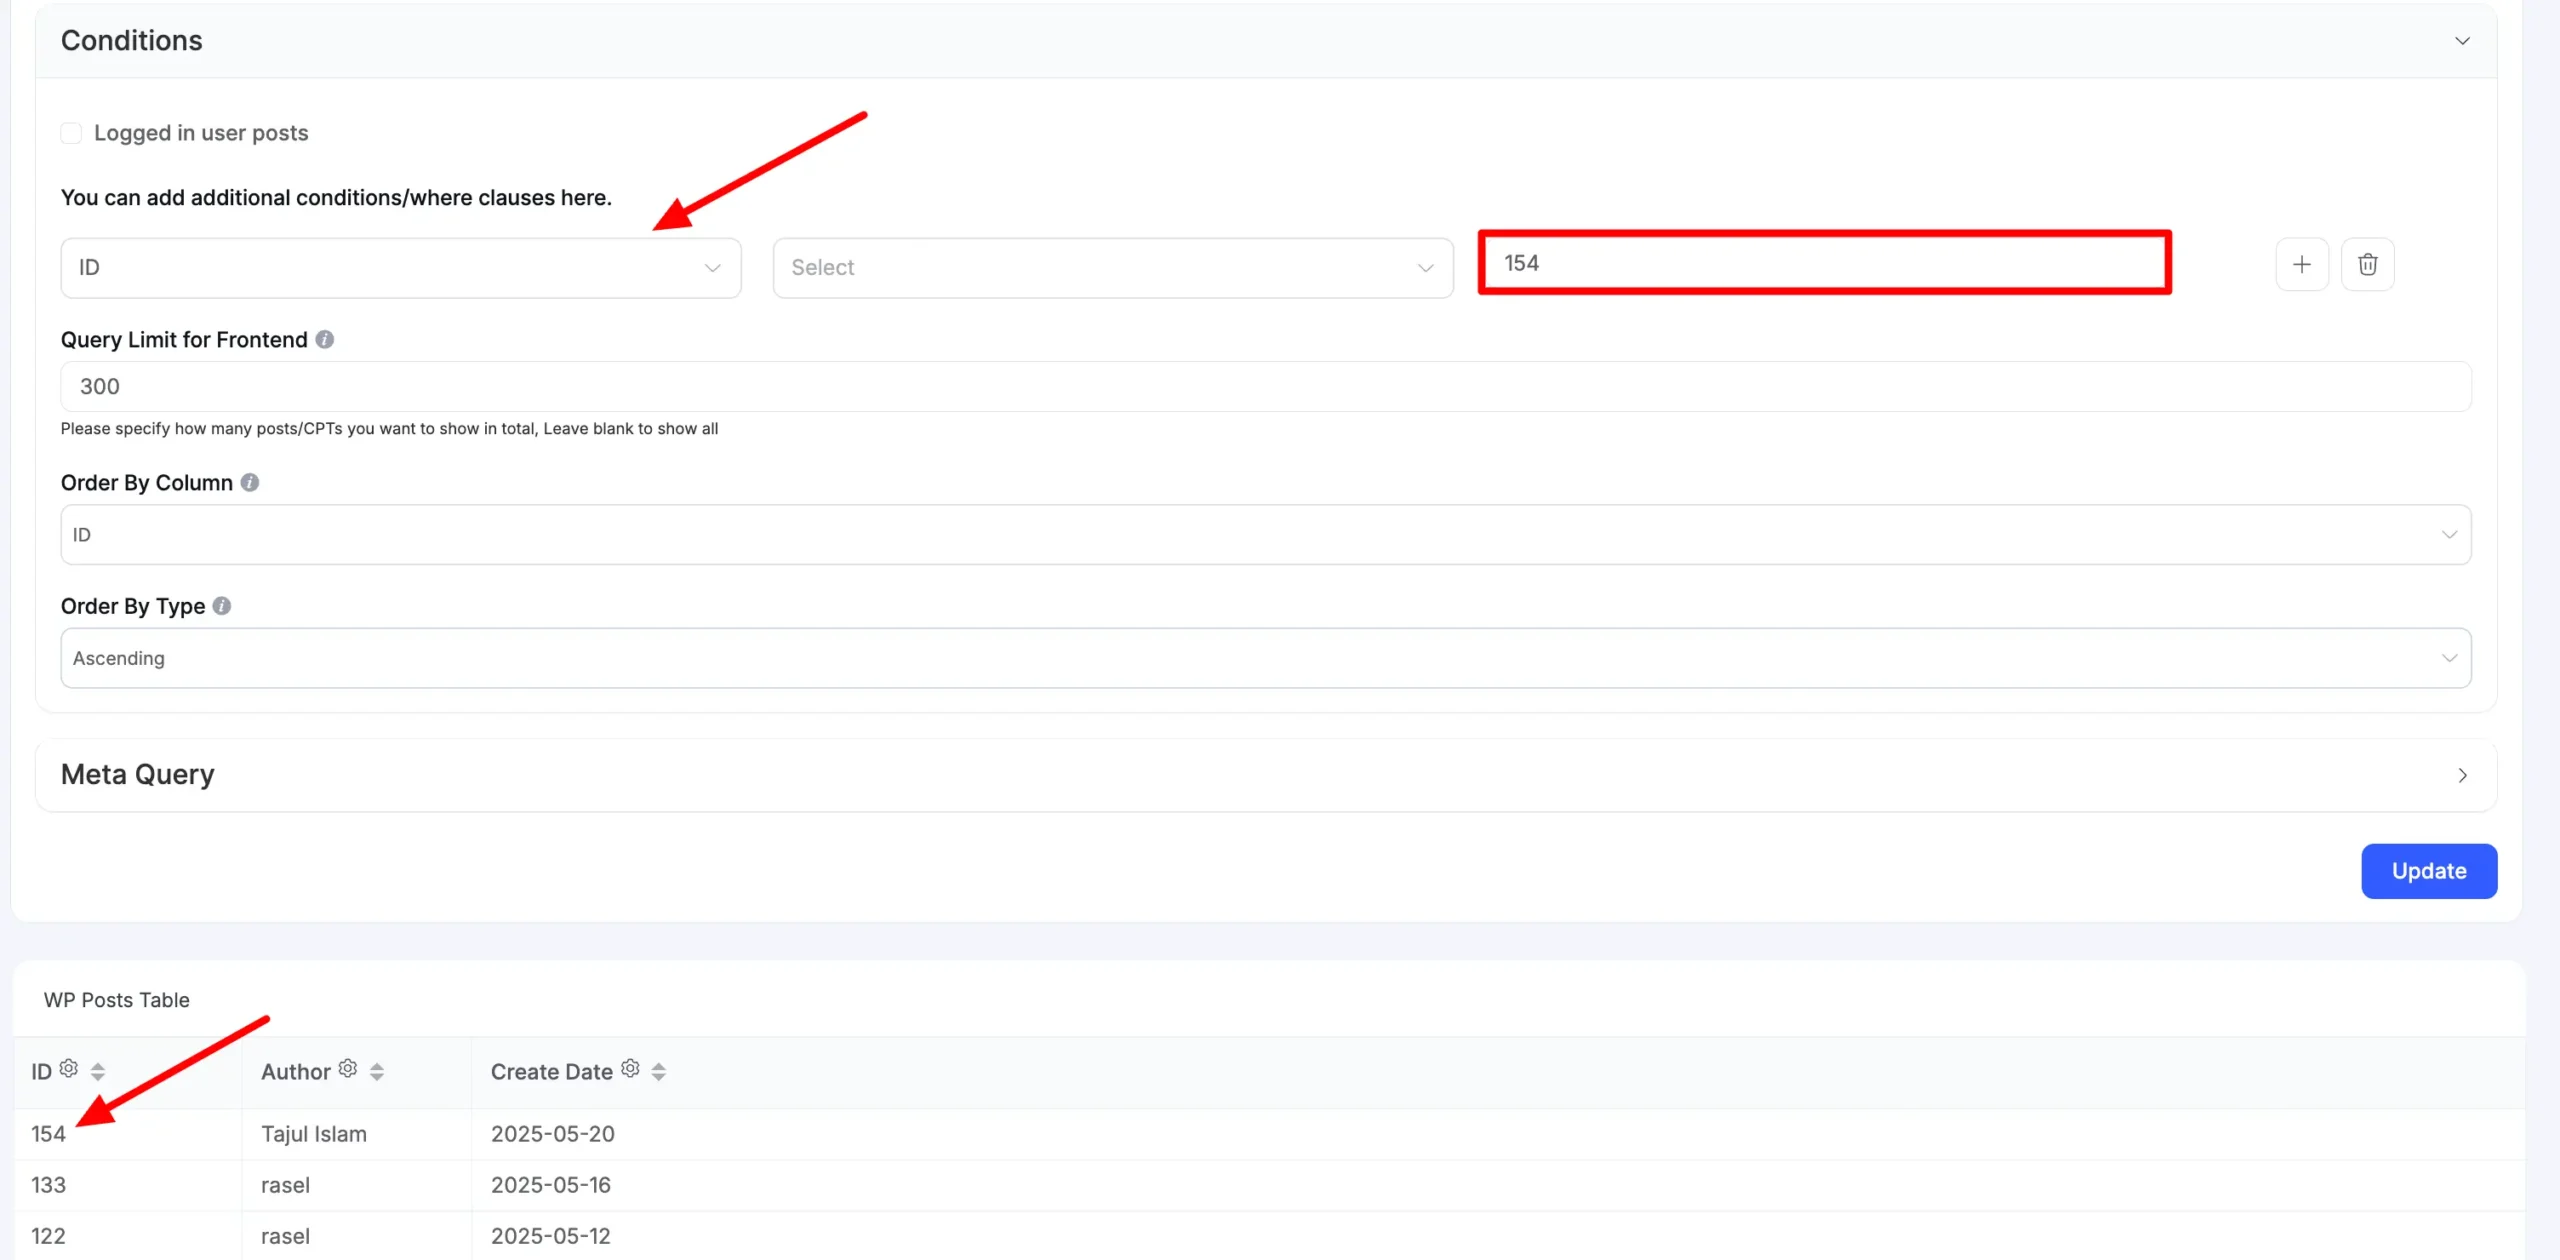
- Now, see how these conditions work. It should show only the ID where the ID number is 129.

Meta Query #
You can add an additional meta query here to filter the table rows.
If you want to apply a meta query, you need the meta key, which will be compared to the value of your columns.
For instance, in this case, the meta key is the acf_demo, and the value ACF Demo Example will be In the meta key. It will then display only the row with the Meta name ACF Demo Example. See the below screenshot –
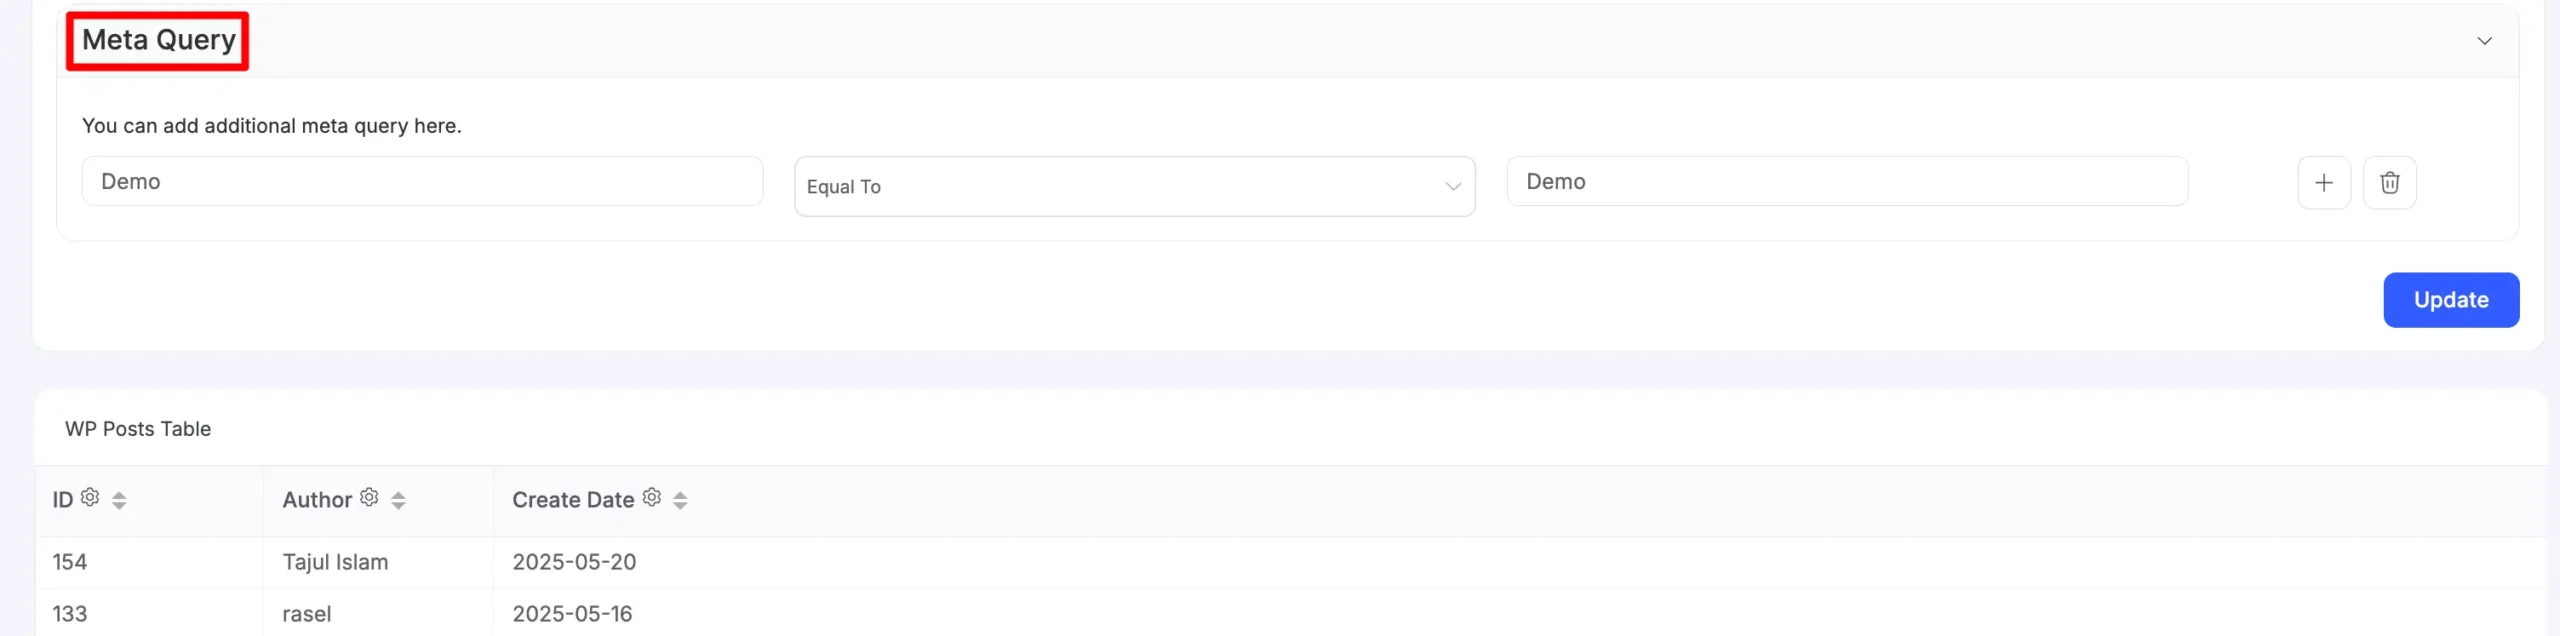
Don’t forget to click the Update button when the configuration is done!
This is also applicable to other custom post types!


