
Table of Contents
Before you install Ninja Tables Pro, make sure you have the Free Version of Ninja Tables already installed on your site. By upgrading to the Ninja Tables Pro add-on, you can access many features.
Here is how you can upgrade Ninja Tables –
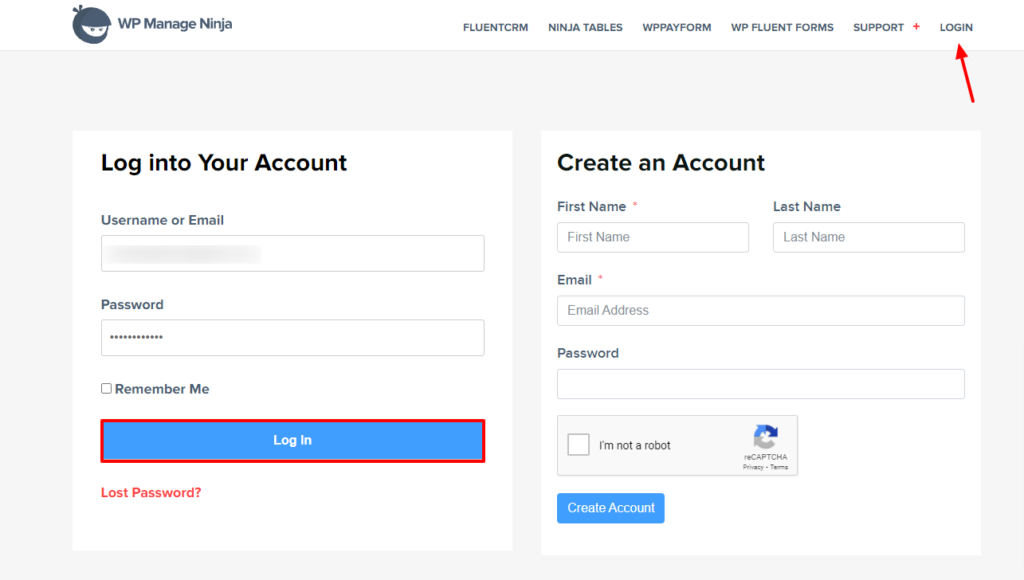
- First, go to wpmanageninja.com and purchase the Ninja Tables Pro Add-on.
- Sign-up for WPManageNinja if you are a new user. This account will be required to provide you with the License Key and Support, if necessary.
- Then fill in your payment details for the transaction to go through. After you log in to the dashboard, click on the Download button.
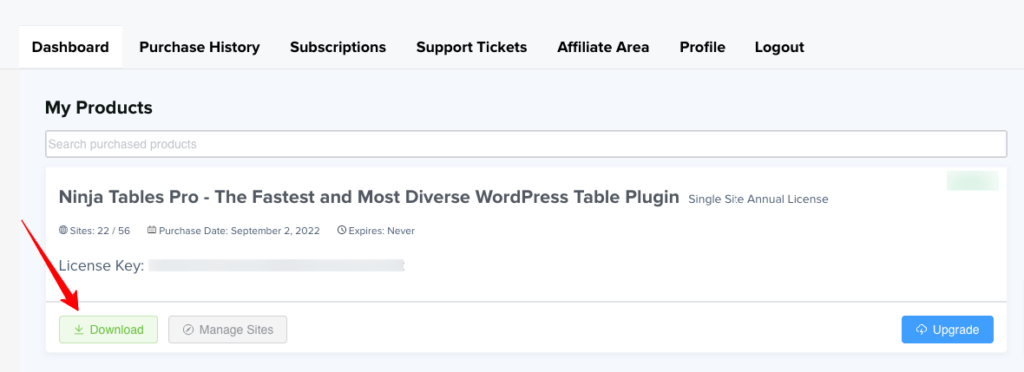
- The Ninja Tables Pro Add-on will be downloaded to your Computer in .zip format.
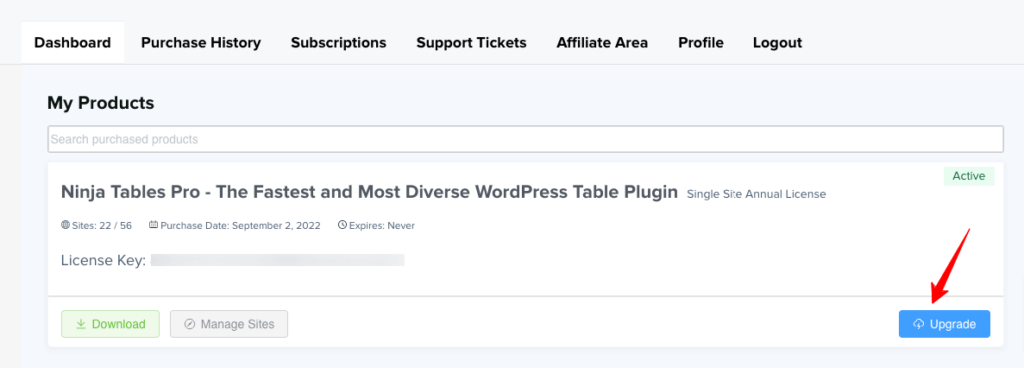
- Or, you can click on the Upgrade button.
- Now go to your website’s WordPress Dashboard. Click on Plugins → Installed Plugins → Add New → Upload Plugin.

- Congratulations! Ninja Tables Pro-add-on is successfully installed in your domain. Activate the plugin from your Plugins list.
- DO NOT DEACTIVATE OR DELETE the Ninja Tables plugin from the plugins list. The Pro add-on won’t work if the Free version of the plugin is removed.
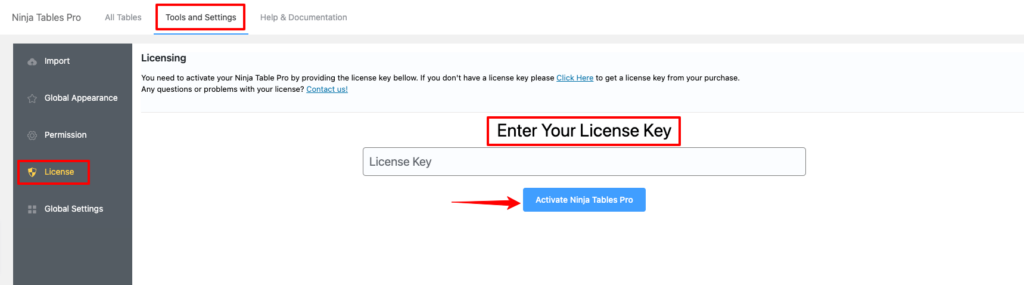
Ninja Tables Pro License Key #
A License Key will be asked when you will be going to use the Pro features for the first time. You can retrieve the License you purchased from your dashboard.
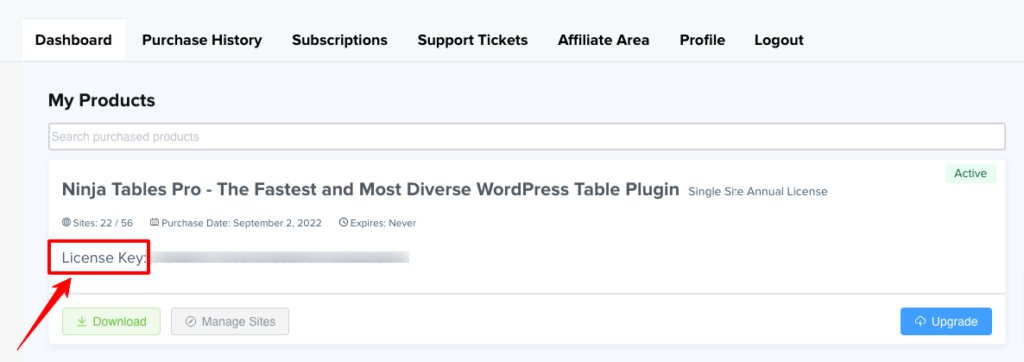
- Copy the Key and paste it into the License key input field of the Ninja Tables Pro License tab & Click on the Activate Ninja Tables Pro button.
Now you can enjoy all the awesome Premium features of the Ninja Tables Pro Add-on!


Add your first comment to this post