Table of Contents
Ninja Tables can import JSON file from an existing table of the plugin into another table.
Importing JSON to your table using Ninja Tables is a simple and quick process. This plugin is intended to make things easier for users and to improve the overall user experience.
Import JSON File #
Let’s dive into the simple guide to learn how to import JSON file.
- First, navigate to the Ninja Tables dashboard and click on the Import Table button on the top right of the screen.
- To know how to Export Data (CSV/JSON), you can get help from here.
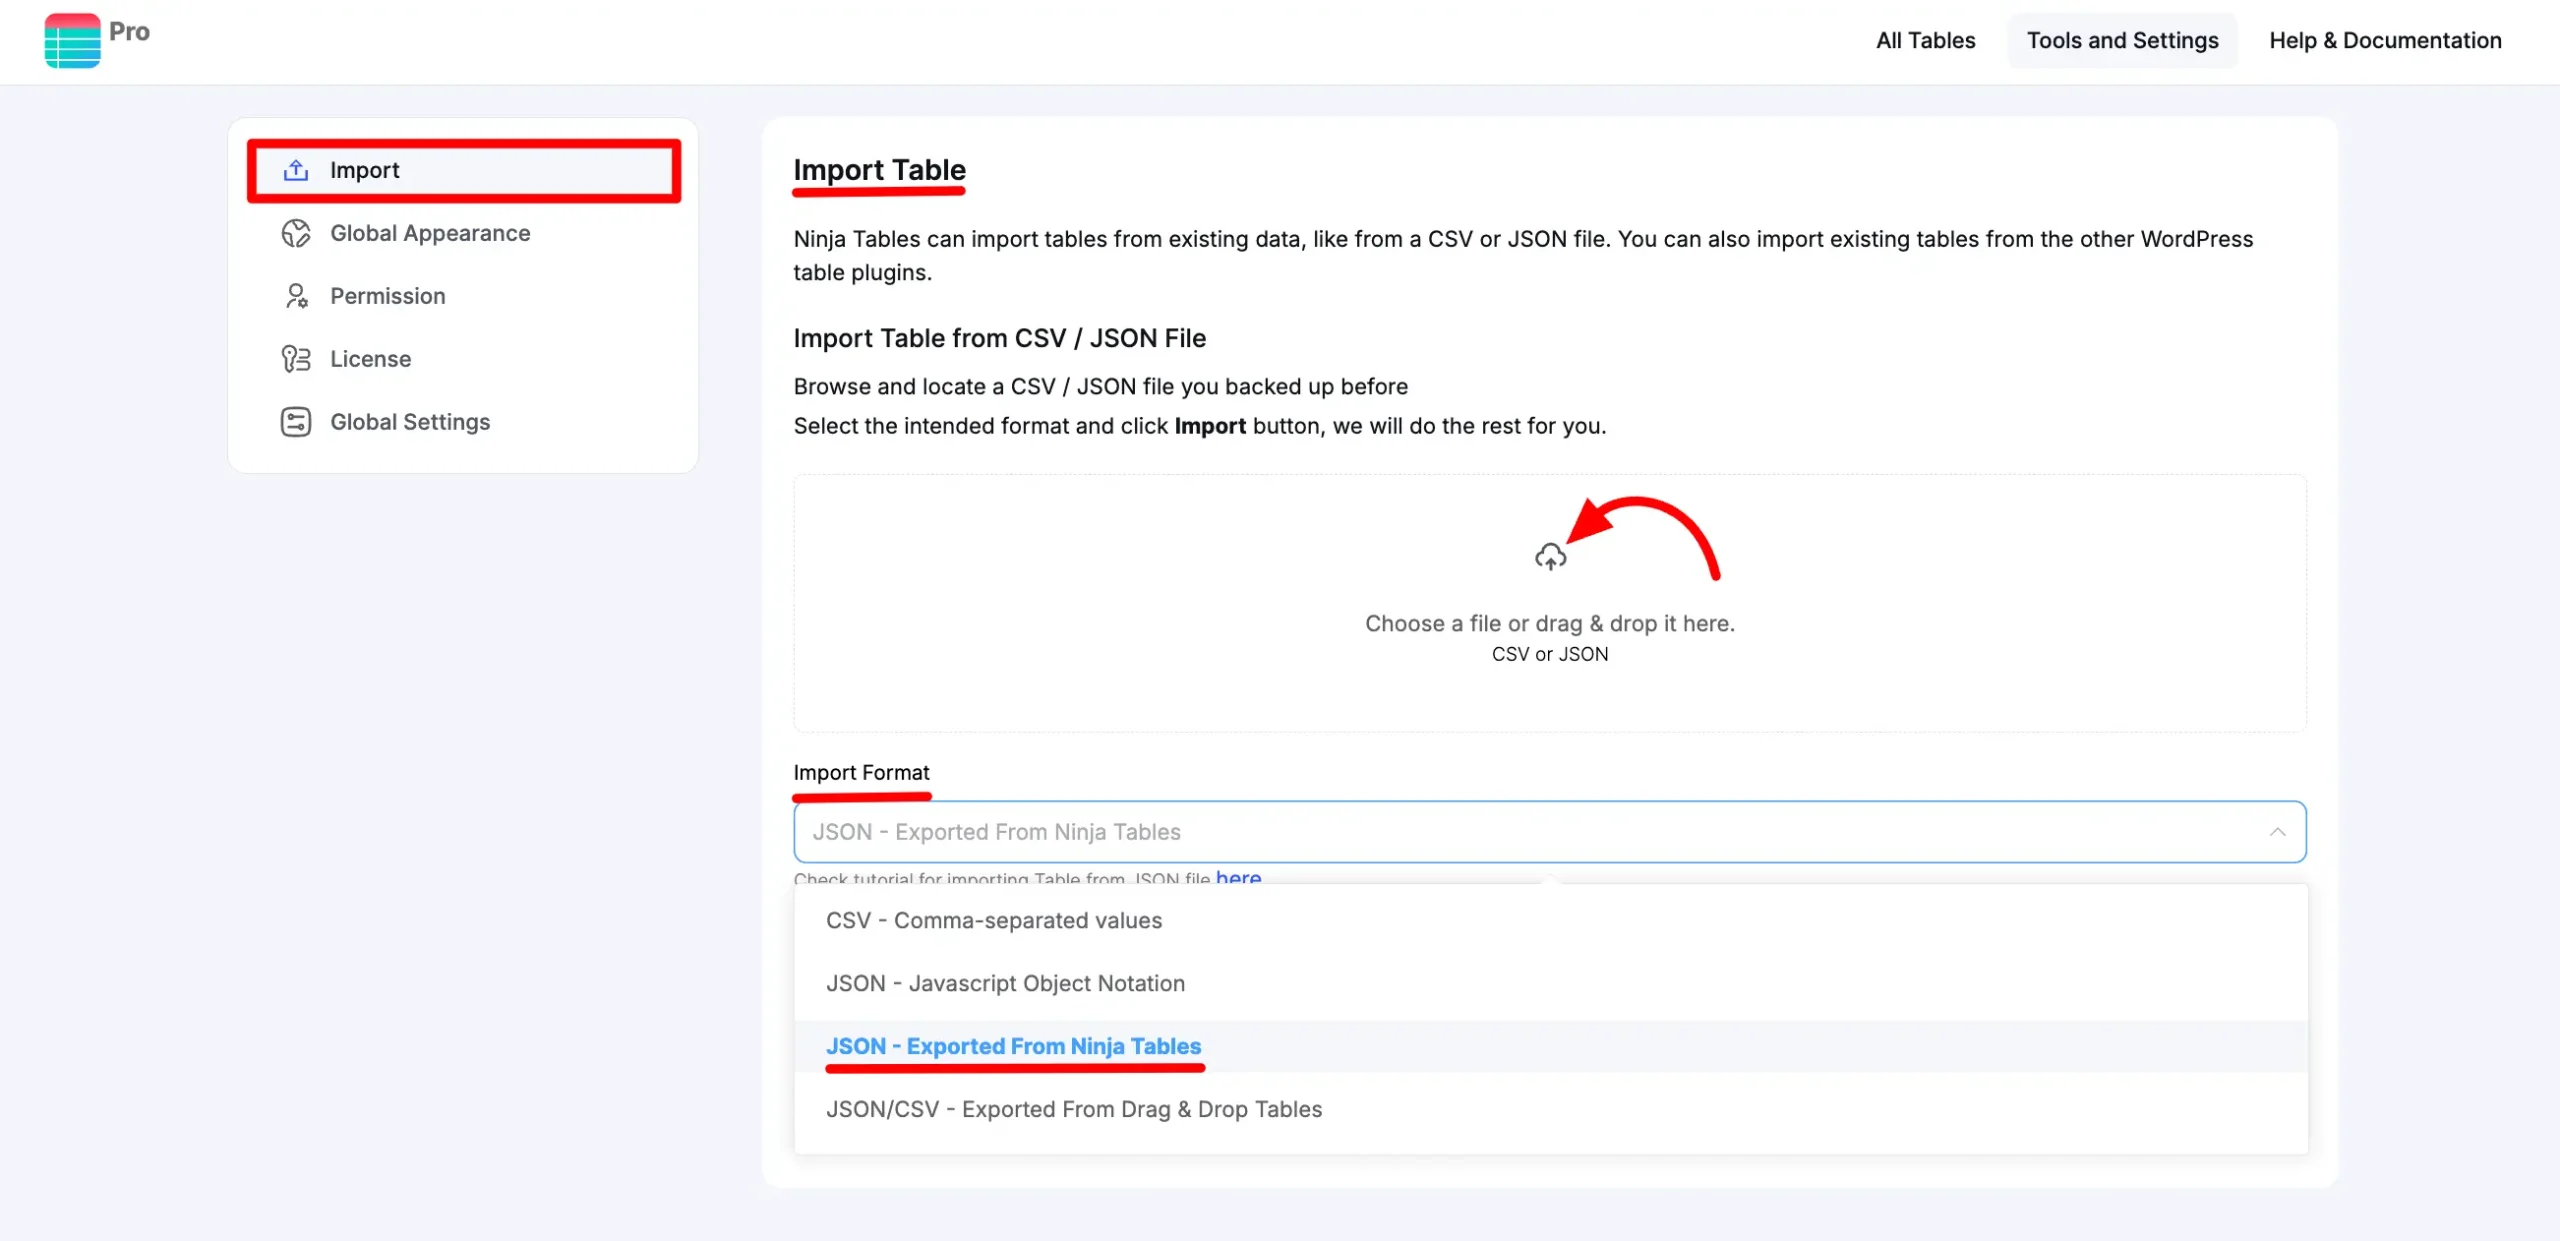
- Now, go to the Import button (on the left), and you will get an Import Format field, where you can choose your desired JSON (Exported From Ninja Tables) table format.

- Upload your Exported JSON file (from Ninja Tables) in the Select File area by clicking on the Choose File button and then set the Import Format as a JSON (Exported From Ninja Table).
- You can also upload your Exported JSON/CSV file (from Drag & Drop Tables) in the Select File area by clicking on the Choose File button and then setting the Import Format as a JSON (Exported From Ninja Table).
- Lastly, click on the Import button when you are done!
Exporting the JSON file lets you export the Table Styling with the table data.
This is how easy it is to import JSON file in Ninja Tables.


comparison table is not getting imported
Hi Grace. You probably didn’t select the correct “import format” for the template.
If the .txt file in the .zip folder says “JSON/CSV- Exported from Ninja Tables Drag & Drop Tables,” then the table template is in Drag & Drop mode and won’t be exported as “JSON- Exported from Ninja Tables” format.
Kindly check the .txt to select the right import format.
Pros/Cons comparison table does not import. I’ve tried it a bunch of different ways. I’ve checked the format carefully. I’ve read the txt file. I’m a lifetime/agency subscriber to Pro.
I fixed this. The issue is that the TXT file with your Comparison Table template is actually not that accurate or specific. The TXT file should specify that you need to select Ninja Tables drag and drop format. It does not say that and so people are selecting the “export from Ninja Tables” format (not drag and drop.)
Maybe this stuff is obvious to someone who has used Ninja Tables for awhile, but new users are probably going to do exactly what the TXT file/docs tell them to do. It isn’t the right thing in this case.
hello Ken, Thank you for pointing this out. We’ll fix this ASAP.
I would like to import data from a JSON file, but cannot find any examples of the expected JSON formatting. This needs to be documented somewhere.
Hi Sarah. Thanks for your comment.
You can import 2 JSON types into Ninja Tables – external & a Ninja Tables Json.
Select “JSON- Exported From Ninja Tables” for Ninja Tables’ JSON file. The table style will automatically appear.
Or select “JSON – Javascript Object Notation” for your own JSON file. Here’s a sample JSON for that: https://table.xcloudon.com/wp-content/uploads/2025/05/Example.json_.zip