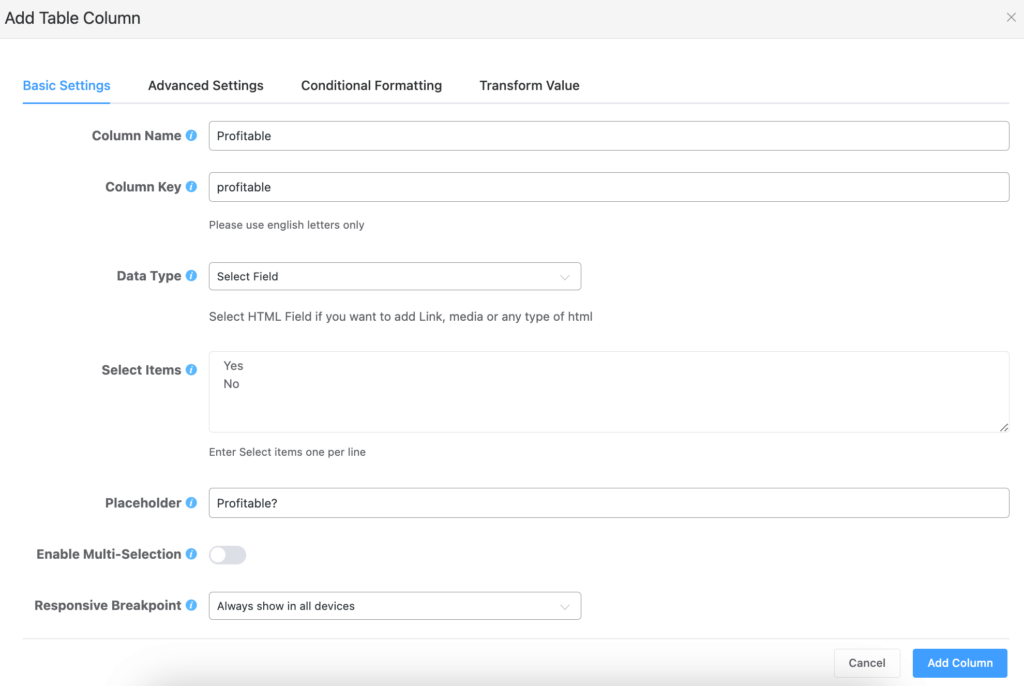
The Select Field data type is for columns with multiple options in a dropdown list. It’s one of the most useful features in Ninja Tables.
You can decide the Select Field data type right from the start when you add a column to the table. From your dashboard, go to the Ninja Tables plugin → Tables (the table where you want to add Column) → Add Column.
Select Field Data Type in Ninja Tables #
This data type is used to add multiple options in a dropdown format when certain data is entered.
It’s helpful if the column needs different data for each row. For example, “Yes” for one and “No” for another. No need to type every time if you can just select it from a dropdown.
- Go to the Data Type option and select the Select Field type of the column and add a column.

Select Items #
After choosing this Select field, the Select Items field will automatically appear.
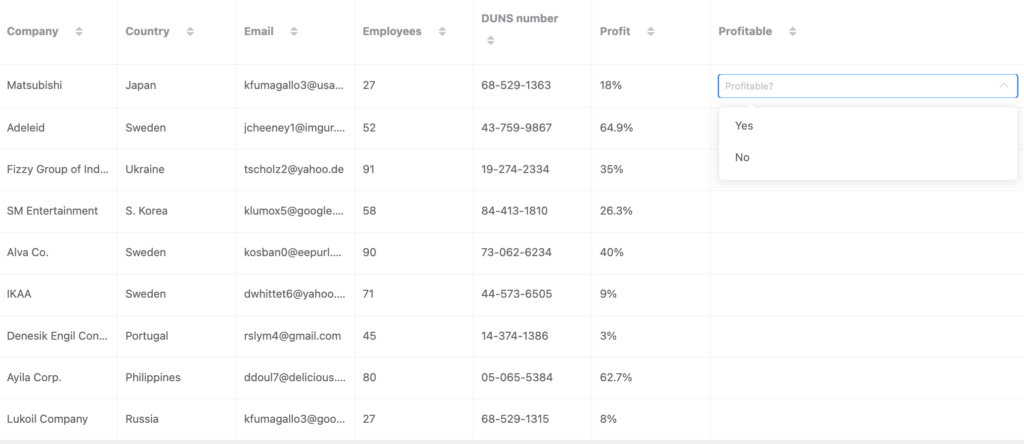
This is where you add the elements of the dropdown list in the specific column. Here we’ve added “Yes” and “No” for the dropdown.
Placeholder #
In this option, you can enter a custom placeholder text. For example, we’ve added, “Profitable?” and we’ll pick yes/no from the dropdown.
Enable Multi-Selection #
There’s an additional feature called Enable Multi-Selection. This allows you to choose multiple elements to be added in a single column.
We can choose both “Yes” and “No” if we enable it.
Select Items, Placeholder, and Enable Multi-selection fields are pro features!
Here’s how the table looks with Select Field.

Use this feature to show if the product is in stock or not if you have a product table. Or, you can use it to display icons.
Let us know your thoughts.


Can the dropdown be populated from another table? For example, if I have a warehouse table and a product table, could I have a third table which selects warehouse and product from their respective tables?
Hi. We just tested if what you wanted was possible. Unfortunately, it’s not. But thanks for your comment because we’ll keep trying to find a way to work on it, treating it as a feature request.