Ninja Tables allows you to personalize your tables in various ways, including altering Row Colors to enhance visual appeal and clarity. Here in this article, we will show how you can modify Row colors using Ninja Tables.
Accessing Row Editing #
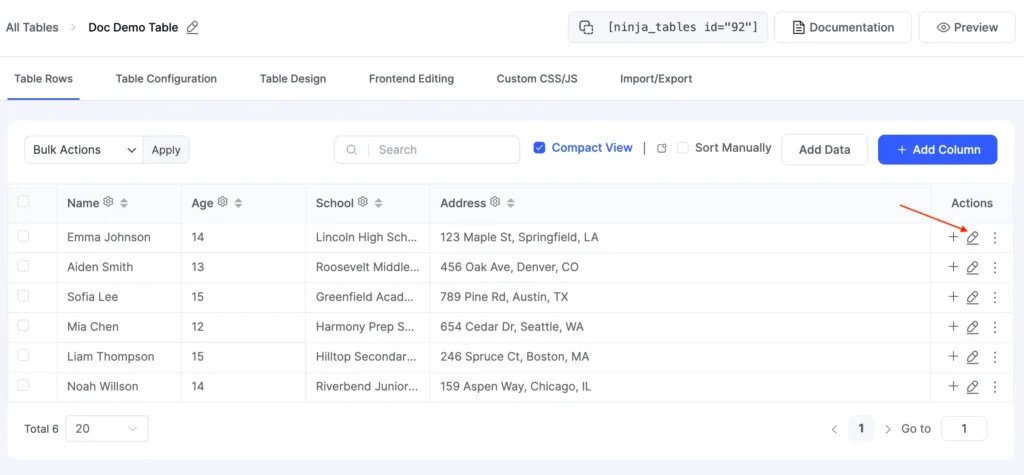
Start by navigating to your Table where you want to make changes and go to the specific Row you wish to customize. Click on the Pencil icon, representing the Edit option.

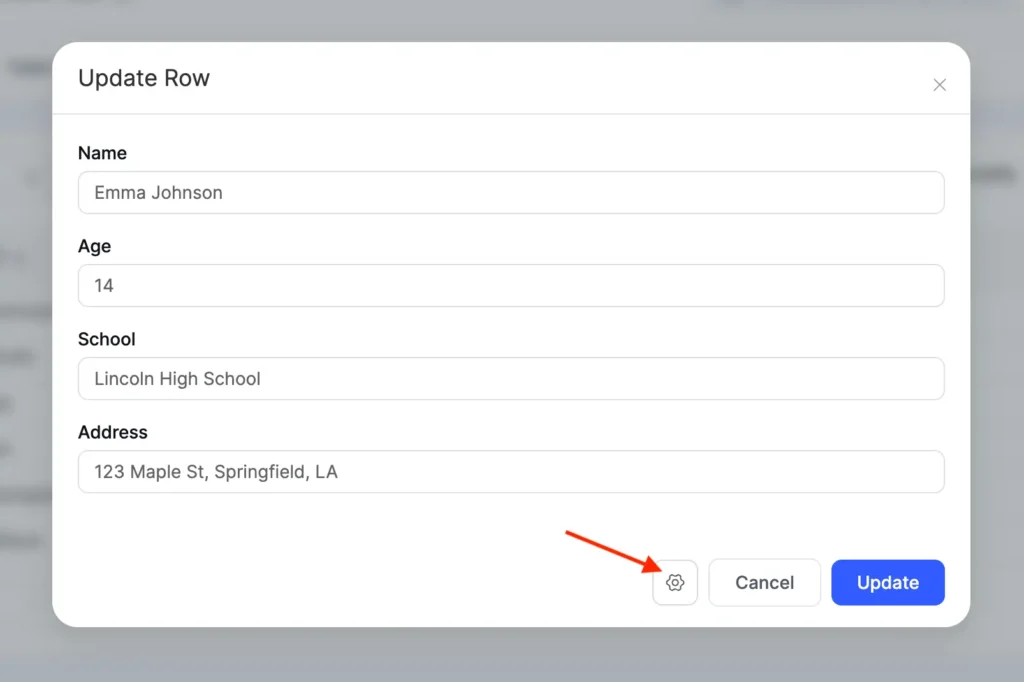
By clicking the pencil icon, a popup window will appear, presenting editing options for the selected row.
At the bottom of this window, locate and click on the “Settings” icon to enter advanced customization for this specific row.

Customizing Row Colors #
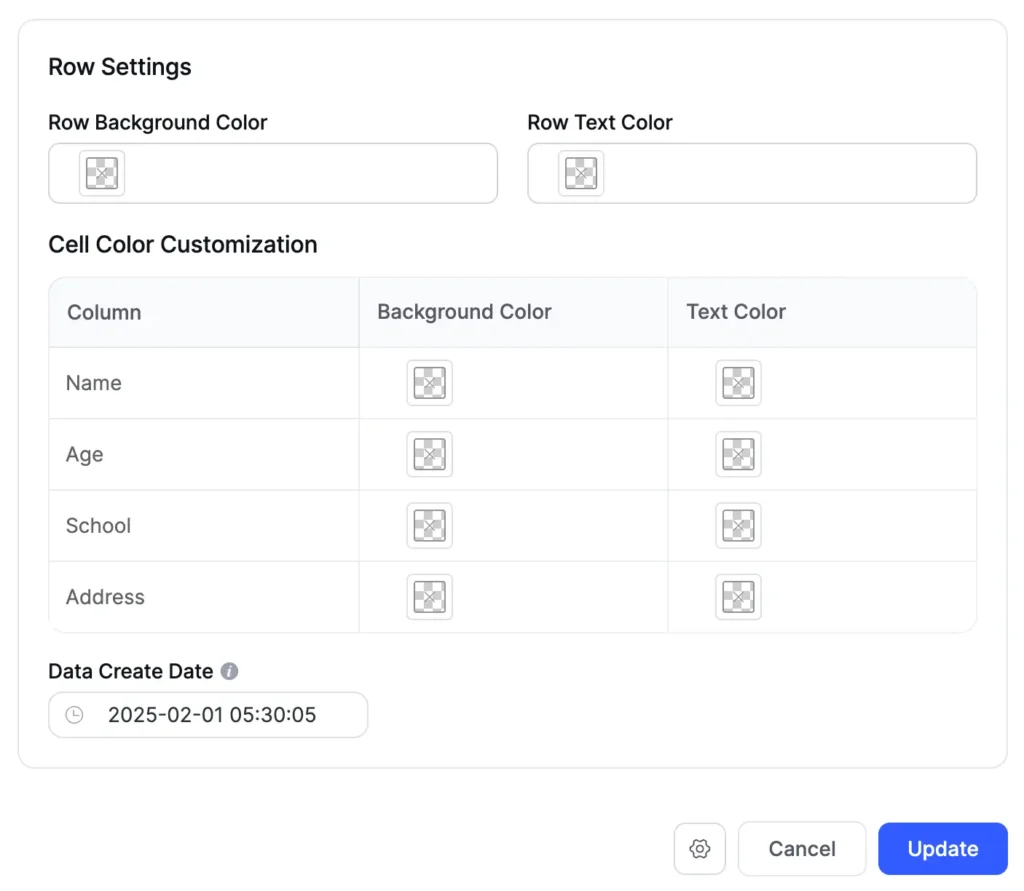
There are several customization choices available in the Settings section, including the Row Background color, Row Text Color, and Cell Color Customization settings.
To make changes, click the color box next to the Row or particular Column Cell Color you want to change. A color scheme will appear, allowing you to choose your favorite shade. After making your selection, click Ok to confirm.

Lastly, click on the Update button to save your changes.
After the table has been saved, visit it in the front-end interface to see how the color changes have been smoothly included, improving the readability and overall presentation.


