
Fluent Forms is an amazing dynamic form plugin with 25+ form input fields, multiple integrations, conversational forms, conditional logic, and more.
Ninja Tables and Fluent Forms integration lets you display all form entries in a table format on the front end.
Here’s a video on how this integration works.
Both the Ninja Tables and Fluent Forms are installed beforehand in the dashboard we’re using.
Create a Form and Display Form in a Table #
Go to the Fluent Forms dashboard, create a form (here’s a form named Contact Form) & put some entries into it.
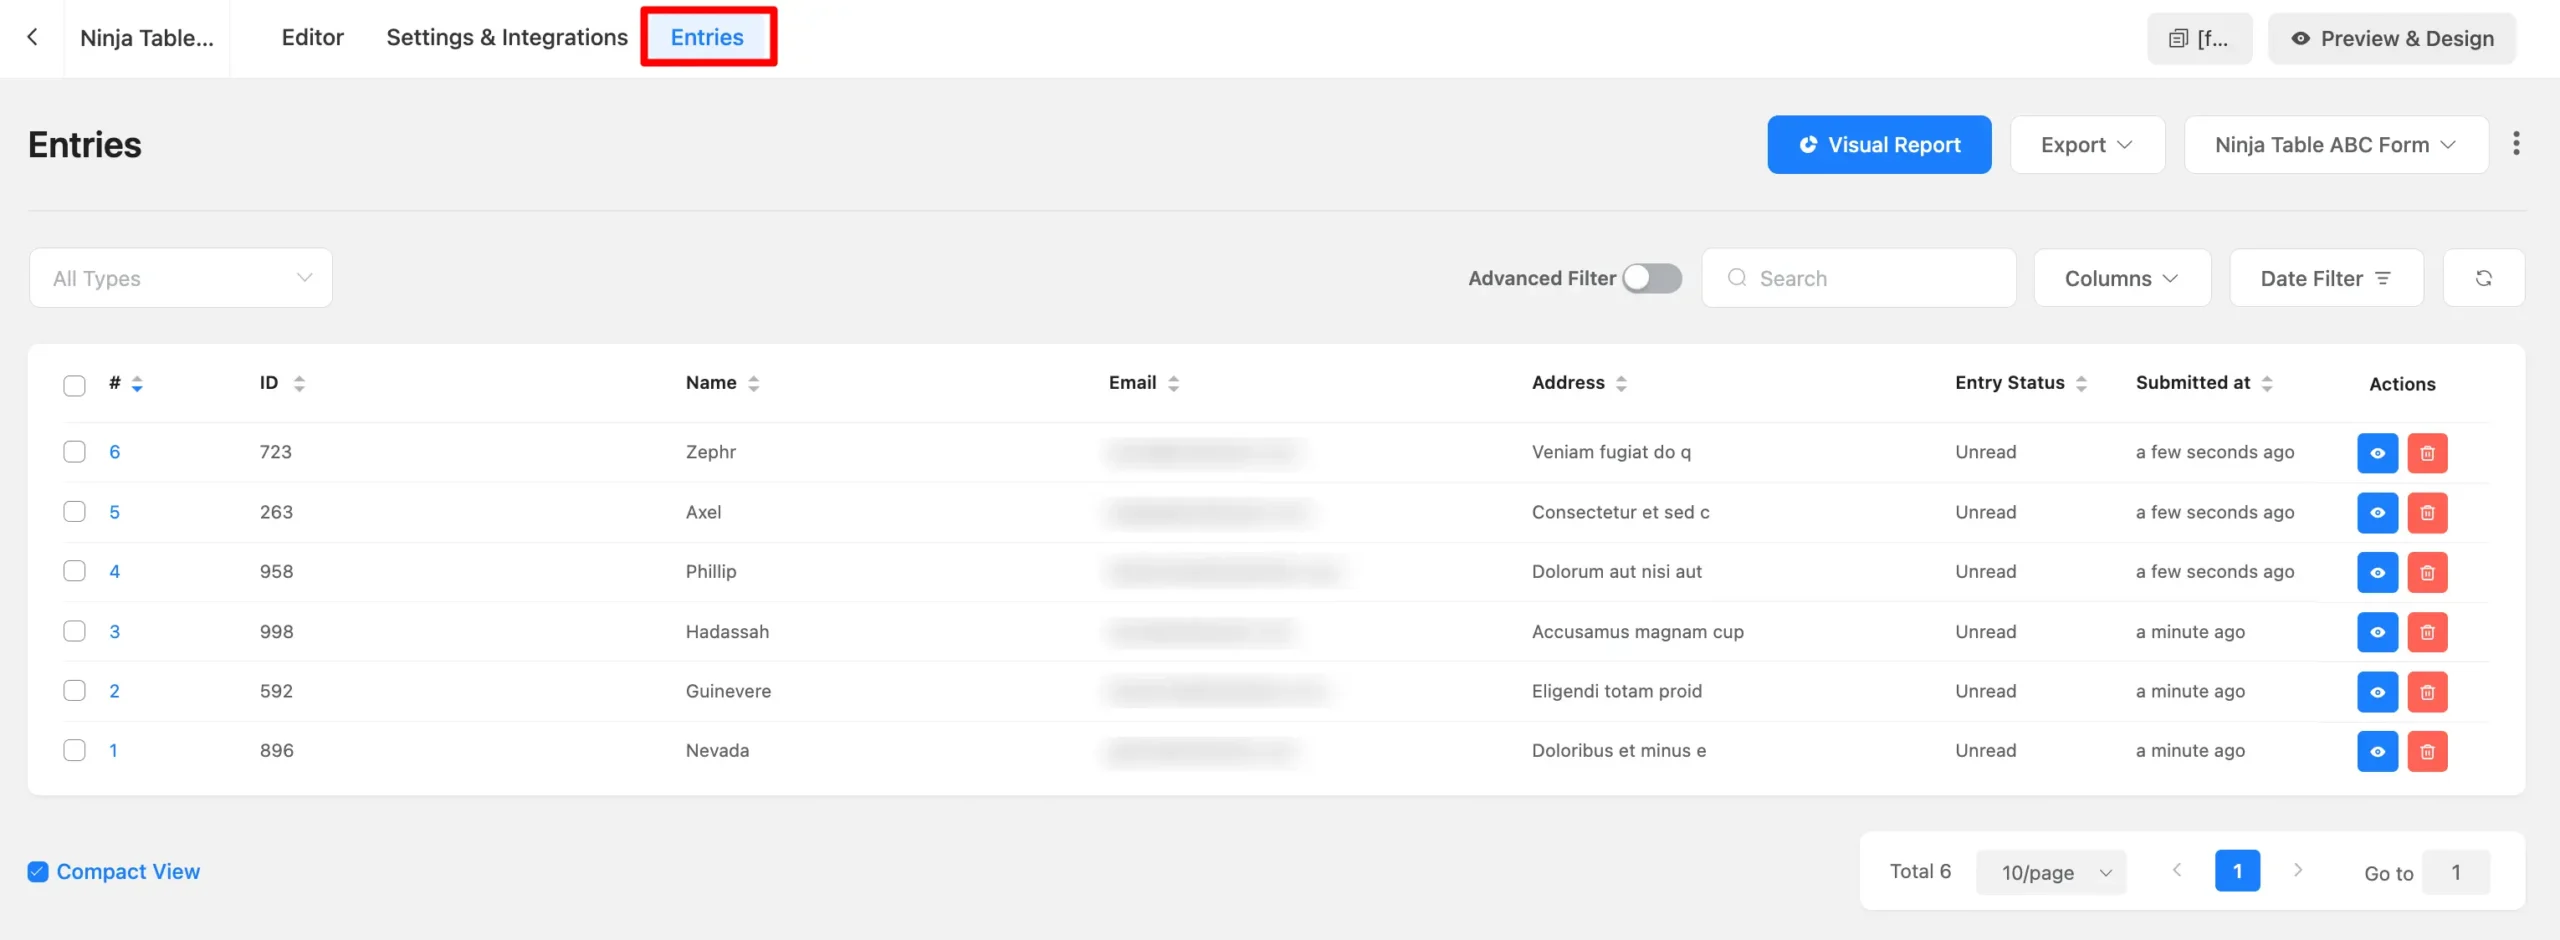
- The above image shows that all the required data has been entered into the form.
- To show these entries in customized and designed Ninja Tables, simply connect your table to Fluent Forms.
- Click Connect Fluent Forms from there, and give a title to your table. Then choose your preferred form using the box “Select a Form” like the below screenshot.
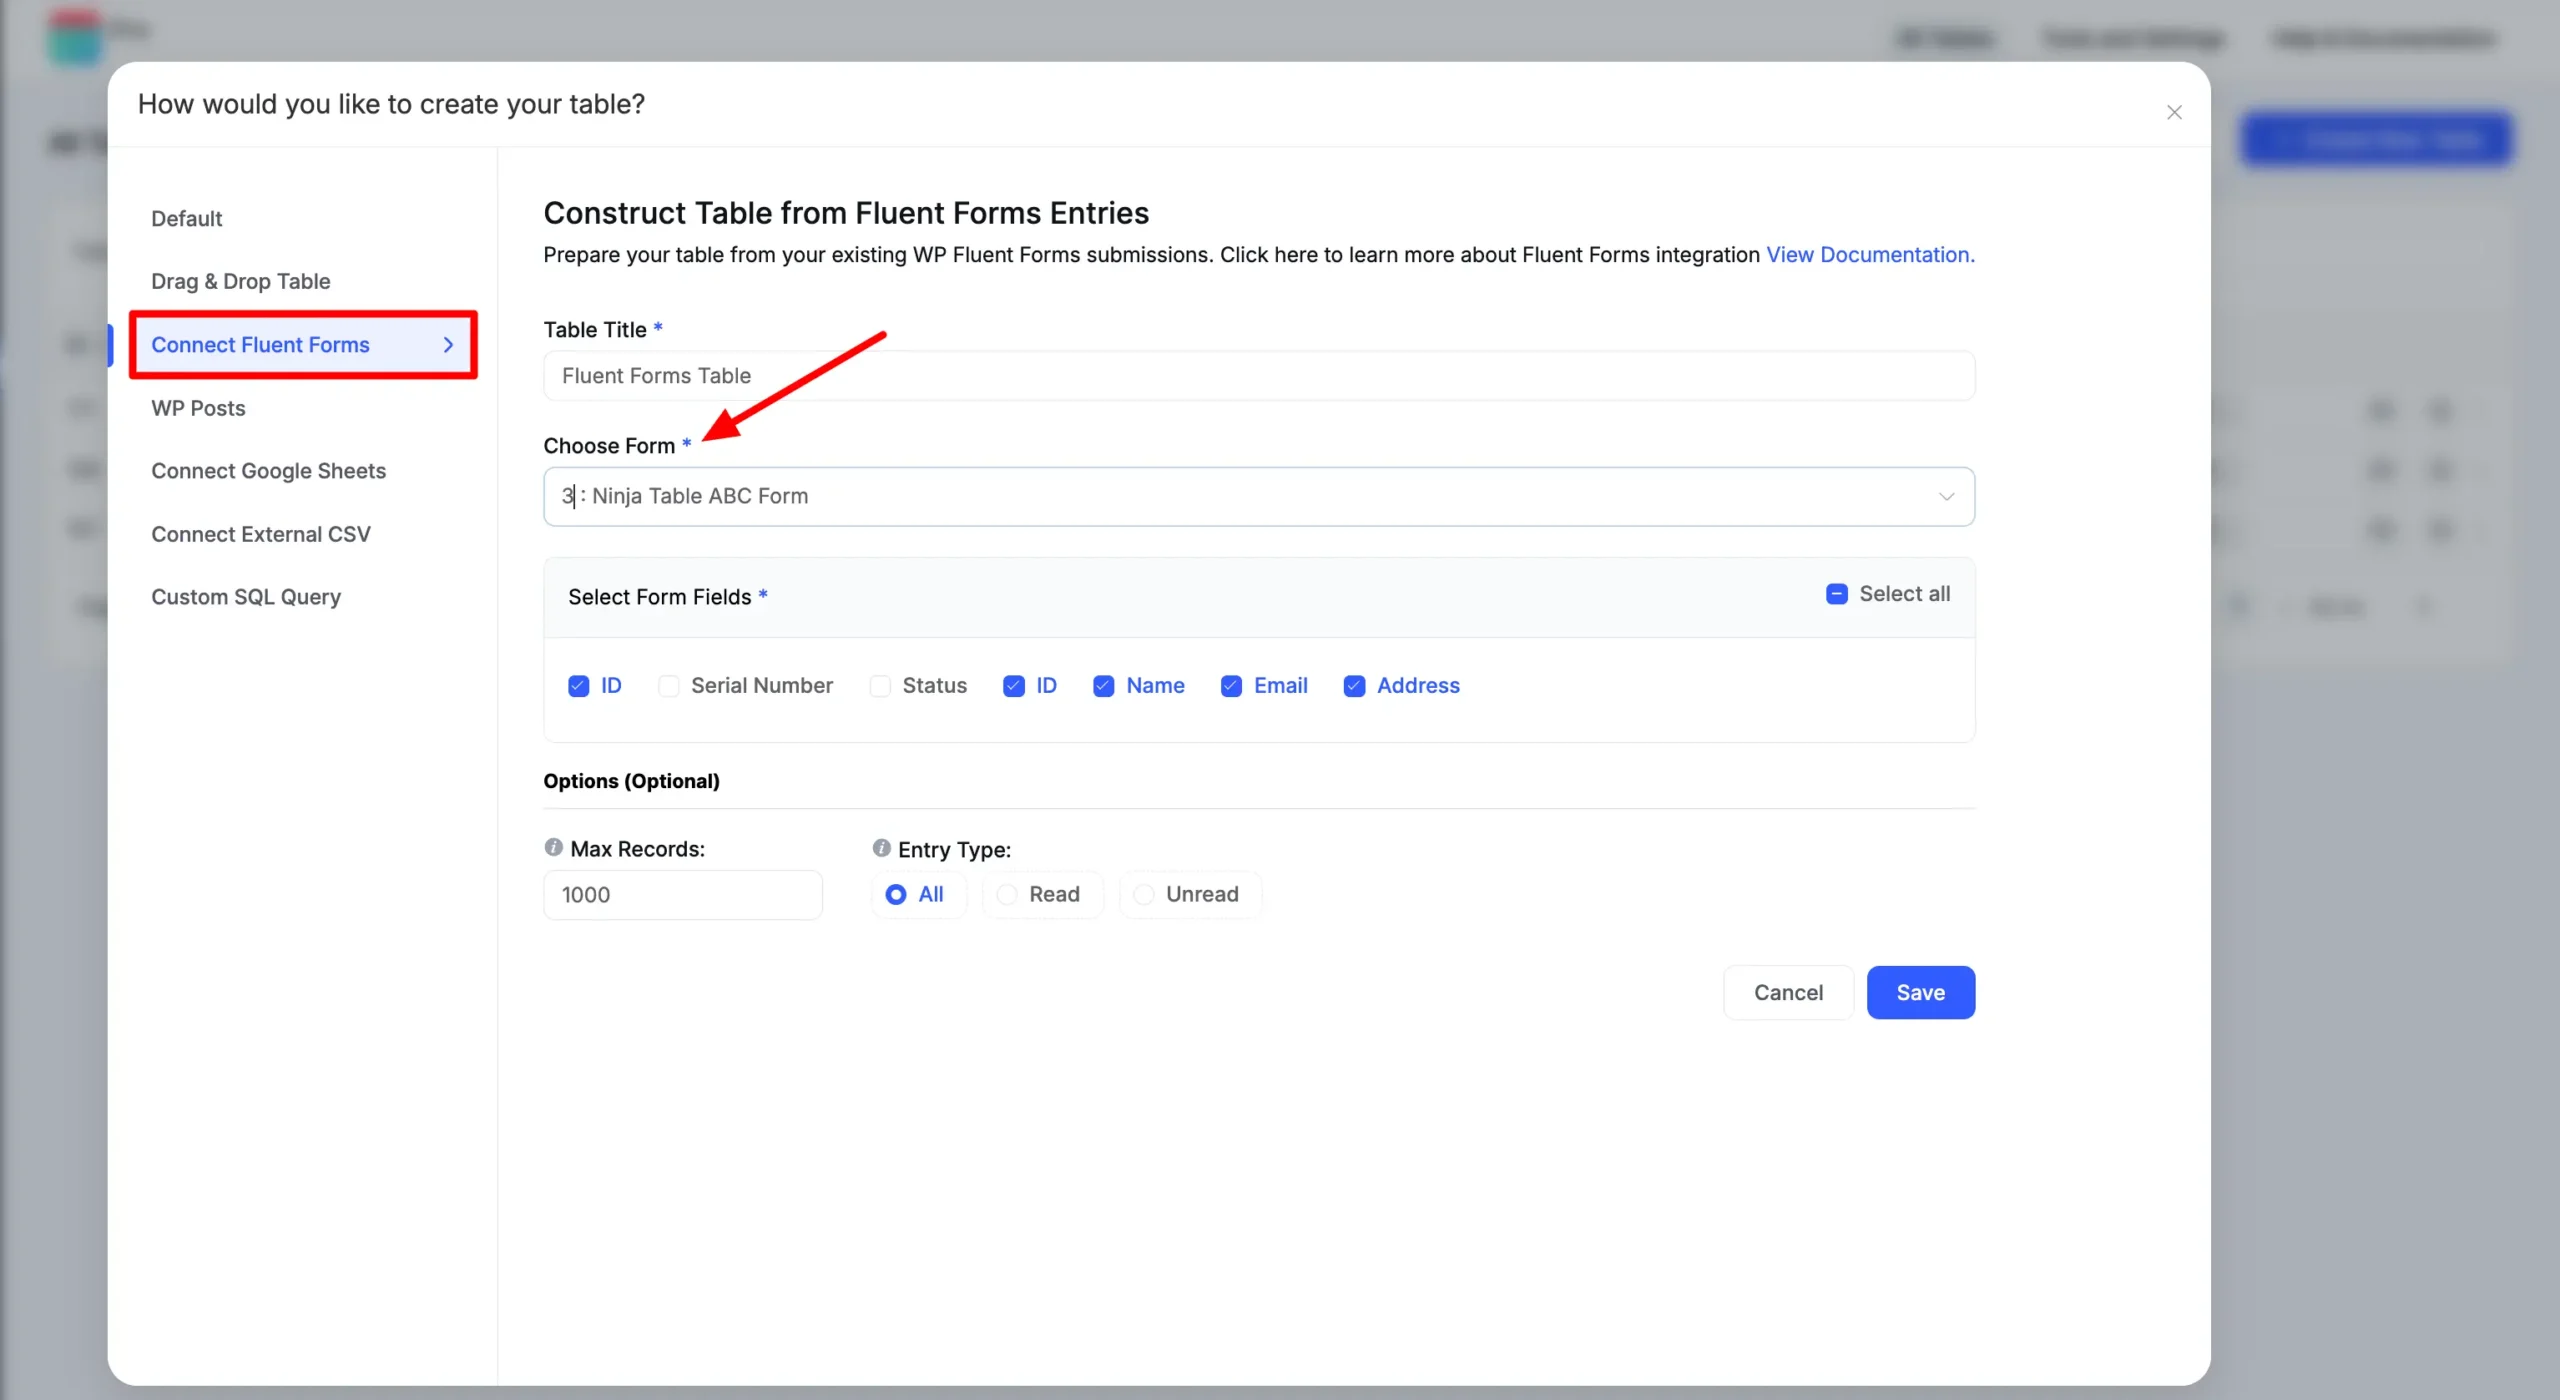
- After connecting your form, all fields of your selected form will now show up.
From here, you can choose and save all fields or any unique field you wish to view in the table.
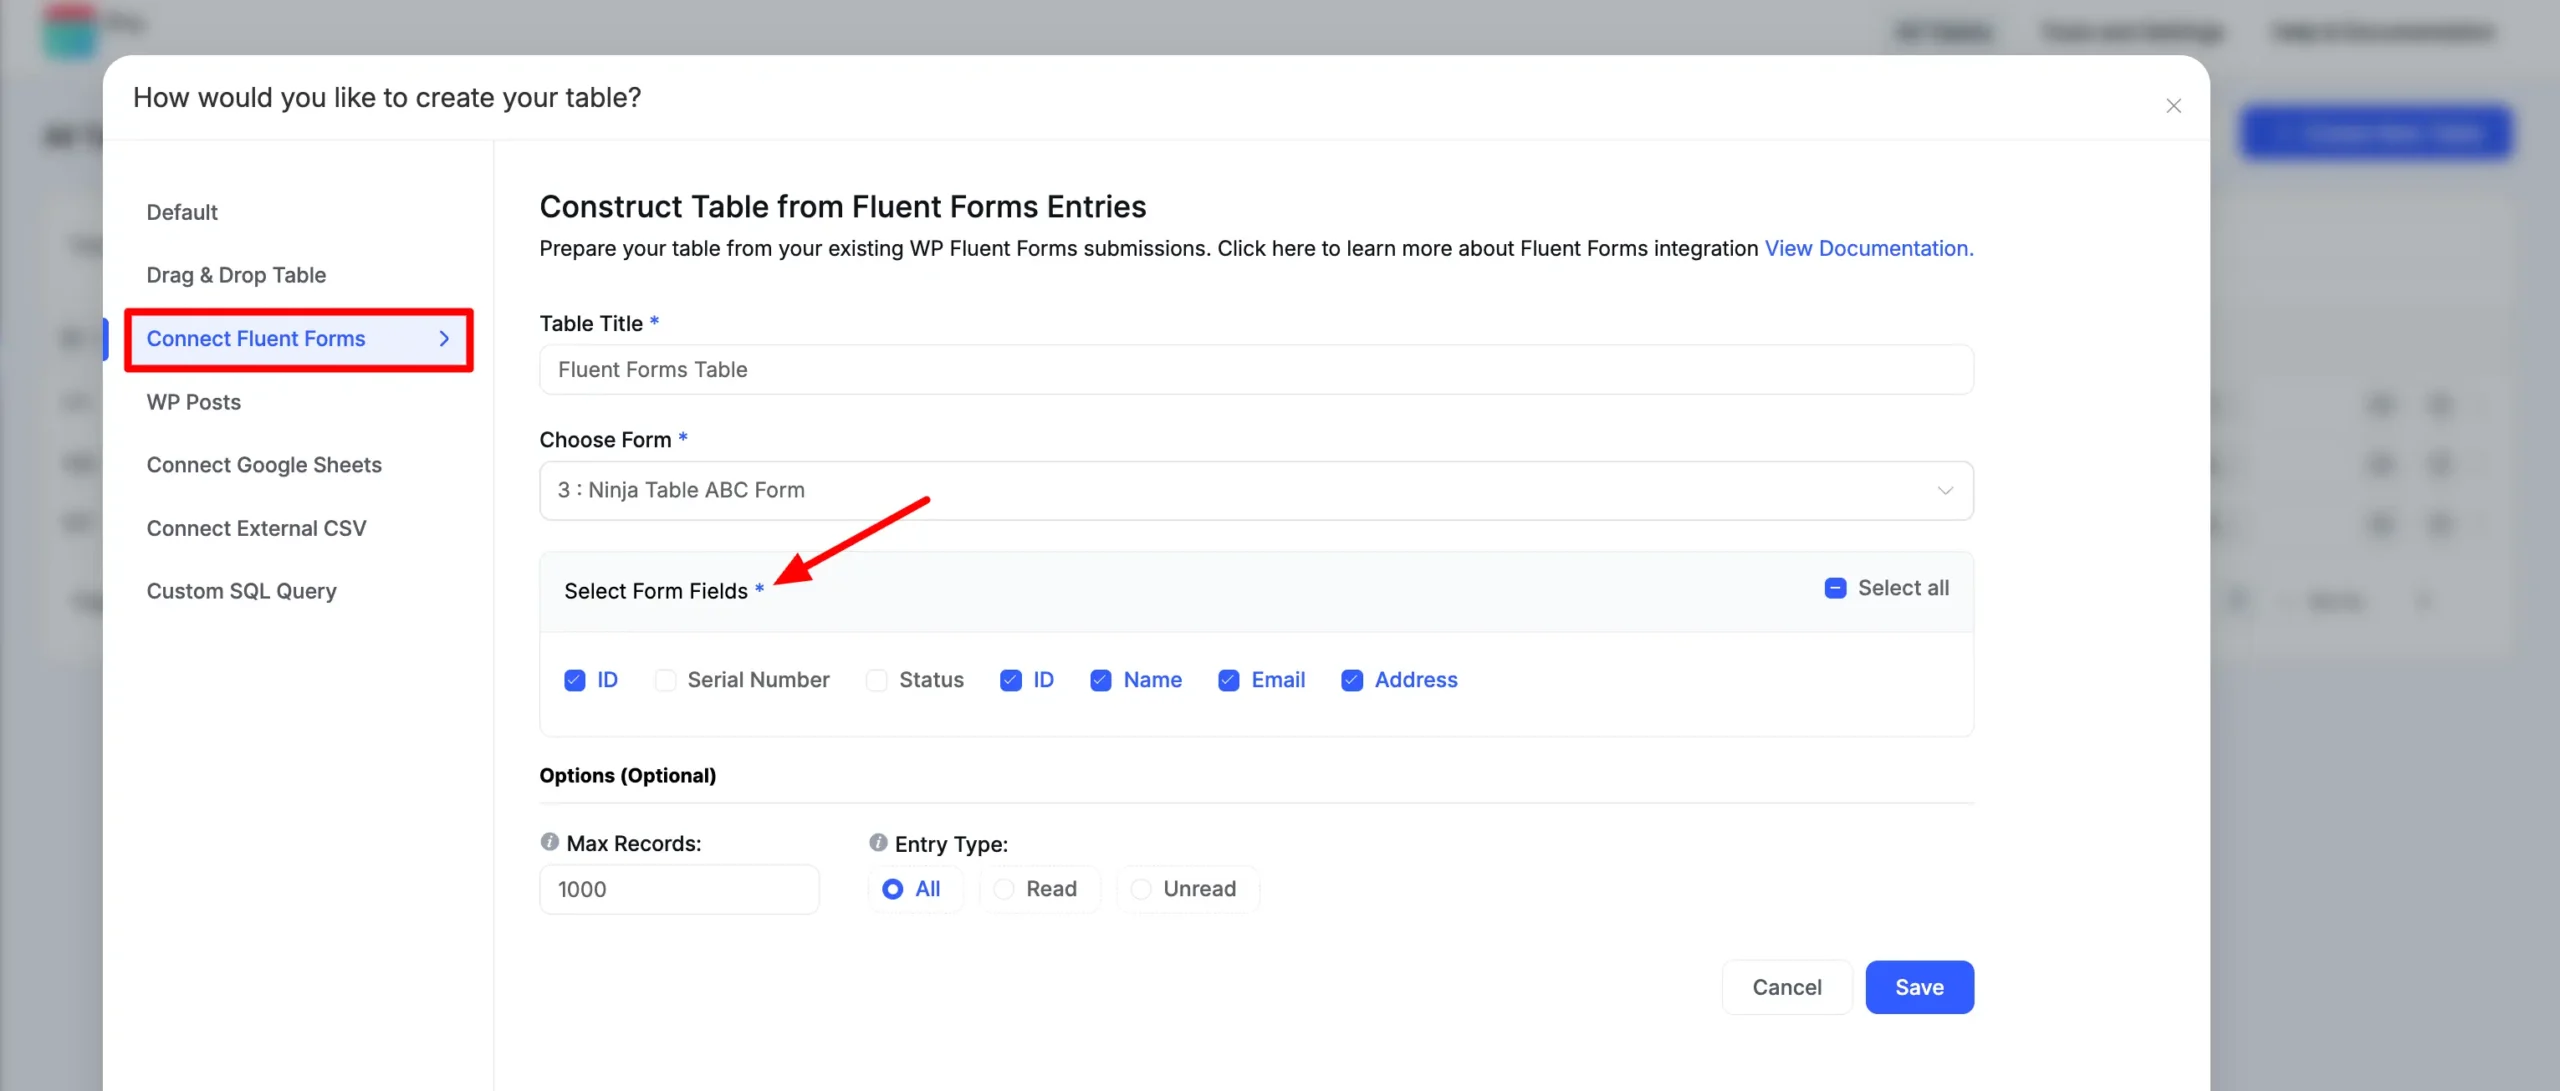
- When you’re done selecting or deselecting the form fields, hit the “Save” button.
Now a new table will be created with the form fields as table header and form entries as table data.
- Edit the table’s name, data type & table style as well using Ninja Tables. Plus, Ninja tables also give you the option to customize table design, responsiveness, and table color.
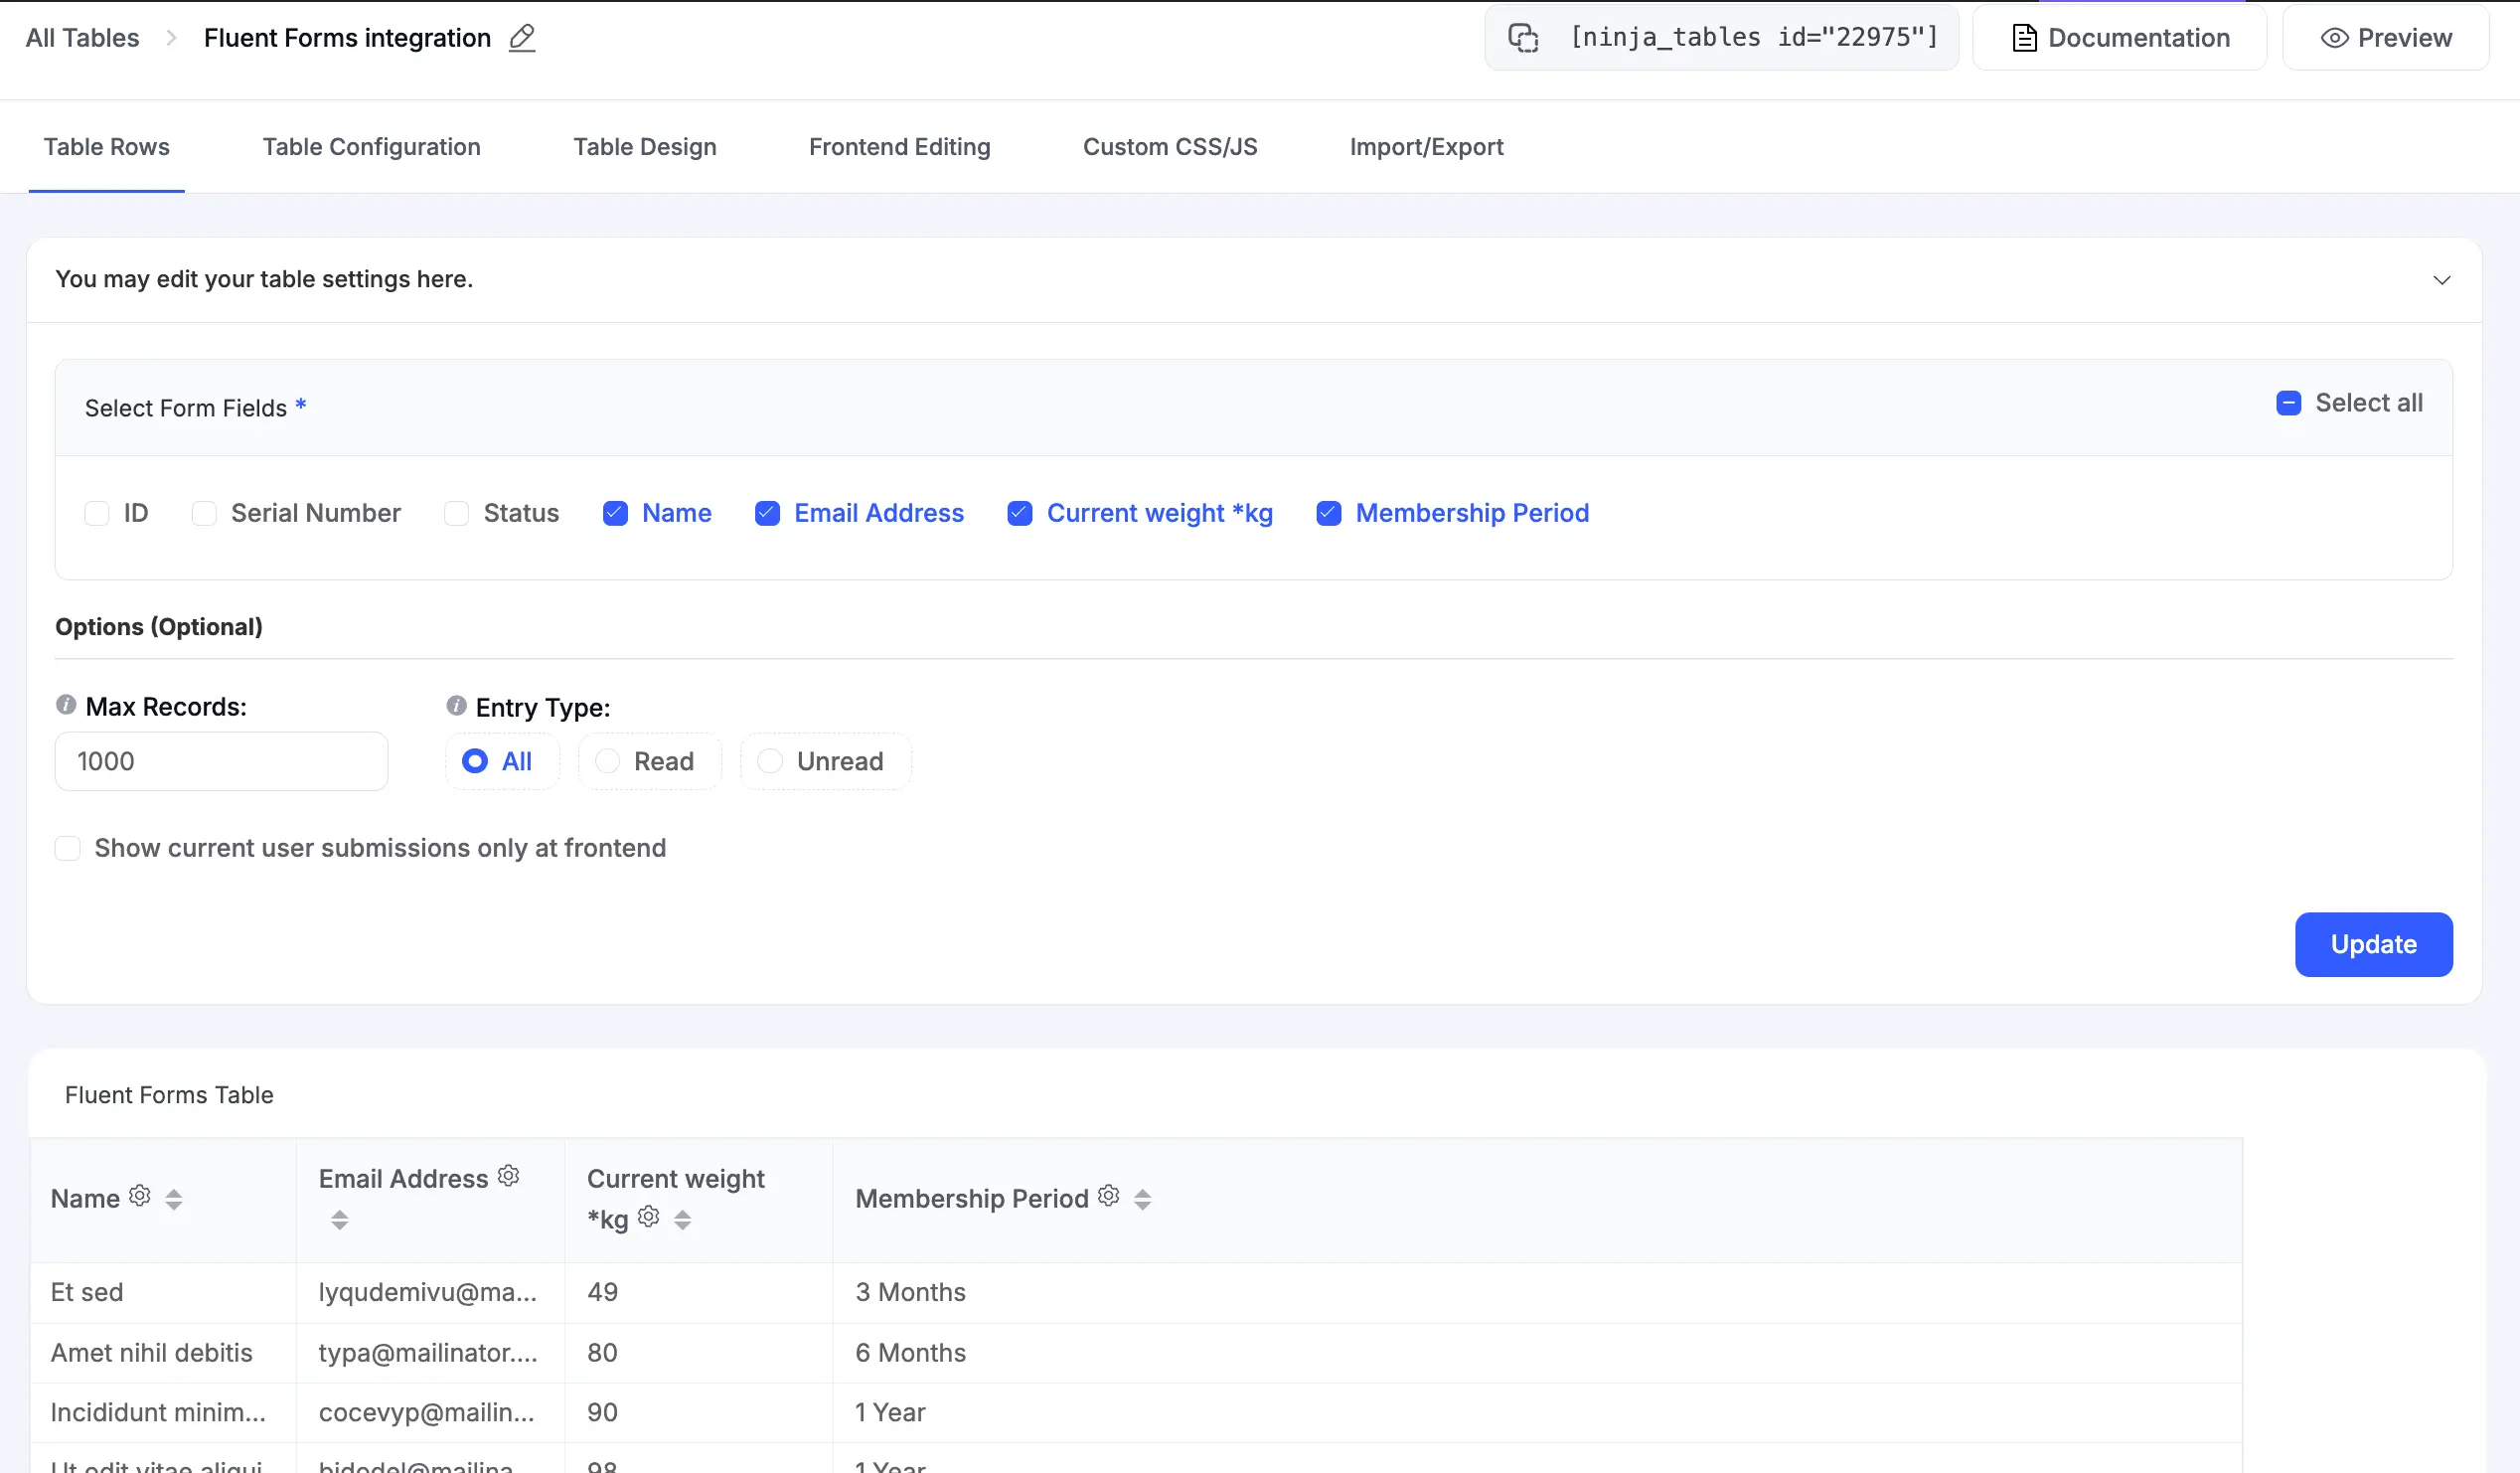
- Further customization can be done if you click “You may edit your table settings here.” You can add other columns or deselect the one you added.
Use responsive breakpoints or stackable table features in this form data table if you need a cleaner look.
Here’s a Fluent Form data table.
| Name | Email Address | Current weight *kg | Membership Period |
|---|---|---|---|
| Et sed | [email protected] | 49 | 3 Months |
| Amet nihil debitis | [email protected] | 80 | 6 Months |
| Incididunt minima qu | [email protected] | 90 | 1 Year |
| Ut odit vitae aliqui | [email protected] | 98 | 1 Year |
| Incididunt quae arch | [email protected] | 77 | 6 Months |
| Repellendus Omnis e | [email protected] | 59 | 6 Months |
Show Your Table Data According to the Entry Type #
You can also show table data based on the Entry type.
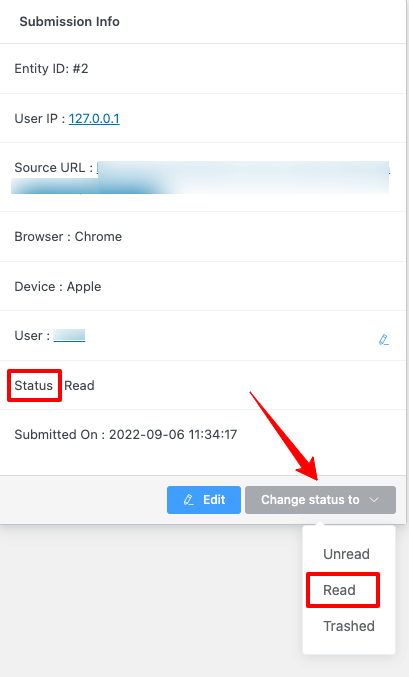
Go to the form where all the required data has been entered.
- Click the Change Status field and select your entry type Read / Unread / Trashed.
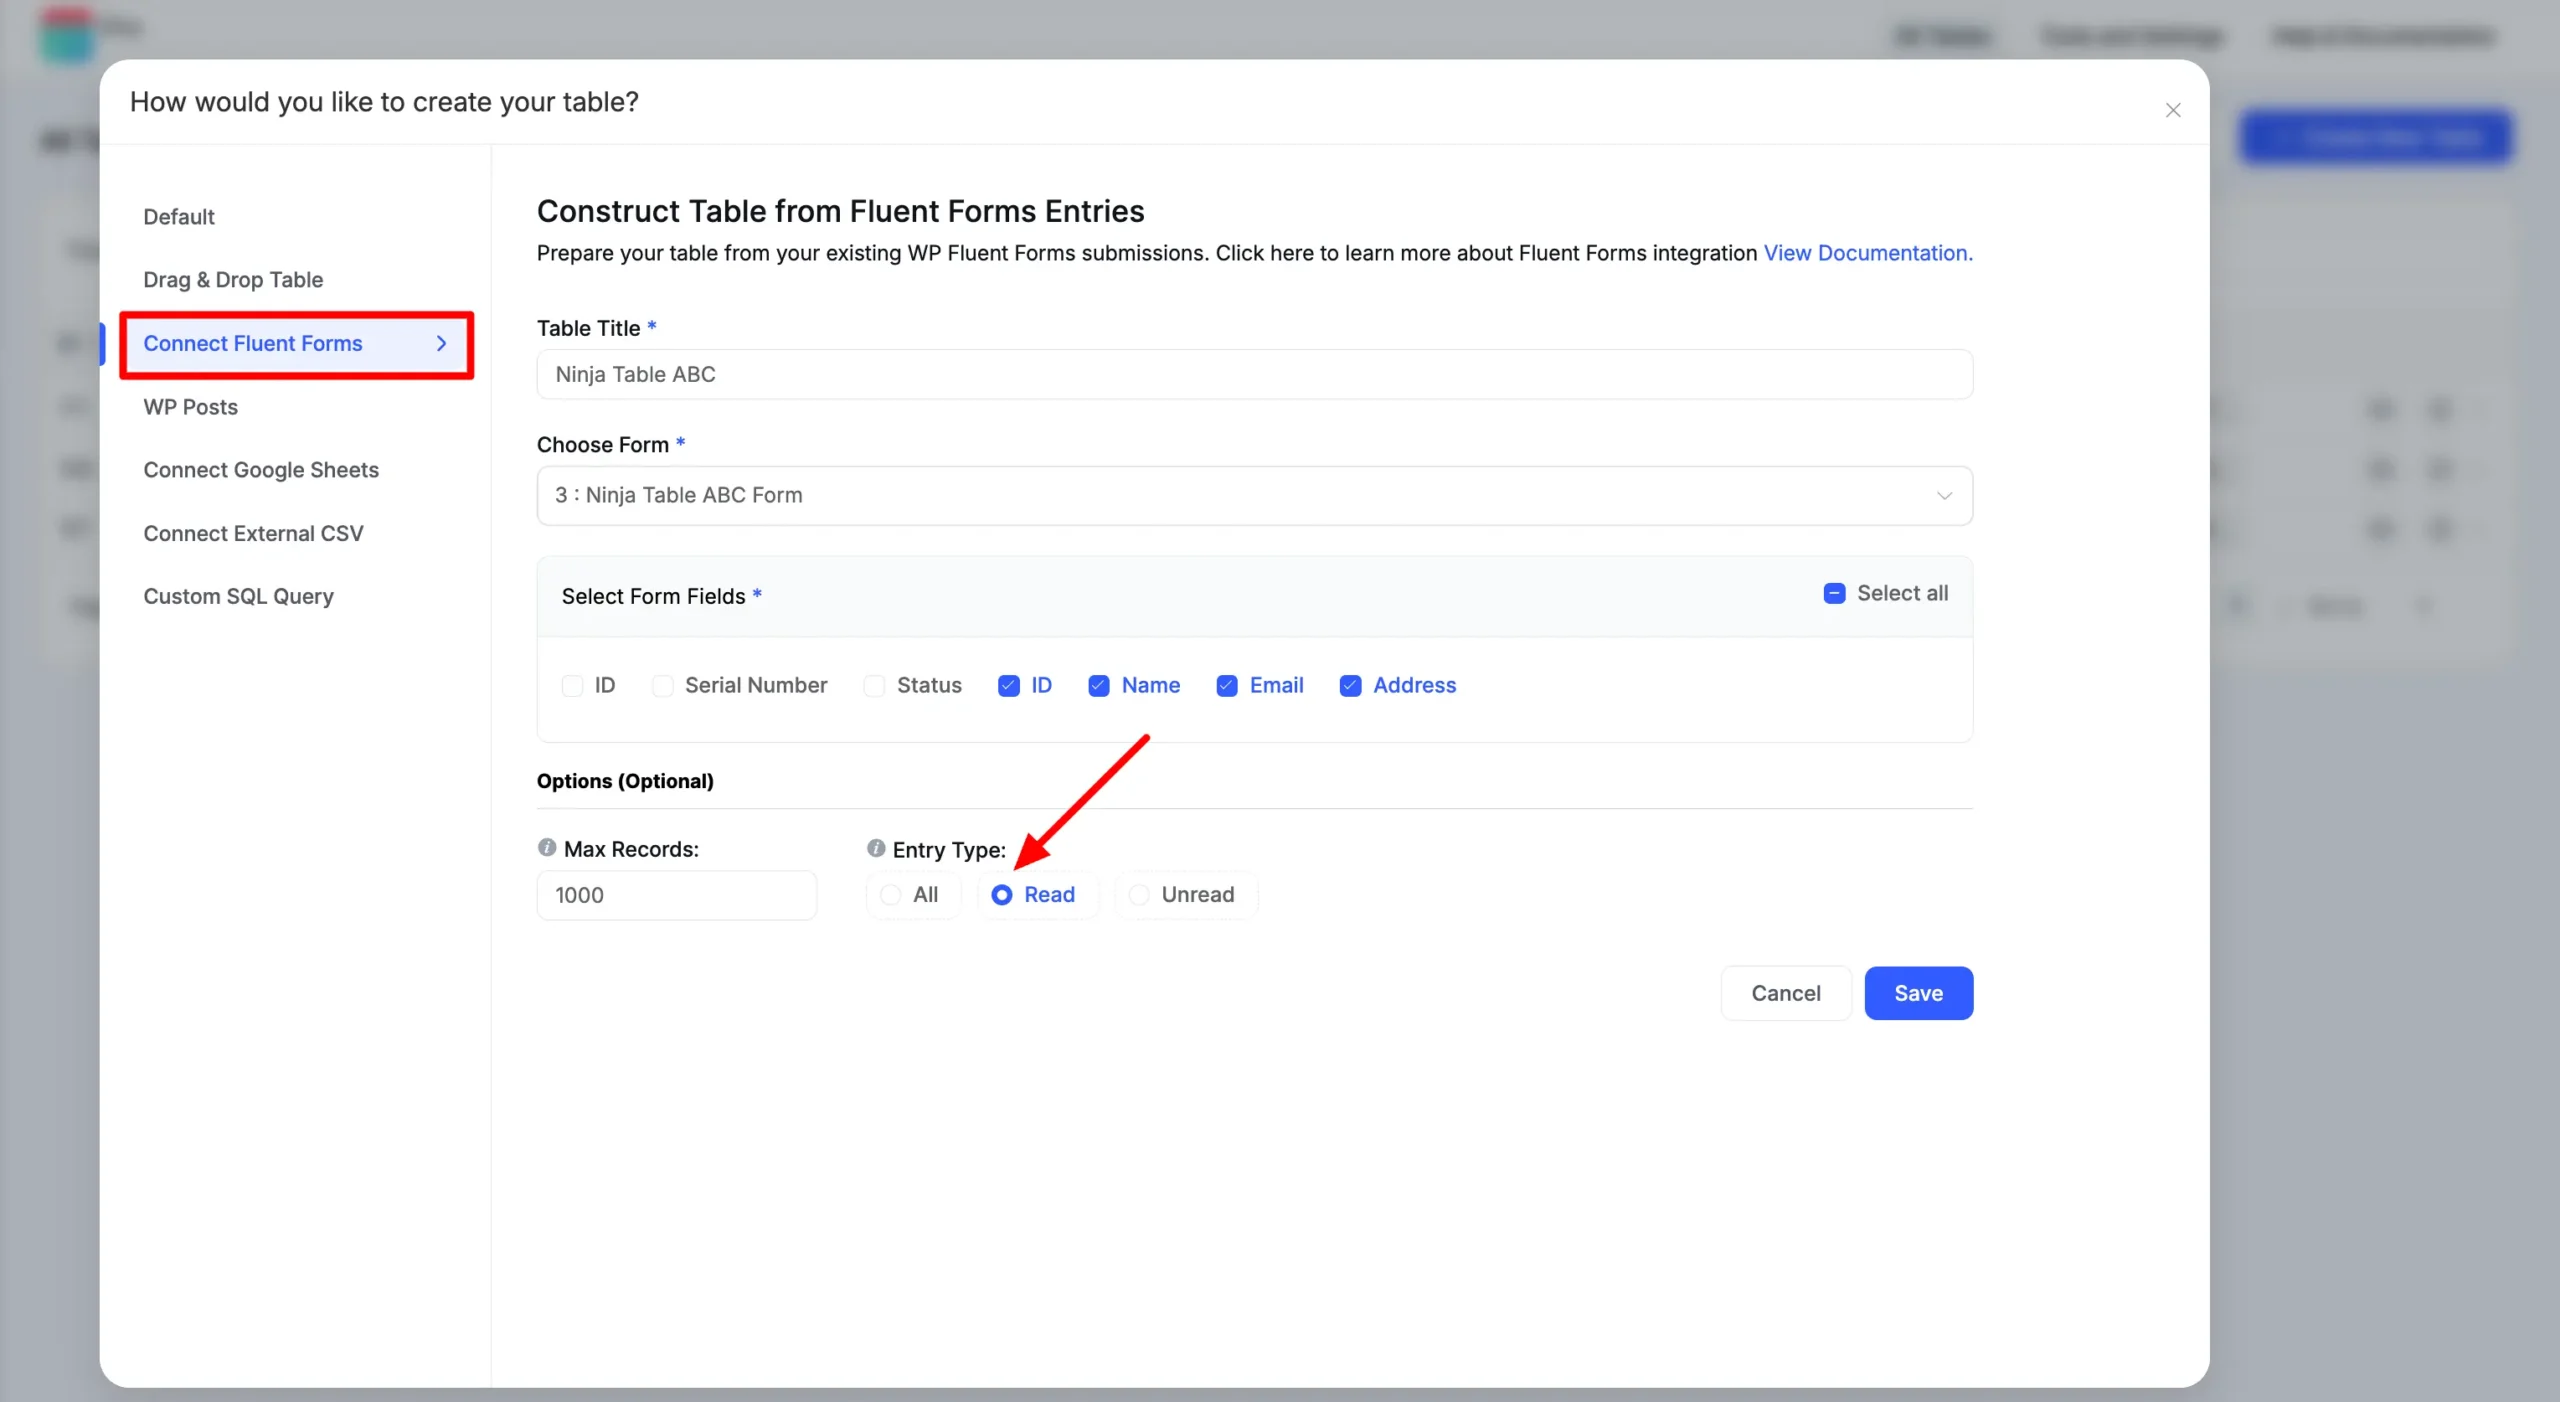
- Now go to your Ninja Table, which is connected with Fluent Forms. Entry Type enables you to select what type of entries you want to show from fluent forms.
- Choose your Entry type as per your needs.
The combination of Fluent Forms and Ninja Tables is the most powerful one! And undoubtedly, it is very helpful for your website.

Craft Responsive Data Tables Fast! #
Ninja Tables is the best table plugin to show data in an organized table format.
Fluent Forms integration with Ninja Tables unlocks a lot more opportunities for lead generation and sales increase. Try this combo once and enjoy the magic!


Greetings,
Thank you for providing the information. Is it possible to use this plugin to display entries based on the user profile within the website? Specifically, if a user is a subscriber with multiple purchase entries, can the plugin be configured to display only the entries associated with that user, rather than all the entries?
I appreciate your prompt response.
Best regards.
Hello Yanet. This is Nusrat from Ninja Tables. Thanks for your comment!
For user-specific rows, you need custom PHP. Kindly open a support ticket and our proficient support agent will send you a code.
(Link: https://wpmanageninja.com/support-tickets/#/)
I am also looking for a way to display products that a user has purchased, with columns providing download links and media. Would be nice if there was a simple checkbox like there is for FluentForm integration.
Barn2 Plugins has a table plugin that does this with a simple addition to the shortcode.
Hi Alan. This isn’t possible for a WooCommerce table. However, I’ve forwarded your query to the team. Thank you.
It would be great to be able to insert entries with only certain attributes. For example, if have a booking form that has 3 different class options on it. I would like to be able to create attendance lists based on the class selected as a seperate table for each.
Hi Bill,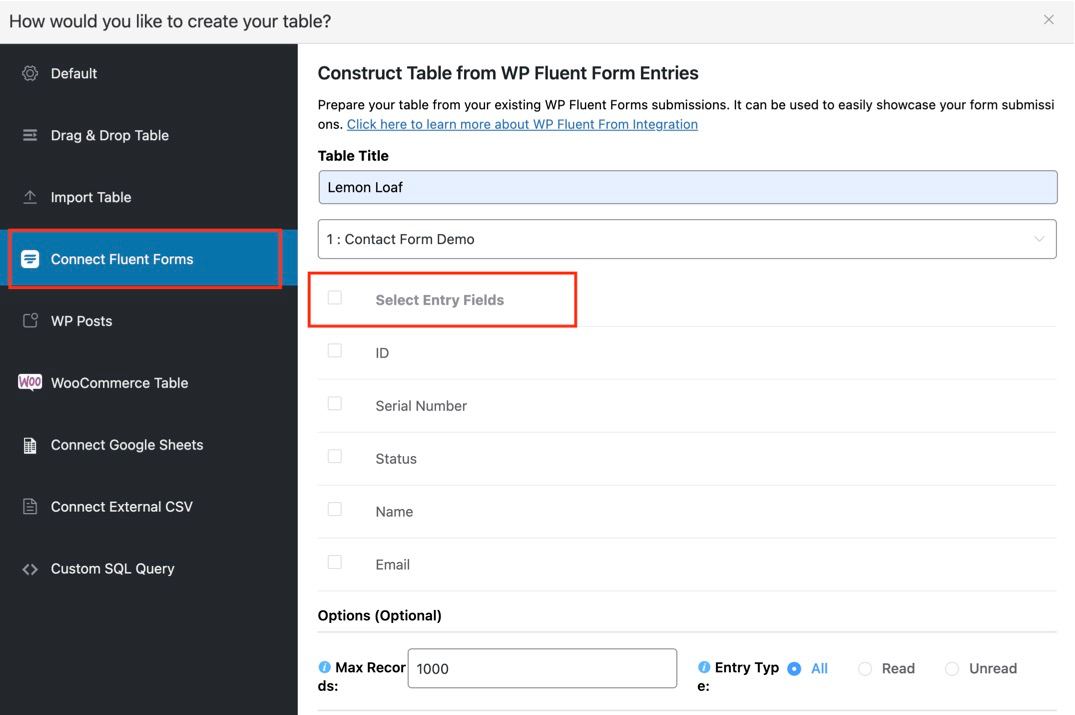
With NInja Tables and FLuent Forms Integration you can easily do what you wanted on your comment. When you insert any table from your Fluent Forms theres the option to select the entry fields.
how to add column to the tables when integrated to fluentforms
Hi Karim. Thanks for your comment. It’s not possible to add a new column independently in a table like this. However, you can create another entry field in the form and then select it as a column from the checkboxes in the table backend.
Is i possible to access the “submitted on (date/time)” field like you do the status field? I want to display this as a column in the table.
Hi. You can create a hidden field in your form for the submission date and time. This field can then be displayed in a column within the table. Hope it answered your question. Thanks!